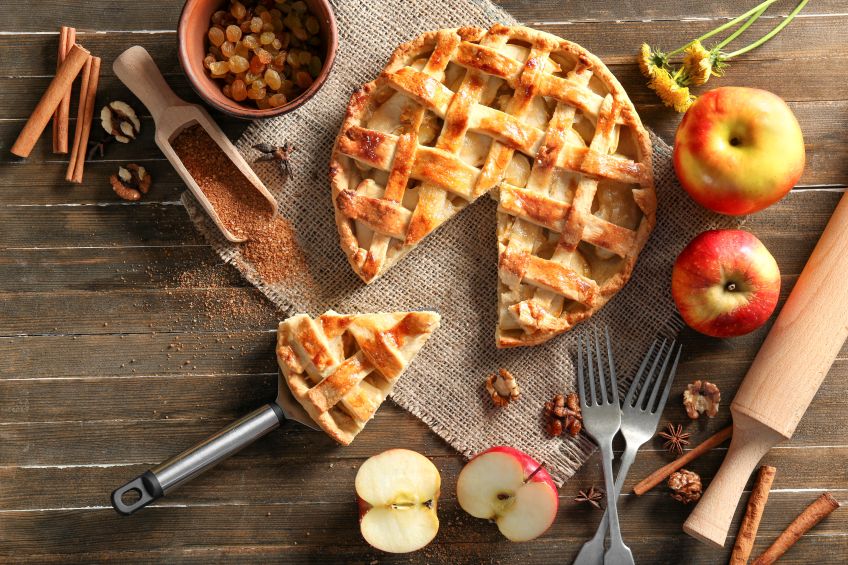

 A perfectly baked apple pie features a delightful contrast between the tender filling and a crisp, flaky bottom crust.
Many bakers struggle to achieve that ideal texture, often left with a soggy disappointment.
Using a combination of pre-baking the crust, controlling moisture, and choosing the right baking materials can greatly enhance the crispness of the bottom crust.
Key techniques allow for optimal baking results.
Ensuring the dough is well-chilled before rolling it out, utilizing a hot oven, and placing the pie on a preheated baking stone or steel can transform the baking experience.
These simple adjustments can make a significant difference in results.
Each step contributes to success in achieving that desired crispness.
Follow the insights shared throughout the article to elevate the quality of each apple pie to a new standard.
The journey to a perfect pie begins with understanding the science behind the crust.
Understanding the Importance of Pie Crust Structure

The structure of a pie crust plays a crucial role in achieving a perfect apple pie.
A well-formed crust provides texture and flavor while also protecting the filling.
Key components of pie crust structure include:
- Fat: Contributes to flakiness and tenderness. Butter or shortening creates layers that help separate dough.
- Flour: Provides strength. Choosing the right type affects the crust’s rigidity and texture.
- Water: Binds ingredients. Too much water causes a tough crust, while too little results in crumbliness.
A crisp bottom crust is essential for balancing moisture from the apple filling.
To achieve this, the crust must be baked at the right temperature.
Typical recommendations include:
- Pre-baking: This helps establish a firm foundation before adding the filling.
- Temperature: Baking at a higher temperature initially can help create steam, which contributes to flakiness.
Tips for maintaining crust structure include:
- Use cold ingredients to maintain fat solid.
- Avoid overworking the dough to prevent gluten development.
- Allow the crust to rest to relax gluten, enhancing tenderness.
Attention to these factors can lead to a successful and satisfying pie crust, enhancing the overall quality of the apple pie.
Selecting the Right Ingredients

Choosing the right ingredients is crucial for achieving a crisp bottom crust in an apple pie.
Each component contributes to the texture and flavor.
Flour: Use all-purpose flour for balance. It provides enough strength without being overly tough.
Fat: Opt for a good quality butter or a combination of butter and shortening. This blend offers flavor and flakiness while keeping the crust tender.
Salt: Including salt enhances flavor. A pinch in the dough can elevate the overall taste.
Sugar: A small amount of sugar in the crust helps with browning. It adds a subtle sweetness and aids in achieving that golden color.
Water: Use ice-cold water to bring the dough together. The cold temperature helps keep the fat firm, which is essential for a flaky texture.
Apples: Select a mix of tart and sweet apples. Varieties like Granny Smith and Honeycrisp can create a balanced filling that complements the crust.
Acid: A splash of lemon juice in the filling can brighten flavors. It also helps to prevent browning in the apples.
By carefully selecting these ingredients, the crust can achieve a satisfying crispness, ensuring a delightful apple pie experience.
Perfecting the Pie Dough

Creating the perfect pie dough is essential for achieving a crisp bottom crust.
Attention to texture and proper handling transforms a basic recipe into a culinary masterpiece.
Achieving the Right Dough Texture
The texture of pie dough plays a key role in its final outcome.
A successful dough should be tender yet sturdy.
- Ingredients: Use cold ingredients like butter and water. This keeps the fat solid, promoting flaky layers.
- Flour Selection: All-purpose flour works well, offering a good balance of gluten. For a lighter texture, some bakers prefer pastry flour.
- Mixing Technique: Combine flour and salt first, then cut in chilled butter until the mixture resembles coarse crumbs. Less mixing promotes flakiness.
- Water Addition: Introduce ice water gradually. Overworking the dough develops gluten, which can lead to tough crusts.
Getting the right balance of these elements creates a dough that bakes to a crisp finish.
Handling and Resting the Dough
Proper handling is crucial for pie dough.
Care should be taken to avoid introducing excessive heat, which can melt the butter.
- Kneading Method: Avoid over-kneading. Combine ingredients until just together to maintain structure.
- Resting the Dough: After mixing, wrap the dough in plastic and chill for at least 30 minutes. This relaxes gluten and firms up the fat, enhancing the flakiness.
- Rolling: When rolling out, dust surfaces with flour to prevent sticking. Roll starting from the center, applying even pressure to maintain thickness.
- Blind Baking: For an extra crisp bottom, consider blind baking the crust before adding filling. This involves pre-baking the crust with weights to prevent puffing.
Following these steps ensures a well-crafted pie dough that serves as a foundation for a perfect apple pie.
Preparing the Pie Filling

Selecting the right apples is crucial.
A mix of tart and sweet varieties enhances flavor.
Good choices include Granny Smith, Honeycrisp, and Braeburn.
Ingredients:
- Apples: About 6-8 medium-sized, peeled and sliced
- Sugar: ¾ cup (adjust for sweetness)
- Cinnamon: 1-2 teaspoons for warmth
- Nutmeg: ¼ teaspoon for depth
- Lemon Juice: 1 tablespoon to brighten flavors
- Flour or Cornstarch: 2-3 tablespoons as a thickener
Once the apples are prepared, combine them in a bowl.
Add sugar, cinnamon, nutmeg, and lemon juice.
Toss to coat the apple slices evenly.
Let the mixture sit for about 20 minutes.
This process helps release juices from the apples.
If too much liquid accumulates, drain some off to avoid a soggy crust.
In some recipes, a small amount of butter (1-2 tablespoons) can be added.
Placing it in small dots over the filling provides richness.
Finally, sprinkle flour or cornstarch for thickening.
This helps absorb excess moisture during baking, contributing to a firmer filling.
With these steps, the pie filling is ready to be poured into the prepared crust.
Assembling the Pie

Proper assembly is key to achieving a crisp bottom crust on an apple pie.
Attention to detail during this process ensures even baking and enhances the flavor and texture of the final product.
Layering the Filling and Dough
Start by rolling out the bottom crust to a 12-inch circle.
The dough should be about 1/8-inch thick.
Place it gently into a 9-inch pie pan, ensuring it fits snugly.
Trim excess dough, leaving about 1 inch hanging over the edge.
Next, prepare the apple filling.
Combine sliced apples with sugar, cinnamon, and a touch of lemon juice.
This mixture not only adds flavor but also reduces moisture.
Pour the filling into the crust, making sure to distribute it evenly.
If desired, sprinkle a tablespoon of flour or cornstarch on top to absorb extra juices.
Cover the filling with the top crust, rolling it out to the same thickness.
Cut a few slits in the top crust for steam to escape.
Sealing the Pie Edges
To seal the edges effectively, fold the overhanging bottom crust over the top crust.
Pinch together to create a decorative edge, which helps prevent moisture from seeping in.
For added security, use a fork to press down along the edge, creating a patterned seal.
Brush the crust with an egg wash or milk for a golden finish during baking.
This adds flavor and creates an appealing shine.
Additionally, sprinkling a bit of sugar on top enhances sweetness and adds a crunch.
These steps ensure the pie stays intact and contributes to a crisp bottom crust when baked.
Pre-Baking Techniques

Pre-baking ensures that the bottom crust of an apple pie achieves a desirable crispiness.
Utilizing effective techniques can prevent sogginess and enhance the overall texture.
Docking the Dough
Docking refers to the process of pricking the pie crust with a fork before baking.
This technique allows steam to escape during the baking process, preventing bubbles from forming under the crust.
To dock properly, a baker should:
- Use a fork to create small holes evenly across the bottom and sides of the crust.
- Focus on the edges, as they often trap steam.
This simple step can significantly improve the texture by promoting even cooking and reducing moisture buildup.
It’s especially effective for pies filled with juicy fruits.
Utilizing Pie Weights
Using pie weights is another essential technique for a crisp bottom crust.
Pie weights help to keep the crust in place during the baking process, preventing it from shrinking or puffing up.
To use pie weights correctly:
- Line the crust with parchment paper or aluminum foil.
- Fill the lined crust with ceramic or metal pie weights, dried beans, or rice.
These weights force the crust to maintain its shape as it bakes.
After pre-baking for about 10-15 minutes, the weights can be removed, and the crust can finish baking until golden brown.
This method is particularly beneficial for achieving that perfect balance of texture in dessert pies.
Final Baking Steps

Achieving a crisp bottom crust on an apple pie requires precision in both temperature control and monitoring during the baking process.
Proper adjustments to the oven temperature and attention to the pie’s progress are key elements that contribute to a perfectly baked pie.
Adjusting Oven Temperature
For optimal results, preheat the oven to 425°F (220°C) before placing the pie inside.
This initial high temperature helps to set the crust quickly, preventing sogginess.
After about 15 to 20 minutes, the temperature can be reduced to 350°F (175°C) to ensure even baking without burning the crust.
Using an oven thermometer can help maintain accurate temperatures, as many home ovens may not reflect true heat accurately.
The bottom heat setting can also be beneficial, as it allows for better browning of the bottom crust.
If the crust is browning too quickly, covering the edges with aluminum foil can protect them from burning.
Monitoring Baking Progress
Checking the pie periodically during baking is essential.
Visual cues are important; look for a golden-brown color on the crust and bubbling of the filling to indicate it is cooked through.
Using a pie shield or aluminum foil to protect crust edges may be necessary if they begin to darken too much.
Generally, the baking time ranges from 45 to 60 minutes.
However, every oven behaves differently, so he or she should start checking the pie at the lower end of the range.
Once it’s finished, let the pie cool completely on a wire rack to allow the filling to set before slicing.
Cooling and Serving

Cooling an apple pie properly is essential for achieving a crisp bottom crust.
After baking, remove the pie from the oven and place it on a wire rack.
This allows air to circulate around the pie, preventing steam from making the crust soggy.
Cooling Time:
- Let the pie cool for at least 2 hours at room temperature.
- For best results, a longer cooling time of 4 hours is recommended.
Serving can significantly affect the pie’s texture.
She should aim to cut the pie once it has cooled adequately.
A hot or warm pie may result in a mushy filling.
Use a sharp knife to slice the pie gently.
It is helpful to warm the knife in hot water and wipe it dry before cutting to ensure clean slices.
Serving Tips:
- Serve the pie with a scoop of vanilla ice cream for added flavor.
- Whipped cream can also be a delightful accompaniment.
Store any leftovers in an airtight container.
Keeping it at room temperature is fine for a short period.
If storing for longer, it should be refrigerated to maintain freshness.
Reheating slices briefly in the oven can restore some crispness to the crust, making it enjoyable to eat.
