

Achieving the perfect loaf of rich bread requires attention to detail, especially when it comes to baking temperatures.
While many factors influence the final product, knowing the right temperature is key to avoiding undercooking or overbaking.
Bread dough is fully baked when it reaches an internal temperature of 190 to 210 degrees Fahrenheit.
The science behind bread baking lies in the transformation of ingredients into the desired crust and crumb.
As the dough bakes, heat causes the proteins and starches to react, impacting texture and flavor.
Understanding the precise temperature ensures not only safety but also enhances the bread’s quality.
Bakers often use instant-read thermometers to accurately gauge doneness, providing peace of mind that the finished product meets expectations.
As one dives deeper into the nuances of baking, mastering these temperature guidelines opens the door to consistent and delicious results every time.
Understanding Bread Baking Basics

Bread baking involves several key components that contribute to the final product.
Temperature, time, and ingredients play crucial roles in achieving the desired results.
Temperature: Different types of bread require specific baking temperatures.
Typically, rich bread dough bakes between 350°F to 375°F (175°C to 190°C).
This range allows for proper expansion and crust formation.
Ingredients: Common ingredients include flour, water, yeast, and salt.
The type of flour influences the dough’s structure.
For rich dough, fats like butter or oil add flavor and tenderness.
Kneading: This process develops gluten, providing strength and elasticity.
Kneading should last around 8 to 10 minutes, ensuring a smooth and elastic texture.
Proofing: After kneading, dough requires resting to rise.
First proofing lasts about 1 to 2 hours, allowing yeast to ferment and produce gas bubbles.
This leads to the dough’s expansion.
Baking Time: The baking time varies based on the loaf size.
A typical loaf may take 30 to 45 minutes.
Visual cues, like a golden-brown crust and a hollow sound when tapped, indicate readiness.
Cooling: Allowing bread to cool on a rack prevents sogginess.
This final step is crucial for texture and flavor development.
Cooling usually takes about 30 minutes before slicing.
Determining the Ideal Baking Temperature for Rich Bread Dough

The ideal baking temperature for rich bread dough is influenced by various factors.
Understanding these variables and the underlying science can help achieve optimal results.
Variables Affecting Baking Temperature
Different factors can alter the required baking temperature.
Ingredients in rich bread dough, such as fats and sugars, significantly impact how heat is absorbed.
High sugar content may lead to quicker browning, which could necessitate lower temperatures to prevent over-baking.
Additionally, dough thickness plays a role.
Thicker loaves require longer baking times and may benefit from a slightly higher initial temperature.
An appropriate temperature range for rich bread is typically between 350°F to 375°F (175°C to 190°C).
A thermometer can be useful in ensuring the dough reaches the desired internal temperature without relying solely on visual cues.
The Science of Gluten and Starch Gelatinization
Baking involves complex chemical processes, particularly gluten development and starch gelatinization.
Gluten proteins provide structure, while gelatinization affects the dough’s texture.
At about 150°F (65°C), starches absorb water, swell, and gelatinize, contributing to the bread’s final texture.
For rich bread, the ideal internal temperature upon completion of baking is around 190°F to 210°F (88°C to 99°C).
This range ensures proper gelatinization and a well-cooked crumb without excessive browning.
Monitoring these temperatures ensures that rich bread dough is both fully baked and texturally appealing.
Baking Techniques and Oven Types

Different baking techniques and oven types significantly impact the quality of rich bread dough.
Understanding these can help achieve optimal results.
Conventional Ovens vs. Convection Ovens
Conventional ovens use radiant heat from heating elements, creating a stable environment for baking.
They can produce excellent results with rich bread dough when preheated properly.
The heat distribution is often uneven, so it’s wise to rotate the baking pan halfway through.
Convection ovens, on the other hand, have a fan that circulates hot air, promoting even baking and browning.
This method can shorten baking time by about 10-15%.
Adjustments may need to be made, such as lowering the temperature or checking for doneness earlier.
For rich bread dough, convection ovens tend to provide a well-risen loaf with a crisp crust.
Using a Baking Stone or Steel
A baking stone or steel offers superior heat retention and even heat distribution.
Placing the stone or steel in the oven during preheating ensures that the bread dough gets an initial burst of heat, which helps achieve an optimal rise.
When using these tools, it’s essential to preheat for at least 30 minutes to one hour.
This ensures the stone or steel reaches the desired temperature.
Rich bread dough baked on a hot surface will develop a nice crust while maintaining a soft interior.
The technique enhances texture and flavor, crucial for high-quality bread.
Verifying Doneness in Bread Baking

Ensuring that bread is fully baked is crucial for achieving the desired texture and flavor.
Accurate methods for verification can include the use of a digital thermometer and observing specific visual and tactile cues.
Utilizing a Digital Thermometer
A digital thermometer provides a reliable way to check the internal temperature of bread.
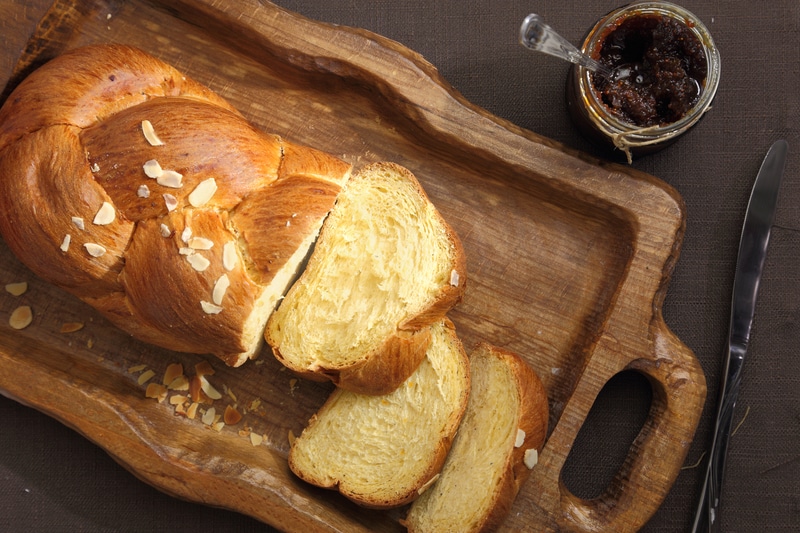
For rich bread dough, such as brioche or challah, the ideal internal temperature typically ranges between 190°F to 210°F (88°C to 99°C).
To use a digital thermometer effectively, insert it into the thickest part of the loaf without touching the pan.
It’s important to wait a few seconds for an accurate reading.
If the temperature is below the desired range, the bread likely requires additional baking time.
Remember to allow some carryover cooking, as the bread will continue to cook slightly after being removed from the oven.
Visual and Tactile Cues
Visual and tactile cues also aid in determining bread doneness.
A well-baked loaf should exhibit a golden-brown crust that feels firm to the touch.
When tapped gently on the bottom, the bread should produce a hollow sound, indicating a properly baked interior.
Additionally, the loaf should have a slight springiness when pressed lightly with a finger.
Color can vary among different types of bread, so familiarity with personal recipes is beneficial.
Overall, combining these methods allows for a more accurate assessment of doneness, ensuring optimal results in baked goods.
Common Mistakes to Avoid When Baking Bread

Baking bread requires attention to detail.
Several common mistakes can affect the final product.
1. Incorrect Measurements
Using inaccurate measurements can disrupt the balance of ingredients.
It is crucial to use a kitchen scale for precision.
2. Not Activating Yeast Properly
If using active dry yeast, it should be proofed in warm water first.
Failing to do so may result in unrisen dough.
3. Skipping the Kneading Process
Kneading develops gluten, which gives bread structure.
Neglecting this step can lead to dense, flat bread.
4. Rushing the Rising Time
Bread needs time to rise for flavor and texture.
Hurrying this process can yield poor results.
5. Baking at the Wrong Temperature
An oven that is too hot or too cold can lead to uneven baking.
A thermometer ensures the oven is at the correct temperature.
6. Not Using Steam in the Oven
Introducing steam during the first few minutes of baking enhances crust development.
Without it, the bread might not have the desired texture.
7. Cutting Into Bread Too Soon
Slicing bread immediately after baking can result in a gummy texture.
Allowing it to cool completely is essential for the best texture.
Avoiding these mistakes can improve the quality of homemade bread significantly.
Post-Baking Procedures

After baking rich bread dough, proper post-baking procedures are essential to achieve optimal texture and flavor.
This involves careful cooling and appropriate storage methods to maintain freshness and prevent spoilage.
Cooling
Cooling bread is a critical step that affects its texture and moisture retention.
Once removed from the oven, rich bread should be placed on a wire rack.
This allows air to circulate around the loaf, preventing sogginess on the bottom.
The ideal cooling time is about 1 to 2 hours for most bread types.
During this period, the interior crumb continues to set.
If left too long in the pan, trapped steam can lead to unwanted moisture accumulation.
Tip: For best results, avoid cutting the bread until it has fully cooled.
Cutting too soon can result in a gummy texture.
Storage
Proper storage is vital for preserving the quality of baked bread.
Once cooled, it can be wrapped in plastic wrap or placed in a bread bag to keep it fresh.
This prevents the bread from drying out and protects it from mold.
For longer preservation, rich bread should be stored in the freezer.
Wrapping it in aluminum foil or a freezer-safe bag helps maintain quality for up to 3 months.
When ready to consume, let it thaw at room temperature or reheat in the oven for a few minutes for a fresh-baked crust.
Avoid storing bread in the refrigerator, as this can accelerate staling.
Recipe Adjustments for Altitude Baking

Baking at high altitudes requires specific adjustments due to lower atmospheric pressure.
This affects how bread rises and cooks.
Here are essential adjustments to consider for rich bread dough.
Flour and Liquid Adjustments
- Increase flour: At higher altitudes, increase the amount of flour by 1-2 tablespoons per cup. This helps with gluten structure.
- Decrease liquid: Reduce liquid by 1-2 tablespoons per cup. This counteracts faster evaporation.
Leavening Agents
- Reduce yeast: Cut the yeast amount by 25%. The quicker rise can lead to less flavor development.
- Increase baking temperature: Raise the baking temperature by 15-25°F (8-14°C) to enhance crust formation.
Rising Time
- Shorten rising times: Dough will rise faster, so check for readiness sooner. It’s crucial to prevent over-proofing.
Baking Time
- Monitor closely: Baking times may decrease, so start checking for doneness earlier. Use a thermometer to ensure the internal temperature reaches 190-200°F (88-93°C).
Experimental Approach
Each recipe may vary, so it’s beneficial to experiment with these adjustments.
Keeping notes helps in fine-tuning techniques for consistency in high-altitude baking.
By understanding how altitude affects baking, one can achieve optimal results with rich bread dough.
Baking Safety and Kitchen Best Practices

Maintaining safety in the kitchen is critical for successful baking.
Here are essential practices to follow:
- Wash Hands: Always wash hands before handling food. This prevents contamination.
- Use Clean Utensils: Ensure all utensils and surfaces are cleaned before and after use.
- Avoid Cross-Contamination: Use separate cutting boards for meats and bread ingredients to minimize risk.
- Check Oven Temperature: An accurate oven thermometer helps achieve the correct baking temperature for dough.
- Test Dough: Use a thermometer to check internal dough temperature. Rich bread dough is fully baked at approximately 190°F to 210°F (88°C to 99°C).
Storage Tips:
- Cool Breads Properly: Allow baked bread to cool on a wire rack to prevent sogginess.
- Store Correctly: Use airtight containers or bags to maintain freshness.
Fire Safety:
- Stay Attentive: Never leave baking items unattended in the oven.
- Know Your Oven: Familiarize yourself with your oven’s safety features.
Ingredient Safety:
- Check Dates: Ensure all ingredients are fresh and not expired.
- Store Ingredients Properly: Keep dry ingredients in cool, dry places to extend shelf life.
Following these practices helps ensure a safe and enjoyable baking experience.
