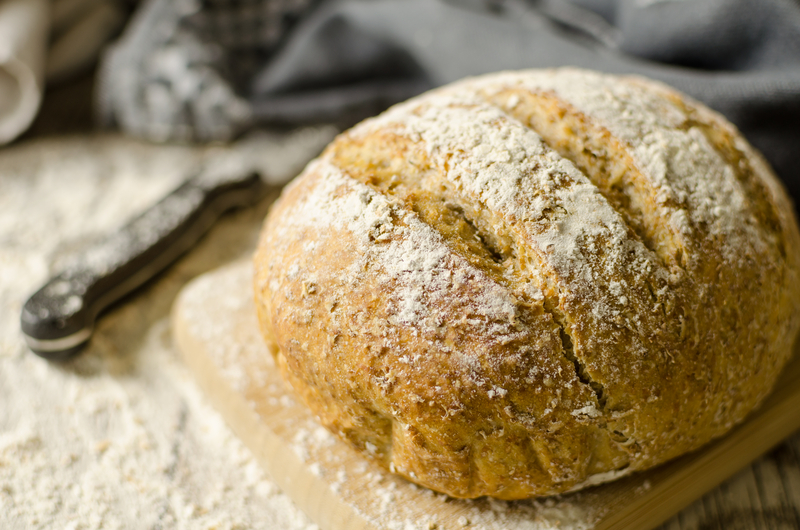


Homemade bread can be a rewarding culinary endeavor, but achieving the perfect flavor can sometimes feel elusive.
Every baker desires a loaf that not only looks good but also has a delightful taste that leaves a lasting impression.
By incorporating quality ingredients, allowing the dough to ferment properly, and experimenting with different flavors, one can significantly enhance the taste of homemade bread.
Many factors contribute to the overall flavor profile of bread, including the choice of flour, yeast, and additional ingredients like herbs or spices.
Small adjustments in the fermentation process or baking techniques can lead to surprising improvements in taste.
Curious bakers can find that the right balance of these elements creates a loaf that stands out.
Embracing the art of bread-making is about exploration and finding what works best for personal preferences.
With a few thoughtful tweaks and a willingness to experiment, anyone can elevate their homemade bread to a new level of deliciousness.
Understanding Bread Basics

Bread making involves multiple factors that significantly influence taste and texture.
Key elements include flour selection, hydration levels, yeast activity, and salt usage.
These basics serve as the foundation for creating delicious homemade bread.
Flour Types and Their Effects on Flavor
Different types of flour impart distinct flavors and textures to bread.
Common options include:
- All-Purpose Flour: Versatile and balanced. It produces a moderate flavor and texture.
- Bread Flour: Higher in protein, yields a chewier texture and greater rise.
- Whole Wheat Flour: Adds a nutty flavor but can produce denser bread.
Specialty flours like rye or spelt can further enhance complexity.
The presence of bran and germ in whole grain flours absorbs more water, impacting hydration and dough consistency.
Hydration Ratios and Dough Consistency
Hydration refers to the ratio of water to flour and is pivotal for dough consistency.
A typical range for hydration is 60% to 75% of the flour weight.
Higher hydration doughs create an open crumb structure and chewy texture.
- Low Hydration (50-60%): Results in a firmer, denser crumb.
- Medium Hydration (65-70%): Balances chewiness and lightness.
- High Hydration (75% or more): Produces a lighter and airier bread.
Adjusting hydration affects the kneading process and the overall flavor development during fermentation.
Yeast and Fermentation
Yeast is crucial for fermentation, which develops flavor and texture.
Two main types of yeast are commonly used:
- Active Dry Yeast: Requires activation in water.
- Instant Yeast: Can be mixed directly with flour.
Fermentation times vary.
A longer rise enhances flavor complexity, while shorter times yield milder bread.
Temperature also plays a role.
Warmer conditions speed up fermentation, often sacrificing flavor depth.
The Role of Salt in Bread Making
Salt is essential for enhancing flavor and controlling fermentation.
It strengthens gluten, improving the bread’s structure.
Using salt in appropriate quantities (typically 1.5-2% of flour weight) influences:
- Flavor Enhancement: Balances sweetness and strengthens overall taste.
- Fermentation Regulation: Slows yeast activity, allowing flavors to develop more fully.
Salt helps create a desirable crust, especially when used in combination with other ingredients.
Its careful measurement is vital for achieving balanced bread.
The Importance of Ingredients

The choice and quality of ingredients play a crucial role in the taste and texture of homemade bread.
Selecting the right components and ensuring their freshness can elevate the final product, making it more enjoyable.
Choosing Quality Ingredients
When making bread, the quality of ingredients can significantly impact the flavor.
- Flour should be the top consideration. High-protein bread flour will yield a better structure and chew compared to all-purpose flour. Look for organic or unbleached options for optimal results.
- Yeast is another essential component. Active dry yeast should be fresh and stored properly to ensure effectiveness. Consider using instant yeast for its faster activation time.
- Salt enhances flavor and controls fermentation. Opt for sea salt or kosher salt for a more nuanced taste. While some may overlook sugar, it can also be beneficial by adding slight sweetness and helping with browning.
Freshness of Ingredients
Freshness directly affects the outcome of the bread.
- Flour should ideally be used within six months of opening to maintain its flavor and potency. Storing flour in a cool, dark place can extend its shelf life.
- Yeast remains viable for a limited time. Check expiration dates and consider storing it in the refrigerator for longer freshness. Always proof yeast before use to ensure it is active.
- Fresh herbs or spices can add unique flavors and elevate the bread. Ingredients like garlic or rosemary should also be fresh to enhance the overall taste experience.
In baking, freshness translates to more vibrant and complex flavors.
Kneading Techniques

Kneading is a crucial step in bread-making that helps develop texture and flavor.
Different methods can be employed, each with its benefits and methods to achieve the desired bread characteristics.
Hand Kneading vs. Machine Kneading
Hand kneading allows for better control over dough consistency.
A baker can feel the dough’s texture and adjust hydration levels as needed.
The technique typically involves folding, pressing, and turning the dough to incorporate air and distribute ingredients evenly.
Machine kneading, on the other hand, provides convenience and saves time.
Stand mixers with dough hooks can knead dough efficiently, allowing for less physical strain.
However, inconsistent kneading times can lead to variations in dough strength.
Measuring the dough’s temperature can help achieve consistency regardless of the method.
Kneading to Develop Gluten
Developing gluten is essential for achieving a good loaf of bread.
Gluten forms when flour’s proteins absorb water and are manipulated during kneading.
Kneading should be done until the dough becomes smooth and elastic.
A good test is the windowpane test: stretching a small piece of dough should create a thin, translucent membrane without tearing.
This indicates sufficient gluten development.
Timing is essential, as under-kneading leads to weak structure and over-kneading can make the bread tough.
A typical kneading time ranges from 10 to 15 minutes, depending on the dough type.
Noting these details can greatly enhance the final product’s quality.
Proofing and Fermentation

Proofing and fermentation are critical steps in the bread-making process that enhance flavor and texture.
Proper management of these stages can significantly improve the end result.
First Proofing: Bulk Fermentation
The first proofing, or bulk fermentation, occurs after mixing the dough.
During this phase, yeast produces carbon dioxide, which causes the dough to rise.
Ideal conditions include a warm environment, typically between 75°F to 80°F.
The process usually lasts 1 to 3 hours, depending on the recipe and temperature.
Dough should be gently folded every 30 minutes to strengthen gluten development.
This also helps redistribute yeast and encourages even fermentation.
Signs of completion include the dough doubling in size and a slight domed shape.
Incorporating a wet, sticky dough increases hydration, leading to a more open crumb structure.
Second Proofing: Shaping and Flavor Development
The second proofing takes place after the dough has been shaped.
This stage focuses on the final rise before baking, enhancing both flavor and texture.
Typically, this proofing lasts 30 minutes to 1 hour.
The dough should be allowed to rest in a warm environment.
During this time, the flavors deepen as the yeast continues its work.
Overproofing can occur if the dough rises too long, resulting in a flat loaf.
To prevent this, gently press the dough.
If it springs back slowly, it’s ready for the oven.
This step requires practice to perfect timing and techniques for best results.
Baking Process

Attention to detail during the baking process can significantly enhance the flavor and texture of homemade bread.
Key elements include oven temperature, the introduction of steam, and methods to determine doneness.
Oven Temperature and Baking Time
The correct oven temperature is crucial for achieving well-baked bread.
Most recipes recommend a baking temperature between 375°F and 475°F (190°C to 246°C).
For crusty bread like baguettes, higher temperatures yield a better crust.
Timing is equally important. Bread typically bakes for 25 to 45 minutes, depending on the type and size.
An accurate oven thermometer can help maintain the proper temperature throughout the baking process.
If bread is underbaked, the interior will be gummy; if overbaked, it will be dry.
Using Steam in the Oven
Introducing steam in the oven during the first few minutes of baking can create a better crust.
This can be achieved by placing a pan of hot water at the bottom of the oven or misting the oven walls with water before inserting the bread.
Steam prevents the crust from forming too quickly, allowing the loaf to rise fully.
Bread should be placed in the oven with steam for the first 10 to 15 minutes.
After this period, the steam can dissipate, letting the crust harden properly.
Determining Bread Doneness
Properly assessing bread doneness is key to ensuring it tastes as intended.
One common method is the thump test: tapping the bottom of the loaf should produce a hollow sound. Another reliable indicator is internal temperature.
For most breads, a target temperature of 190°F to 210°F (88°C to 99°C) is ideal.
A thermometer can provide an accurate reading.
Additionally, observing the color and texture of the crust can aid in determining if the bread is perfectly baked.
Flavor Enhancements

Improving the taste of homemade bread can be achieved through various techniques.
Incorporating additional ingredients, utilizing a preferment, and experimenting with sweeteners can all significantly elevate flavor.
Incorporating Additional Ingredients
Adding ingredients such as herbs, spices, and cheese can enhance the bread’s flavor profile.
For instance, including fresh rosemary or garlic provides a savory note.
Seeds like sesame or poppy can add texture and a nutty flavor.
For a more adventurous twist, consider incorporating olives or sun-dried tomatoes for a Mediterranean flair.
Suggested Additions:
- Cheese: Cheddar, feta, or parmesan
- Herbs: Basil, thyme, or oregano
- Nuts: Walnuts, pecans, or almonds
Each addition can drastically change the final product, allowing for creativity in flavor.
Utilizing a Preferment
A preferment, such as biga or poolish, is a mixture of flour, water, and yeast allowed to ferment before incorporating it into the dough.
This process develops deeper flavors and improves bread’s texture.
Preferments can introduce complex tastes, creating a rich, tangy flavor.
The use of a preferment also enhances the bread’s aroma, making it more appealing.
To create a basic poolish:
- Mix equal parts flour and water by weight.
- Add a small amount of yeast.
- Let it sit at room temperature for 12-16 hours.
This simple technique can elevate the homemade bread experience significantly.
Experimenting with Sweeteners
Sweeteners can add complexity beyond simple sugar.
Honey, maple syrup, and malt extract can contribute unique flavors.
Using honey can impart floral notes, while molasses can introduce a deep, rich taste.
It’s important to balance the amount—too much can interfere with yeast activity.
Alternative Sweetener Options:
- Agave nectar
- Brown sugar
- Coconut sugar
Adjusting sweeteners not only enhances flavor but can also modify the texture and color of the crust, creating a more appealing bread.
Post-Baking Tips

Proper handling after baking can significantly enhance the bread’s flavor and texture.
Cooling and storing bread correctly is essential for maintaining its quality and taste.
Cooling for Optimum Texture
After baking, bread requires cooling to set its structure.
Placing it on a wire rack allows air circulation, preventing steam buildup that leads to a soggy crust.
- Timing: Let the bread cool for at least 30 minutes before slicing. This time allows the crumb to firm up, enhancing the texture.
- Avoid Tightly Wrapping: Do not cover warm bread tightly, as this traps moisture. Instead, leave it uncovered or cover it loosely with a clean kitchen towel.
Proper cooling results in a firmer crust and a better overall mouthfeel.
Patience during this step pays off in flavor and enjoyment.
Storage to Maintain Freshness
Once cooled, proper storage ensures the bread stays fresh longer.
Different types of bread may require specific storage methods based on their ingredients.
- Short-Term Storage: For daily use, store bread in a breadbox or a paper bag. This method helps maintain a crisp crust.
- Long-Term Storage: For longer preservation, slice the bread and place it in an airtight container or a resealable plastic bag. Freezing is also effective; it should be consumed within three months for best quality.
Consider using a layer of parchment paper when freezing, as it aids in moisture retention.
Proper storage practices directly affect taste and texture, ensuring homemade bread remains enjoyable.
