How Long Do You Blind Bake Pastry? A Guide for Perfect Results
Blind baking means baking a pie or tart crust before adding the filling. This technique works especially well with moist fillings or recipes that require little or no baking. It gives the crust time to set and helps reduce the risk of a soggy base.
For many pastry crusts, bake at 375°F (190°C) for about 15 to 20 minutes with pie weights, followed by 5 to 10 minutes without them.
The exact baking time varies with the type of pastry, crust thickness, oven temperature, and recipe. Some crusts need only a partial bake before filling, while others need a longer bake to create a fully cooked, crisp shell.
During the initial bake, pie weights help hold the pastry in place and limit puffing. After removing the weights, the crust can continue baking until the base reaches the desired level of color and dryness.
What Is Blind Baking?
Blind baking is a fundamental pastry technique used to bake a pie or tart crust before the filling is added. It is especially useful when the filling is moist, requires little baking, or needs to be added to a fully or partially baked crust.
Definition of Blind Baking
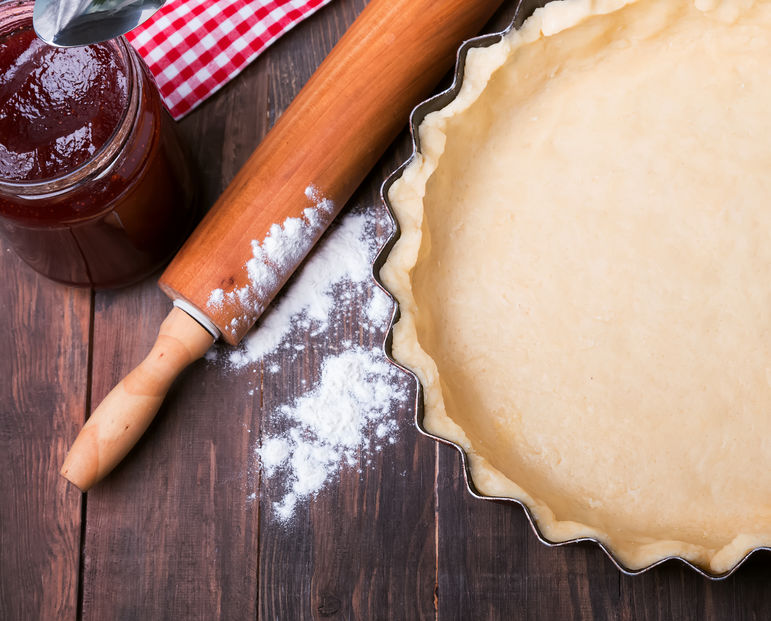
Blind baking is the process of baking a pastry crust without its filling. The technique usually begins by rolling out the pastry, fitting it into a pie or tart pan, and chilling it before baking to help the crust hold its shape.
A typical blind-baking temperature is 375°F (190°C). Some recipes use temperatures between 350°F and 400°F (175°C and 200°C).
Line the pastry with parchment paper or aluminum foil. Then add pie weights, ceramic baking weights, or dried beans. These weights help keep the crust flat and limit excessive shrinkage.
Bake the crust with the weights in place. Remove them afterward so the base can continue baking and dry out.
For a partially baked crust, remove it when the edges have set and the base has started to firm. For a fully baked crust, continue baking until the base looks dry and lightly golden.
Purpose of Blind Baking
The main purpose of blind baking is to produce a properly cooked crust while reducing the risk of a soggy or underbaked base. Pre-baking is particularly useful when a filling releases moisture into the pastry during baking or when the filling itself does not require enough oven time to fully cook the crust.
This technique is commonly used for custard tarts, cream pies, and other pastries where the crust needs to be established before the filling is added. It can also help the pastry develop a crisp texture and lightly browned, baked flavor.
Whether a crust needs to be partially or fully blind baked depends on the recipe and filling. Following the recipe’s recommended temperature and method, while judging the pastry by its color and texture rather than relying solely on a fixed baking time, helps achieve more consistent results.
Preparing the Pastry
Proper pastry preparation is essential for producing a crust with good structure, texture, and even browning. Choosing the right pastry, rolling and shaping it carefully, and chilling it before baking all help the crust hold its shape in the oven.
Choosing the Right Dough
The type of pastry you choose should match the pie or tart and its filling. Shortcrust, puff pastry, and sweet pastry each have different characteristics and are better suited to particular applications.
Shortcrust Pastry: A versatile choice for quiches, savory tarts, and many fruit pies. It produces a tender, crumbly crust with a relatively firm structure.
Puff Pastry: Made with layers of dough and butter, puff pastry produces a light, flaky result. It is useful for certain tarts and pastries but is not interchangeable with traditional shortcrust in every recipe.
Sweet Pastry: Contains sugar and is commonly used for dessert tarts. Its richer, sweeter flavor works particularly well with fillings such as custard, fruit, and pastry cream.
The pastry should therefore be selected according to the recipe, filling, and texture you want to achieve.
Shaping the Dough
Once the pastry has been prepared, careful shaping helps create an even crust that fits the baking tin without excessive stretching.
Rolling: Lightly flour the work surface and rolling pin if necessary to prevent sticking. Roll the pastry from the center outward, turning it occasionally to maintain an even thickness.
Fitting: Transfer the pastry to the pie pan or tart tin and gently ease it into the corners and sides. Avoid pulling or stretching the dough, as stretched pastry can contract during baking.
Trimming: Leave a small amount of pastry overhanging the edge of the tin. Trim and shape the edges according to the recipe once the pastry has been fitted securely.
Working gently at this stage helps minimize distortion and gives the crust a more even shape during baking.
Chilling the Dough
Chilling the shaped pastry before blind baking helps firm the fat in the dough and makes the pastry less likely to lose its shape when it enters the oven. It also makes the dough easier to handle and can help reduce excessive shrinkage.
Chill Time: A minimum of about 30 minutes is a useful starting point, although some recipes recommend longer chilling.
Cover the Pastry: Cover the shaped pastry with plastic wrap or another suitable covering to prevent it from drying out or absorbing odors from the refrigerator.
Chill Before Baking: Keep the pastry refrigerated until it is firm, particularly if the dough has become soft during rolling and shaping.
Once chilled, the pastry can be lined with parchment paper or foil, filled with pie weights, and transferred to a preheated oven for blind baking.
Blind Baking Procedure
Blind baking relies on a few simple techniques that help the pastry bake evenly. The main steps include docking the dough, adding pie weights, and choosing an appropriate baking temperature.
Docking the Dough
Docking means pricking the pastry with a fork or pastry-docking tool before baking. The small holes allow steam to escape from the dough, which can help prevent bubbles from forming on the base.
For most pie and tart crusts, prick the base evenly with a fork, concentrating on the flat bottom rather than heavily perforating the sides. Avoid excessive docking, particularly with fillings that could seep through the holes.
Adding Weights
Pie weights help hold the pastry against the bottom and sides of the pan during the initial stage of blind baking. Ceramic baking beads, metal pie weights, or dry rice or beans can be used for this purpose.
After fitting the chilled pastry into the tin, line it with parchment paper and add enough weights to cover the base evenly and reach into the sides. Using a generous, evenly distributed layer of weights provides better support than placing a small amount in the center alone.
The weights are normally removed partway through baking once the pastry has set. The uncovered crust can then continue baking so the base dries out and develops additional color.
Baking Temperatures and Times
Blind baking is commonly carried out at around 350–400°F (175–200°C), with 375°F (190°C) being a practical temperature for many standard pastry crusts. The appropriate temperature depends on the pastry, recipe, and whether the crust is being partially or fully baked.
A typical crust may need approximately 15 to 20 minutes with weights, followed by another 5 to 10 minutes without them. These times are only a guide, however, as pastry thickness, pan size, and oven performance can affect how quickly the crust bakes.
For a partially baked crust, remove it when the edges are set and the base has begun to cook. For a fully blind-baked crust, continue baking after removing the weights until the base is dry and the pastry is evenly golden.
Rather than relying solely on the clock, check the pastry during the final stage. This helps prevent overbaking while ensuring the base is sufficiently cooked for the filling that will be added.
Types of Pie Weights
When blind baking pastry, using suitable pie weights helps prevent the crust from puffing and shrinking while it sets in the oven. The weights should be distributed evenly across the lined pastry so they support both the base and the sides.
Several materials can be used as pie weights, ranging from purpose-made baking weights to inexpensive pantry alternatives.
Ceramic Pie Weights
Ceramic pie weights are small, heat-resistant pieces designed specifically for blind baking. Their shape and weight allow them to sit evenly across the pastry while providing consistent pressure during the initial stage of baking.
To use them, line the chilled pastry with parchment paper and spread the ceramic weights evenly over the entire base. They are reusable and can be washed and stored for future baking.
Dried Beans or Rice
Dried beans and uncooked rice can be used as inexpensive alternatives to commercial pie weights. Once the pastry has been lined with parchment paper, add enough beans or rice to cover the base and support the sides.
These pantry staples work because their combined weight helps keep the pastry from rising as it bakes. They can be stored and reused specifically as blind-baking weights, although they may become dry or toasted after repeated exposure to the oven and are generally best kept separate from ingredients intended for cooking or eating.
Rice and beans also do not provide quite the same convenience as purpose-made weights because their individual pieces vary in size and can be slightly less convenient to handle.
Commercial Pie Weights
Commercial pie weights are available in materials such as ceramic or metal and are specifically designed for repeated blind baking. They provide a convenient and consistent way to weigh down pastry and are generally easy to distribute and remove.
Some commercial weights are individual balls or beads, while others are linked together in chains. Both styles can be effective, provided they are used with a suitable parchment or foil liner and distributed across the pastry.
For occasional baking, dried rice or beans can be a practical low-cost option. For frequent pie and tart making, dedicated pie weights offer greater convenience and are designed specifically for repeated use.
Troubleshooting Common Issues
Blind baking can produce an excellent pastry crust, but several problems can occur if the dough is handled incorrectly or the crust is not baked sufficiently. Understanding the cause of each issue makes it easier to correct the problem and achieve a crisp, evenly baked shell.
Shrinkage
Shrinkage occurs when the pastry pulls away from the sides of the pan or becomes noticeably smaller during baking. It can be caused by stretching the dough while fitting it into the tin, overworking the pastry, or failing to chill and rest it adequately before baking.
To reduce shrinkage, handle the dough as little as possible and gently ease it into the pan rather than pulling it into position. Leave a small amount of pastry over the rim when trimming, and chill the shaped crust for at least 30 minutes before baking, or follow the resting time specified in the recipe.
Using parchment and pie weights during the initial bake helps support the pastry as it sets, but weights should not be relied upon as the sole solution to shrinkage.
Soggy Bottoms
A soggy or undercooked base can occur when moisture from the filling penetrates the pastry or when the crust has not been baked sufficiently before filling. This is particularly relevant for recipes containing wet fillings.
For a partially baked crust, make sure the base has had enough time to set before the filling is added. If the recipe calls for a fully blind-baked shell, continue baking after removing the weights until the base is dry and lightly golden.
Controlling the moisture in the filling can also help. Where appropriate, cook fruit or other moisture-rich ingredients first to reduce excess liquid before adding them to the pastry.
Bubbles and Puffing
Bubbles and puffing occur when steam or air becomes trapped between the pastry and the baking surface. This can leave the base uneven and make it more difficult to add the filling evenly.
Docking the pastry with a fork can provide an escape route for steam and help reduce puffing. Pie weights also provide downward pressure while the crust is setting, particularly when they are spread evenly across the lined base.
If a large bubble develops during baking, it can sometimes be gently flattened with the back of a spoon or another suitable utensil once the pastry is firm enough to handle. Avoid cutting into the crust unnecessarily, as creating large holes can allow filling to leak through later.
Checking the pastry during the final stage of baking is also important. The finished crust should be set, with the color and texture appropriate for whether the recipe calls for a partially or fully blind-baked shell.
After Blind Baking
After blind baking, the pastry needs to be handled carefully so the crust retains its structure and is ready for its filling. The appropriate next steps depend on whether the recipe calls for a partially or fully baked shell.
Cooling the Pastry
Allow the pastry to cool briefly after removing it from the oven. A short cooling period of around 5 to 10 minutes is usually sufficient before handling the crust, although the recipe may call for a different approach.
If the pastry is baked in a removable-bottom tart tin, allow it to cool enough to handle safely before removing it from the pan. A wire rack can be useful when the crust needs to cool completely, as it allows air to circulate around the pan and pastry.
There is no need to leave every blind-baked crust to cool completely before filling. Some recipes call for the filling to be added while the crust is still warm, particularly when the filled tart or pie will return to the oven.
Removing the Weights
Remove the pie weights and parchment or foil once the initial baking stage is complete. Lift the liner carefully, preferably by holding the edges of the parchment, and pour or scoop the weights out rather than dragging them across the pastry.
If the base still looks pale, soft, or undercooked after the weights have been removed, return the crust to the oven for several additional minutes. This allows the exposed base to dry and brown without the weights restricting its surface.
If small bubbles remain, they can usually be gently flattened while the pastry is still warm. Avoid pressing aggressively, as the crust may be fragile at this stage.
Preparing for Filling
Before adding the filling, inspect the crust for cracks, holes, or areas that appear underbaked. Small cracks can sometimes be patched with a little raw pastry or, depending on the recipe, sealed with a small amount of beaten egg.
Whether the crust needs additional baking depends on the filling. A crust intended for a fully baked, no-bake, or chilled filling may need to be completely baked and cooled first, while a crust that will return to the oven with its filling may only require partial blind baking.
Some recipes also call for brushing the partially or fully baked crust with beaten egg before a final short bake. This can help create a thin sealed surface, but it is a recipe-specific technique rather than a requirement for every blind-baked crust.
Once the shell has reached the required level of doneness and temperature for the recipe, it is ready to be filled.
Blind Baking Without Weights
Blind baking pastry without traditional pie weights is possible, although the best alternative depends on the type of pastry and the shape of the baking tin. The main goal is to keep the pastry against the base and sides of the pan while it sets in the oven.
Alternative Techniques
One of the simplest alternatives is to use parchment paper filled with uncooked rice or dried beans. The ingredients act as temporary baking weights and provide enough pressure to help prevent the pastry from puffing during the initial stage of baking.
Another option is to use a second ovenproof pie or tart pan that fits inside the pastry-lined pan. Place a sheet of parchment between the pastry and the second pan, then gently press the inner pan into position. This can provide even pressure across the base and sides without requiring loose pie weights.
Docking the pastry is another useful technique. Prick the bottom evenly with a fork to create small openings through which steam can escape. Docking can reduce bubbling, although it does not always eliminate the need for weights, particularly with thinner or more delicate pastry.
Avoid relying on a loosely crumpled ball of aluminum foil as the primary weight. It can provide some pressure, but it is less predictable than properly distributed baking weights or a fitted second pan.
When to Skip Weights
Some recipes allow you to blind bake pastry without weights, especially when the dough is firm and well chilled. However, this method does not suit every pastry.
A chilled, well-fitted crust can help limit deformation, while docking allows steam to escape and can reduce puffing. If the recipe calls for a substantial filling, the filling may provide support during the later bake, but it does not replace weights during the initial blind bake.
Monitor the Baking
Watch the pastry closely during the first part of baking. If large bubbles form, gently press them down with the back of a spoon while the pastry remains soft.
Use the crust’s appearance rather than the baking time alone to judge doneness. Partially baked pastry should have set, lightly golden edges, while a fully baked shell should have a dry, evenly baked base.
Storing and Reusing Pastry
Proper storage helps preserve the texture and quality of pastry until you are ready to use it. You can refrigerate raw pastry for short-term storage or freeze it for longer periods. Blind-baked pastry should cool completely before you store it.
Refrigeration
Raw pastry: Well-wrapped pastry dough can generally stay refrigerated for 2 to 3 days, depending on the recipe and ingredients.
Storage method: Wrap the dough tightly in plastic wrap or place it in an airtight container. This protects the pastry from drying out and absorbing odors from other foods.
Shaped pastry: You can also cover a pastry-lined pie or tart tin and refrigerate it before baking. This option works well when you want to prepare the crust ahead of time.
Let refrigerated dough soften slightly before rolling if it feels too firm to handle. Avoid leaving pastry at room temperature for longer than necessary. Warm fat can soften the dough and make it harder to roll and shape.
Freezing Pastry
Raw pastry can be frozen for longer-term storage. You can also freeze fully baked pastry shells when you wrap and protect them properly. Around 2 to 3 months is a useful quality guideline, although storage recommendations can vary by recipe and pastry type.
For raw pastry, wrap the dough tightly in plastic wrap. Then place it inside a freezer-safe bag or container for additional protection.
For a blind-baked shell, allow the pastry to cool completely before storing it. Wrap the shell securely in foil or place it in a suitable freezer-safe container.
Thawing Frozen Pastry
Transfer frozen pastry dough to the refrigerator when you are ready to use it. Allowing the dough to thaw gradually helps keep it firm and makes rolling and shaping easier.
Avoid thawing pastry at room temperature for extended periods. The fat can soften too much, which may make the dough sticky and difficult to handle.
Storing Blind-Baked Pastry
If you plan to use a blind-baked shell within a few days, let it cool completely first. Cover the shell and refrigerate it to protect the pastry from drying out and absorbing refrigerator odors.
Before adding the filling, check that the crust remains dry, firm, and intact. If storage has softened the crust, a short period in a preheated oven may help restore some crispness. However, the best approach depends on the type of pastry and the filling you plan to use.
Proper wrapping, suitable storage temperatures, and careful handling will help keep pastry in good condition until you are ready to bake or fill it.
Expert Tips for Perfect Results
Achieving a well-baked pastry crust requires attention to a few important details. Chilling the dough, using the right amount of weight, and choosing the correct baking temperature can all improve the final result.
Start With a Well-Chilled Crust
Chill the pastry before baking. Once you shape the dough in the pie or tart pan, place it in the refrigerator before it goes into the oven. Chilling firms the fat in the pastry and helps the crust hold its shape during baking.
A 30-minute chilling period provides a useful starting point, although some recipes call for longer. If the pastry becomes soft while you roll or shape it, give it additional time in the refrigerator.
Use Enough Pie Weights
Pie weights, dried beans, or uncooked rice help hold the pastry against the pan while it bakes. Line the chilled crust with parchment paper or foil, then spread the weights evenly across the base and into the sides.
Purdue University Extension recommends lining a quiche crust with foil and adding beans, rice, or pie weights before baking. This approach helps support the pastry as it sets and reduces excessive puffing.
The amount of weight matters. A generous, evenly distributed layer works better than placing a small amount in the center of the crust.
Dock the Pastry When Appropriate
Docking means pricking the bottom of the pastry with a fork. These small holes give steam a way to escape and can help reduce bubbles in the base.
However, docking does not always replace pie weights. Some recipes use both techniques, while others rely primarily on weights. Follow the method recommended for the particular pastry and filling.
Choose the Right Baking Temperature
Yes. I’d break these into much shorter sentences. The last paragraph is also unnecessary because it repeats points already covered.
Temperature plays an important role in blind baking. Around 375°F (190°C) works well for many pastry crusts. However, some recipes use higher or lower temperatures.
For example, Louisiana State University uses 425°F (218°C) for one blind-baked pie crust. The temperature then decreases for the filling. Always follow the temperature given in your recipe.
Look for Signs of Doneness
Use the baking time as a guide. Check the pastry’s appearance and texture as it bakes. Oven temperatures and pastry thickness can affect the final baking time.
A partially blind-baked crust should have set edges. The base should also look partly cooked. A fully blind-baked shell should have a dry, evenly golden base.
Start checking near the end of the recommended baking time. If the edges brown too quickly, cover them with a pie shield or strips of foil.
Cool the Crust Before Filling
Follow the recipe when deciding how long to cool the crust. A fully baked shell for a chilled filling usually needs to cool before filling.
Some recipes call for a warm or partially baked crust. In these cases, you should not cool the pastry completely. Follow the instructions for the specific filling and recipe.
Get Amazing Results With These Baking Essentials
Having the right equipment can make blind baking easier and more consistent. Good-quality pie weights help keep the pastry in place during the initial bake, while a suitable pie or tart pan provides the structure needed for an evenly shaped crust.
Pie Weights:RocksHeat Ceramic Pie Weights Baking Beans are designed for blind baking and help hold the pastry in place during the initial bake. Place them over parchment paper or foil and distribute them evenly across the crust.
Baking Pan: A sturdy, appropriately sized pan such as these Le Tauci Ceramic Pans works well for sweet and savory pies and tarts. Always check the manufacturer’s care and temperature instructions before using a ceramic pan in the oven.
The right equipment can make blind baking easier, but proper pastry preparation matters most. A well-chilled crust, evenly distributed weights, and the correct oven temperature all help produce a well-baked shell.
Once you master these basic steps, blind baking becomes a simple technique for fruit tarts, quiches, cream pies, and other pastries. With practice, you’ll become more confident in judging the crust by its appearance and texture.
FAQ: How Long Do You Blind Bake Pastry?
Bake pastry at 375°F (190°C) for 15–20 minutes with baking weights, then remove the weights and bake for another 5–10 minutes. The weights help prevent puffing and shrinkage, while the second bake helps dry and brown the base. Exact times vary by pastry, thickness, and oven.
How Long Do You Blind Bake Pastry Without Weights?
After removing the weights and parchment, bake the pastry for another 5–10 minutes. Continue until the base looks dry and the pastry has developed a light golden color.
What Temperature Should You Blind Bake Pastry?
A temperature of around 375°F (190°C) works well for many pastry crusts. Some recipes use a higher temperature initially to set the crust before reducing the heat.
Do You Have to Use Weights When Blind Baking?
Using weights helps keep the pastry base flat and limits bubbling and shrinkage. You can use dedicated pie weights, dried beans, or uncooked rice.
How Do You Know When Blind-Baked Pastry Is Done?
The pastry should look dry, firm, and lightly golden, especially around the edges. If you plan to fill the crust and bake it again, you do not need to brown it completely during the first bake.


 Proper storage helps preserve the texture and quality of pastry until you are ready to use it. You can refrigerate raw pastry for short-term storage or freeze it for longer periods. Blind-baked pastry should cool completely before you store it.


