

Many home bakers often find themselves puzzled over the density of their Dutch oven bread.
A dense loaf typically results from insufficient gluten development, inadequate fermentation time, or using too much flour.
Each of these factors can significantly impact the texture and rise of the bread, leading to disappointment after hours of preparation.
Understanding the role of hydration is another key aspect.
A dough that’s too dry will not form enough air pockets during rising, contributing to a heavier loaf.
Properly managing ingredient ratios and allowing for enough rising time can make a noticeable difference in achieving that light, airy bread everyone desires.
This exploration into the causes of dense bread will provide insights and practical tips for achieving the perfect homemade loaf.
By addressing the most common pitfalls, bakers can improve their results and enjoy the satisfaction of pulling a beautifully risen bread from the oven.
Understanding the Basic Principles of Dutch Oven Bread

Dutch oven bread relies on a few fundamental principles to achieve its distinct texture and flavor.
The combination of steam, heat retention, and proper ingredient ratios plays a crucial role.
Key Factors:
- Hydration Level: The amount of water affects dough texture. Higher hydration creates an open crumb, while lower hydration may lead to denser bread.
- Yeast Activity: Active yeast contributes to the rise. Inadequate fermentation time may result in dense bread.
- Temperature: Maintaining a consistent baking temperature is essential. A preheated Dutch oven promotes even cooking and crust formation.
- Kneading Technique: Proper kneading develops gluten. Insufficient gluten structure can lead to a dense loaf.
Important Considerations:
- Flour Type: Different flours absorb water differently. Bread flour, with higher protein content, aids in gluten development.
- Autolyse Method: Allowing flour and water to rest before adding other ingredients can enhance dough extensibility.
- Proofing Time: Allowing the dough to rise adequately ensures it has enough air pockets for a lighter texture.
Focusing on these principles can help to address common issues with density in Dutch oven bread.
By understanding and adjusting these factors, bakers can achieve a better crumb structure and overall texture.
Evaluating Key Ingredients

Understanding the impact of key ingredients is vital for troubleshooting dense Dutch oven bread.
Each ingredient contributes uniquely to the bread’s texture and overall success.
Flour Types and Their Effects on Bread Density
Flour type plays a significant role in the density of bread.
Bread flour, containing higher protein levels, promotes strong gluten formation.
This results in a lighter texture.
Conversely, all-purpose flour has moderate protein content, which may not adequately support the structure needed for airy bread.
Whole wheat flour, while nutritious, contains bran that interferes with gluten development, often leading to denser loaves.
Bakeries often prefer specific flour blends to achieve ideal density.
Experimenting with different flour types can yield various results, so it’s essential to assess the protein content on the labels.
The Role of Water in Hydration and Dough Consistency
Water is crucial for achieving the right dough consistency.
It hydrates flour, activating gluten-forming proteins.
The amount of water dictates the dough’s stickiness and elasticity.
A high hydration dough allows for better gluten expansion, leading to a lighter crumb structure.
Conversely, insufficient water can result in dry, dense bread, as the gluten will not develop sufficiently.
Measuring water accurately is essential.
Different flours absorb water differently, so adjustments may be needed depending on the type used.
A balance ensures optimal fermentation and rise during baking.
Yeast and Leavening Agents: Finding the Right Balance
Yeast is a key leavening agent that influences bread texture.
Active dry yeast and instant yeast are commonly used, each contributing to fermentation rates and flavor profiles.
Using too little yeast can lead to insufficient rise, resulting in dense bread.
Conversely, excessive yeast may create overly rapid fermentation, impacting flavor and structure negatively.
Proofing the yeast before adding it to the dough is recommended.
This ensures it is active and helps avoid dense areas in the final product.
Following proper measurements and fermentation times is crucial for achieving the desired lightness.
Salt Proportions and Gluten Development
Salt plays multiple roles, including flavor enhancement and gluten strengthening.
It regulates yeast activity, preventing over-fermentation, which can contribute to density issues.
Too little salt may cause the dough to rise too quickly, leading to weak gluten structure.
This can create dense, gummy areas in the loaf.
Correct salt levels help strengthen the dough, contributing to better texture.
Typically, a 1.5% to 2% salt ratio relative to flour weight is recommended.
Keeping salt away from direct contact with yeast until mixed in ensures balanced development throughout the dough.
The Importance of Dough Kneading

Kneading plays a critical role in developing the structure and texture of bread.
Proper kneading helps build gluten strength, which affects the bread’s ability to rise and maintain its shape.
Understanding the techniques and the balance between too much and too little kneading is essential for achieving the desired bread consistency.
Kneading Techniques and Their Impact
Different kneading techniques can influence the outcomes of bread.
The most common methods include:
- Hand Kneading: This involves pushing, folding, and stretching the dough by hand. It allows for better control and feel of the dough’s texture.
- Machine Kneading: Using a stand mixer with a dough hook saves time and effort but may result in different gluten development compared to hand kneading.
Kneading should continue until the dough is smooth and elastic.
Typically, this takes about 10 minutes by hand or 5-7 minutes with a mixer.
Time and technique affect the final density of the bread.
Proper kneading introduces air into the dough, which promotes better rising.
Over-Kneading vs Under-Kneading
Achieving the right balance in kneading is crucial.
Under-kneading results in weak gluten development. The dough may not rise well, leading to dense, heavy bread. Signs of under-kneading include a shaggy texture and lack of elasticity.
Over-kneading can also pose problems. It can make the dough overly tight, causing it to collapse or not rise properly. This results in bread that is tough and dense. Signs of over-kneading include a shiny surface and excessive elasticity.
Both under-kneading and over-kneading can contribute to unsatisfactory bread texture.
Recognizing these signs helps bakers adjust their kneading techniques for better results.
Proofing and Fermentation Processes

Proofing and fermentation are critical steps in bread making that directly influence the texture and rise of the loaf.
These processes affect the development of gluten and the overall flavor, impacting how dense the final product may turn out.
The Role of Temperature and Time in Proofing
Temperature and time play significant roles in proofing.
Yeast activity increases with warmth but can become inhibited if it gets too hot.
The ideal temperature for proofing dough is generally around 75°F to 85°F (24°C to 29°C).
Timing also matters; under-proofing can lead to dense bread as it hasn’t had enough time to develop air pockets.
A typical first proofing can last from 1 to 2 hours.
For the second proofing, about 30 to 60 minutes is usually sufficient.
Monitoring both elements ensures the dough rises adequately, contributing to a lighter texture.
Signs of Proper Fermentation
Proper fermentation is identifiable through multiple signs.
A visibly enlarged dough is a primary indicator.
It should have doubled in size after the first proof.
Additionally, a gentle poke test can help assess readiness; if the indentation springs back slowly, the dough is well-fermented.
A pleasant, slightly yeasty aroma often accompanies properly fermented dough, indicating active fermentation.
A smooth, elastic texture further signifies good fermentation, essential for achieving an optimal crumb structure in the final loaf.
Shaping and Scoring: Pre-Baking Preparations

The shaping and scoring of bread are critical steps before baking that can significantly impact texture and appearance.
Proper techniques can help create a loaf with an open crumb and an appealing crust.
Creating Tension in the Shaping Process
Creating tension during the shaping process ensures that the dough retains its structure and rises properly.
This can be achieved by following these steps:
- Pre-shaping: Gently shape the dough into a round or oblong form without deflating it completely. This initial shaping helps the dough relax yet maintain some of its gas bubbles.
- Bench Rest: Allow the pre-shaped dough to rest for about 20-30 minutes. This step helps relax gluten, making the final shaping easier.
- Final Shaping: Shape the dough again, using both hands to create a tight surface. This can be done by tucking the edges underneath to create surface tension. A taut surface helps the dough rise nicely during baking, contributing to a lighter texture.
Scoring the Dough: Techniques and Tips
Scoring introduces slashes to the dough, allowing for controlled expansion during baking.
Effective scoring requires some technique:
- Tools: Use a sharp razor blade or a bread lame. A clean cut prevents tearing and produces a better finish.
- Depth and Angle: Score about ¼ to ½ inch deep at a 30-45 degree angle. This depth facilitates the dough’s expansion while preventing collapse.
- Patterns: Consider different scoring patterns, such as straight lines or decorative designs. A well-placed slash not only enhances appearance but also can direct the steam release, resulting in a better crust.
Following these shaping and scoring techniques can lead to improved results in the final bread.
Baking Temperatures and Techniques

Baking temperature and technique play crucial roles in determining the texture and density of Dutch oven bread.
Proper heat levels and methods can significantly influence the final product, leading to a lighter or denser loaf.
The Impact of Oven Temperature on Bread Density
Oven temperature affects yeast activity and moisture loss during baking.
Higher temperatures can create a rapid rise, resulting in a lighter loaf, while lower temperatures may lead to denser bread due to extended baking time.
For best results, aim for a temperature of 450°F (232°C).
This optimal heat encourages the development of a crust while maintaining a tender crumb.
If the temperature is too low, the bread will develop a thick crust too early, preventing proper oven spring.
Tips for Adjusting Temperature:
- Start with a preheated oven to ensure even cooking.
- Use an oven thermometer to verify accuracy.
- Adjust baking time if altering temperature.
Steam in the Oven: Creating the Perfect Crust
Adding steam to the baking process is essential for achieving a crispy crust.
Steam helps with gas expansion, allowing the dough to rise more before the crust sets.
This results in a better oven spring and a more open crumb.
To create steam, he or she can place a pan of water in the oven or spray water inside using a misting bottle. This should be done right after the bread is placed in the oven.
Methods for Incorporating Steam:
- Use a cast iron skillet with hot water.
- Place ice cubes on a baking tray at the bottom of the oven.
- Consider covering the Dutch oven with a lid for the first 20 minutes to trap steam.
Implementing these techniques can enhance the baking experience and yield better results in terms of bread density and texture.
Post-Baking Analysis: Common Pitfalls and How to Avoid Them

After baking, it’s essential to evaluate the bread’s characteristics to identify reasons for density.
Recognizing specific pitfalls can aid in improving future batches.
Diagnosing a Dense Bread Loaf
Several factors contribute to a dense texture in Dutch oven bread.
Under-kneading can lead to insufficient gluten development, which results in a tight crumb structure.
Knead until the dough is smooth and elastic.
Too little hydration affects the bread’s volume.
If the recipe calls for a specific hydration percentage, sticking to it is crucial.
Over-proofing can cause the dough to deflate, leading to a heavy loaf.
Conduct the poke test: if the indentation springs back slowly, the dough is ready.
Incorrect oven temperature may not provide the necessary initial steam for rise.
Use an oven thermometer to ensure accuracy.
Adjustments for Future Baking Success

To enhance future baking experiences, consider adjusting several techniques.
- Hydration levels: Increase water incrementally, keeping track of changes.
- A well-hydrated dough yields a lighter loaf.
- Kneading techniques: Use various methods, such as stretch and fold, to promote gluten development without intensive kneading.
- Proofing times: Keep a close watch on dough behavior during proofing. Aim for a balance that allows for maximum rise without over-expanding.
- Temperature control: Utilize an oven thermometer for precise baking conditions.
- Use quality ingredients: Fresh flour and yeast significantly influence texture and taste.
Implementing these adjustments can lead to improved results in future baking endeavors.
Essential Tools and Equipment

Having the right tools and equipment is crucial for successful bread making in a Dutch oven.
This section explores how to choose the best Dutch oven and essential bread-making tools that enhance the baking process.
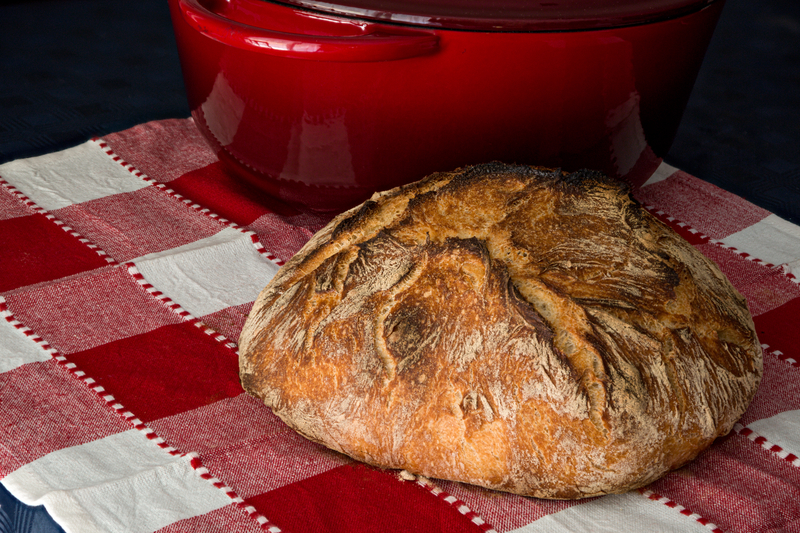
Choosing the Right Dutch Oven
Selecting a Dutch oven involves considering material, size, and lid type.
Cast iron is a popular choice due to its excellent heat retention and even cooking.
A 3.5 to 7-quart capacity is ideal for most bread recipes.
Smaller sizes may hinder proper rising, while larger ones can lead to excessive moisture loss.
Lid designs also matter; a tight-fitting lid traps steam, creating a conducive environment for crust development.
Enamel-coated options are easier to clean and resist rust but ensure they are oven-safe at high temperatures.
For aspiring home bakers seeking the ideal Dutch oven to elevate their bread-making endeavors, look no further.
 Our top recommendation is the Lodge Cast Iron Dutch Oven – a kitchen essential designed to deliver exceptional results.
Explore the features that make it the perfect companion for achieving artisanal loaves with a crispy crust and a heavenly crumb.
Upgrade your baking experience and say goodbye to dense bread with our meticulously curated Dutch oven recommendation.
Bread Making Tools for the Home Baker
In addition to the Dutch oven, several tools enhance the bread-making experience.
A kitchen scale provides accurate ingredient measurements, ensuring consistency.
A bench scraper helps divide and shape dough, while a proofing basket supports dough during the fermentation stage.
Using a thermometer to check the dough’s internal temperature can prevent undercooked bread.
Essential ingredients such as high-protein flour and active yeast are crucial; they contribute to the bread’s structure and taste.
A sharp knife or razor for scoring the dough allows for controlled expansion during baking.
Collectively, these tools enable the baker to achieve better results and address issues like density effectively.
Additional Tips for Perfecting Dutch Oven Bread

Achieving the perfect loaf takes practice and attention to detail.
Here are some key tips to enhance the quality of Dutch oven bread.
- Use a Scale: Measuring ingredients by weight ensures accuracy. A digital kitchen scale helps maintain consistency in recipes.
- Hydration Level: Higher hydration can lead to a lighter loaf. Experiment with adjusting the water content, but do so gradually.
- Knead Properly: Proper gluten development is crucial. Knead the dough enough to achieve an elastic texture, which improves structure.
- Fermentation Time: Allowing the dough to ferment longer can improve flavor. Cold fermentation in the refrigerator for 12–24 hours can yield rich tastes.
- Preheat the Dutch Oven: Heating the pot before baking mimics a professional oven. This step helps create a better crust and oven spring.
- Steam: Steam is essential for crust formation. Using a lid during the first part of baking traps humidity, leading to a crisp crust.
- Don’t Overload: Avoid overcrowding the Dutch oven. This allows hot air to circulate, ensuring even baking.
- Cooling Time: Let the bread cool completely on a wire rack. This step prevents a gummy texture, giving the loaf a better crumb.
Following these tips can elevate Dutch oven bread from dense to delightful. Consistent practice will yield the best results over time.
