Baking is not only a great way to pass the time but also a fantastic way to satisfy your cravings for something sweet and scrumptious.
The beauty of baking lies in its versatility, whether you are in the company of kids, flying solo, or enjoying the company of friends and family.
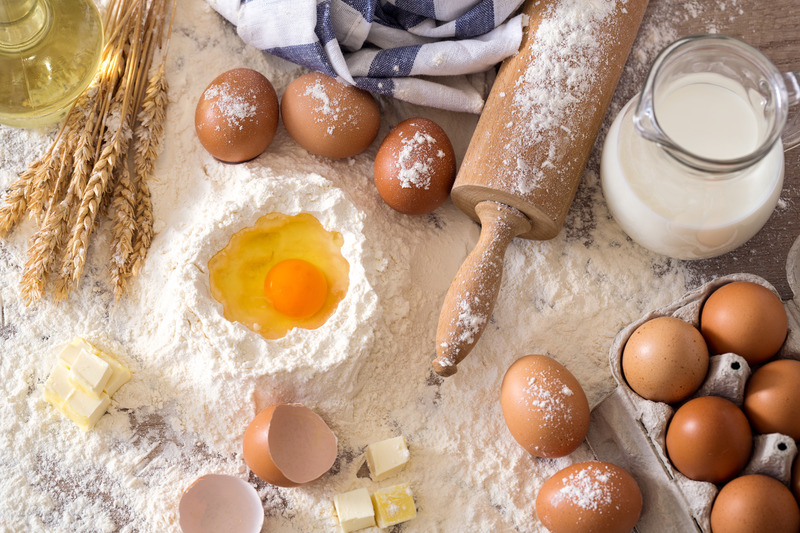
With just a few common household ingredients, you can whip up some of the simplest yet mouthwatering recipes.
From classic chocolate chip cookies to rich fudgy brownies, there’s a plethora of options to choose from.
The best part about baking is the sheer joy it brings, especially when you have unique and creative ideas to inspire you.
The aroma of freshly baked goods wafting through the air and the excitement of seeing the end result is simply unmatched.
If you’re looking for fun and exciting things to bake when feeling bored at home, the possibilities are endless.
The Therapeutic Magic of Baking: How it Alleviates Boredom and Nurtures Creativity
Baking has become a beloved pastime for many, not just for the delicious treats it yields but also for its remarkable ability to combat boredom and spark creativity.
The act of baking engages multiple senses and taps into various cognitive processes, making it a therapeutic and fulfilling activity.
Here’s a closer look at why baking is such an effective antidote to boredom:
Mindful Engagement
Baking requires focus and attention to detail.
From measuring ingredients to following specific steps in a recipe, the process demands mindfulness.
This focused engagement can divert the mind from feelings of boredom and immerse individuals in the present moment.
Creativity Unleashed
Baking is a form of creative expression.
Experimenting with flavors, textures, and presentations allows individuals to unleash their creativity in the kitchen.
Trying new recipes or tweaking existing ones provides a sense of accomplishment and excitement.
Sense Stimulation
The sensory experience of baking is unparalleled.
The aroma of ingredients, the texture of dough, the sound of mixing, and the visual appeal of the final product stimulate multiple senses.
This sensory engagement adds a layer of satisfaction and pleasure to the baking process.
Tangible Results
Baking provides tangible, delicious results.
The joy of seeing a perfectly risen cake or a batch of golden-brown cookies is rewarding.
This tangible outcome contrasts with the intangibility of boredom, offering a sense of achievement.
Shareable Delights
Baked goods are often shared with others, fostering a sense of connection and community.
Whether it’s sharing a cake with neighbors or bringing cookies to the office, the social aspect of sharing homemade treats enhances the overall experience and adds meaning to the activity.
Routine and Structure
Following a baking recipe provides a structured framework.
This sense of order and routine can be particularly comforting in times of boredom or uncertainty.
The step-by-step nature of baking provides a roadmap, guiding individuals through the process.
In summary, baking goes beyond the realm of culinary skills; it serves as a therapeutic and creative outlet that captivates the mind and senses.
Its ability to combat boredom lies in the combination of mindful engagement, creative expression, sensory stimulation, tangible results, social connections, and the comforting structure it offers.
So, the next time boredom strikes, consider donning an apron and exploring the therapeutic magic of baking.
From colorful cupcakes and trendy cake pops to savory scones and cheesy breadsticks, there’s something for everyone.
So, grab your apron, gather your ingredients, and get ready to embark on a delicious baking adventure!
Chocolate Chip Cookies
Chocolate chip cookies are a classic favorite that’s easy to make and always a crowd-pleaser.
Here’s a basic recipe to get you started:
Ingredients:
1 cup (2 sticks) unsalted butter, at room temperature
3/4 cup granulated sugar
3/4 cup packed brown sugar (light or dark)
2 large eggs
1 teaspoon pure vanilla extract
2 1/4 cups all-purpose flour
1 teaspoon baking soda
1/2 teaspoon salt
2 cups semisweet chocolate chips
Instructions:
Preheat your oven to 350°F (175°C). Line a baking sheet with parchment paper or lightly grease it.
In a large mixing bowl, cream together the softened butter, granulated sugar, and brown sugar until it’s smooth and creamy.
Beat in the eggs one at a time, then stir in the vanilla extract.
In a separate bowl, whisk together the flour, baking soda, and salt. Gradually add this dry mixture to the wet ingredients, mixing until just combined.
Fold in the chocolate chips. You can use semisweet, milk chocolate, dark chocolate, or a combination depending on your preference.
Drop rounded tablespoons of cookie dough onto the prepared baking sheet, spacing them about 2 inches apart. You can use an ice cream scoop for even-sized cookies.
Bake in the preheated oven for 9 to 11 minutes or until the edges are golden brown but the centers are still soft. Keep a close eye on them, as baking time can vary depending on your oven and the size of your cookies.
Remove the cookies from the oven and let them cool on the baking sheet for a few minutes before transferring them to a wire rack to cool completely. They’ll continue to set as they cool.
Enjoy your homemade chocolate chip cookies with a glass of milk or your favorite beverage!
Feel free to customize your chocolate chip cookies by adding ingredients like chopped nuts, dried fruits, or even a sprinkle of sea salt on top before baking.
Here’s a basic recipe for vanilla cupcakes with vanilla buttercream frosting:
Ingredients for Vanilla Cupcakes:
For the Cupcakes:
1 1/2 cups all-purpose flour
1 1/2 teaspoons baking powder
1/4 teaspoon salt
1/2 cup (1 stick) unsalted butter, at room temperature
1 cup granulated sugar
2 large eggs
2 teaspoons pure vanilla extract
1/2 cup whole milk
Ingredients for Vanilla Buttercream Frosting:
1 cup (2 sticks) unsalted butter, at room temperature
4 cups powdered sugar (confectioner’s sugar)
2-3 tablespoons whole milk or heavy cream
2 teaspoons pure vanilla extract
Food coloring (optional)
Sprinkles or decorations (optional)
Instructions for Vanilla Cupcakes:
Preheat your oven to 350°F (175°C) and line a muffin tin with cupcake liners.
In a medium bowl, whisk together the flour, baking powder, and salt. Set this dry mixture aside.
In a large mixing bowl, cream the softened butter and granulated sugar together until it becomes light and fluffy, which should take about 2-3 minutes.
Add the eggs, one at a time, mixing well after each addition. Stir in the vanilla extract.
Gradually add the dry mixture to the wet ingredients, alternating with the milk. Begin and end with the dry ingredients, mixing until just combined. Be careful not to overmix, as it can make the cupcakes dense.
Divide the batter evenly among the cupcake liners, filling each about two-thirds full.
Bake in the preheated oven for 18-20 minutes, or until a toothpick inserted into the center of a cupcake comes out clean or with a few moist crumbs. Avoid overbaking, as this can make the cupcakes dry.
Remove the cupcakes from the oven and let them cool in the muffin tin for a few minutes before transferring them to a wire rack to cool completely.
Instructions for Vanilla Buttercream Frosting:
In a large mixing bowl, beat the softened butter until it becomes creamy and pale, which should take about 2 minutes.
Gradually add the powdered sugar, one cup at a time, mixing well after each addition.
Add the vanilla extract and 2 tablespoons of milk or cream. Mix until the frosting is smooth and fluffy. If the frosting is too thick, add more milk or cream a teaspoon at a time until you reach your desired consistency.
If you want to color the frosting, add a few drops of food coloring and mix until the color is even.
Assembling the Cupcakes:
Once the cupcakes are completely cooled, use a piping bag or a spatula to frost them with the vanilla buttercream.
Decorate your cupcakes with sprinkles or any other decorations you like.
Enjoy your homemade vanilla cupcakes!
Feel free to get creative with flavor variations by adding different extracts, fruits, or fillings to the cupcakes, and don’t hesitate to experiment with different frosting flavors and decorations to suit your preferences or special occasions.
Brownies
Brownies are a beloved dessert that can be made in various ways, from fudgy to cakey to chewy.
Here’s a basic recipe for classic fudgy brownies:
Ingredients:
1 cup (2 sticks) unsalted butter
2 1/4 cups granulated sugar
4 large eggs
1 1/4 cups unsweetened cocoa powder
1 teaspoon salt
1 teaspoon baking powder
1 teaspoon pure vanilla extract
1 1/2 cups all-purpose flour
1 cup semisweet chocolate chips (optional)
Instructions:
Preheat your oven to 350°F (175°C). Grease a 9×13-inch baking pan or line it with parchment paper, leaving some overhang on the sides for easy removal.
In a medium saucepan over low heat, melt the butter. You can also melt it in the microwave in short 20-30 second bursts.
In a large mixing bowl, whisk together the melted butter and sugar until well combined.
Add the eggs one at a time, mixing well after each addition.
Stir in the cocoa powder, salt, baking powder, and vanilla extract until the batter is smooth.
Gradually add the flour and mix until just combined. Be careful not to overmix; stop as soon as there are no visible streaks of flour.
If you want to add chocolate chips, fold them into the batter.
Pour the brownie batter into the prepared pan and spread it evenly.
Bake in the preheated oven for 25-30 minutes, or until a toothpick or cake tester inserted into the center comes out with a few moist crumbs. You want the brownies to be slightly undercooked for that fudgy texture. The exact baking time can vary depending on your oven, so start checking around 25 minutes.
Remove the brownies from the oven and let them cool completely in the pan on a wire rack.
Once the brownies are cool, you can lift them out of the pan using the parchment paper overhang, and then cut them into squares or rectangles.
Enjoy your delicious fudgy brownies!
You can customize your brownies by adding ingredients like nuts, caramel, or different types of chocolate chips.
For extra richness, you can also swirl in peanut butter or Nutella before baking.
These brownies are perfect for indulging your sweet tooth.
Skillet Brownie with Ice Cream
A skillet brownie with a scoop of ice cream is a delightful dessert that combines warm, gooey chocolate brownie with cold, creamy ice cream.
Here’s how to make a skillet brownie with ice cream:
Ingredients:
For the Brownie:
1/2 cup (1 stick) unsalted butter
1 cup granulated sugar
2 large eggs
1 teaspoon pure vanilla extract
1/3 cup unsweetened cocoa powder
1/2 cup all-purpose flour
1/4 teaspoon salt
1/2 cup semisweet chocolate chips or chunks
For Serving:
Vanilla ice cream
Chocolate sauce or caramel sauce (optional)
Whipped cream (optional)
Chopped nuts or sprinkles (optional)
Instructions:
Preheat your oven to 350°F (175°C).
In a 10-inch oven-safe skillet (cast iron works great), melt the butter over low heat. Once melted, remove it from the heat and let it cool slightly.
Stir in the granulated sugar until well combined.
Add the eggs one at a time, mixing well after each addition. Stir in the vanilla extract.
In a separate bowl, sift together the cocoa powder, flour, and salt. Gradually add this dry mixture to the skillet, stirring until just combined.
Fold in the semisweet chocolate chips or chunks.
Smooth the brownie batter evenly in the skillet.
Bake the skillet brownie in the preheated oven for 20-25 minutes or until the edges are set, and the center is slightly gooey. Keep in mind that the brownie will continue to cook a bit after you take it out of the oven due to the residual heat.
Remove the skillet from the oven (be sure to use oven mitts as the handle will be hot) and let it cool slightly.
While the brownie is still warm, scoop a generous portion of vanilla ice cream on top.
If desired, drizzle chocolate sauce or caramel sauce over the ice cream and brownie.
Optionally, add a dollop of whipped cream and sprinkle with chopped nuts or sprinkles.
Serve the skillet brownie immediately, making sure to scoop some of the warm, gooey brownie along with the cold ice cream.
Enjoy your indulgent skillet brownie with ice cream!
This dessert is perfect for sharing with friends and family and is sure to satisfy your sweet tooth.
Feel free to get creative with your toppings and serve it as a decadent treat for special occasions or a comforting dessert any day.
Cast iron can last a lifetime when properly cared for.
Lodge is one of the most trusted names in cast iron cookware.
Cakes
Baking a cake is a delightful way to celebrate special occasions or enjoy a sweet treat any day.
Here’s a basic recipe for a classic vanilla cake with buttercream frosting:
Ingredients:
For the Cake:
2 1/2 cups all-purpose flour
2 1/2 teaspoons baking powder
1/2 teaspoon baking soda
1/2 teaspoon salt
1/2 cup (1 stick) unsalted butter, softened
1 1/2 cups granulated sugar
3 large eggs
2 teaspoons pure vanilla extract
1 1/2 cups buttermilk
For the Buttercream Frosting:
1 cup (2 sticks) unsalted butter, softened
4 cups powdered sugar (confectioner’s sugar)
2-3 tablespoons whole milk or heavy cream
2 teaspoons pure vanilla extract
Food coloring (optional)
Instructions:
For the Cake:
Preheat your oven to 350°F (175°C). Grease and flour two 9-inch (23 cm) round cake pans.
In a medium bowl, whisk together the flour, baking powder, baking soda, and salt. Set this dry mixture aside.
In a large mixing bowl, cream the softened butter and granulated sugar together until it becomes light and fluffy, which should take about 2-3 minutes.
Add the eggs, one at a time, mixing well after each addition. Stir in the vanilla extract.
Gradually add the dry mixture to the wet ingredients, alternating with the buttermilk, beginning and ending with the dry mixture. Mix until just combined. Be careful not to overmix.
Divide the cake batter evenly between the prepared pans.
Bake in the preheated oven for 25-30 minutes, or until a toothpick inserted into the center of the cakes comes out clean.
Remove the cakes from the oven and let them cool in the pans for about 10 minutes before transferring them to a wire rack to cool completely.
For the Buttercream Frosting:
In a large mixing bowl, beat the softened butter until it becomes creamy and pale, which should take about 2 minutes.
Gradually add the powdered sugar, one cup at a time, mixing well after each addition.
Add the vanilla extract and 2 tablespoons of milk or cream. Mix until the frosting is smooth and fluffy. If the frosting is too thick, add more milk or cream a teaspoon at a time until you reach your desired consistency.
If you want to color the frosting, add a few drops of food coloring and mix until the color is even.
Assembling and Decorating the Cake:
Once the cake layers have completely cooled, place one layer on a serving plate or cake stand.
Spread a layer of buttercream frosting on top of the first layer.
Place the second cake layer on top of the frosting.
Frost the entire cake with the remaining buttercream frosting, covering the top and sides evenly.
Decorate your cake with additional toppings, such as sprinkles, chocolate shavings, or fresh fruit, if desired.
Slice and serve your homemade cake.
Feel free to get creative with your cake flavors, fillings, and decorations to suit your preferences or special occasions.
Cheesecake
Cheesecake is a decadent and creamy dessert loved by many.
Here’s a classic recipe for a homemade cheesecake:
Ingredients:
For the Crust:
1 1/2 cups graham cracker crumbs (about 12-15 graham crackers)
1/4 cup granulated sugar
1/2 cup unsalted butter, melted
For the Cheesecake Filling:
4 packages (8 ounces each) cream cheese, softened
1 1/4 cups granulated sugar
1 teaspoon pure vanilla extract
4 large eggs
2/3 cup sour cream
2/3 cup heavy cream
Instructions:
1. Prepare the Crust:
Preheat your oven to 325°F (160°C).
In a medium bowl, combine the graham cracker crumbs and sugar.
Stir in the melted butter until the mixture resembles wet sand.
Press the mixture firmly into the bottom of a 9-inch (23 cm) springform pan to create an even crust.
2. Make the Cheesecake Filling:
In a large mixing bowl, beat the softened cream cheese until it’s smooth and creamy, which should take about 2 minutes.
Gradually add the granulated sugar and vanilla extract, and continue to beat until well combined.
Add the eggs one at a time, beating well after each addition.
Finally, mix in the sour cream and heavy cream until the batter is smooth and velvety.
3. Bake the Cheesecake:
Pour the cheesecake filling over the prepared crust in the springform pan.
Tap the pan gently on the countertop to release any air bubbles.
Place the cheesecake in the preheated oven and bake for about 45-50 minutes, or until the edges are set, and the center is slightly jiggly but not soupy.
Turn off the oven, crack the oven door, and let the cheesecake cool in the oven for about 1 hour.
4. Chill the Cheesecake:
Remove the cheesecake from the oven and refrigerate it for at least 4 hours, preferably overnight, to allow it to set completely.
5. Serve the Cheesecake:
Before serving, you can garnish the cheesecake with whipped cream, fruit, chocolate sauce, or any other toppings you desire.
Use a sharp knife to carefully release the cheesecake from the sides of the springform pan before removing the outer ring.
Slice and serve your delicious homemade cheesecake.
Cheesecake is a versatile dessert, and you can customize it with various toppings and flavorings.
Experiment with different fruits, chocolates, or even savory options like caramel or nuts.
Enjoy your creamy and indulgent homemade cheesecake!
Cinnamon Rolls
Homemade cinnamon rolls are a delightful treat that’s perfect for breakfast or as a sweet snack.
Here’s a recipe to make delicious cinnamon rolls from scratch:
Ingredients:
For the Dough:
4 cups all-purpose flour
1/3 cup granulated sugar
1 teaspoon salt
2 1/4 teaspoons active dry yeast (1 packet)
1 cup warm milk (110°F or 43°C)
2 large eggs
1/3 cup unsalted butter, softened
For the Filling:
1 cup brown sugar, packed
2 1/2 tablespoons ground cinnamon
1/3 cup unsalted butter, softened
For the Cream Cheese Frosting:
4 oz (1/2 cup) cream cheese, softened
1/4 cup unsalted butter, softened
1 cup powdered sugar
1/2 teaspoon pure vanilla extract
Instructions:
1. Prepare the Dough:
In a small bowl, combine warm milk and yeast. Let it sit for about 5-10 minutes until it becomes frothy, indicating that the yeast is active.
In a large mixing bowl, combine flour, sugar, and salt.
Add the yeast mixture, softened butter, and eggs to the dry ingredients. Mix until a soft dough forms.
Knead the dough on a floured surface for about 5-7 minutes until it becomes smooth and elastic.
Place the dough in a greased bowl, cover it with a clean kitchen towel or plastic wrap, and let it rise in a warm place for 1-2 hours or until it has doubled in size.
2. Make the Filling:
In a small bowl, mix together brown sugar and ground cinnamon.
3. Assemble the Cinnamon Rolls:
Once the dough has risen, punch it down to release any air bubbles.
Roll out the dough on a floured surface into a large rectangle, about 16×12 inches.
Spread the softened butter evenly over the dough.
Sprinkle the cinnamon-sugar mixture evenly over the butter.
Starting from one of the long sides, tightly roll up the dough into a log.
Slice the log into 12 even pieces.
4. Bake the Cinnamon Rolls:
Place the cinnamon roll slices in a greased 9×13-inch baking pan or a similar-sized baking dish.
Cover the pan with a kitchen towel and let the rolls rise for about 30 minutes while you preheat your oven to 350°F (175°C).
Bake the cinnamon rolls in the preheated oven for 20-25 minutes, or until they are golden brown and cooked through.
5. Make the Cream Cheese Frosting:
In a mixing bowl, beat together softened cream cheese, softened butter, powdered sugar, and vanilla extract until smooth and creamy.
6. Frost and Serve:
Once the cinnamon rolls have cooled slightly, spread the cream cheese frosting evenly over the warm rolls.
Serve the cinnamon rolls while they’re still warm for the best flavor and texture.
Enjoy your homemade cinnamon rolls with a cup of coffee or a glass of milk.
They’re a delightful treat that’s perfect for indulging in some sweet comfort food.
Fruit Pies
Fruit pies are a classic and delicious dessert that can be made with a variety of fruits.
Here’s a basic recipe for a homemade fruit pie:
Ingredients:
For the Pie Crust (you can also use store-bought crusts):
2 1/2 cups all-purpose flour
1 teaspoon salt
1 teaspoon granulated sugar
1 cup (2 sticks) cold unsalted butter, cut into small pieces
6-8 tablespoons ice water
For the Fruit Filling:
4-5 cups of your choice of fruit (e.g., apples, berries, cherries, peaches, or a combination)
1/2 to 1 cup granulated sugar (adjust based on the sweetness of the fruit)
2 tablespoons cornstarch or all-purpose flour (to thicken the filling)
1/2 teaspoon ground cinnamon (optional)
1 tablespoon lemon juice (optional, to enhance the fruit’s flavor)
1 tablespoon unsalted butter (for dotting on top of the filling)
Instructions:
1. Prepare the Pie Crust:
In a large mixing bowl, combine the flour, salt, and sugar.
Add the cold butter pieces and use a pastry cutter or your hands to cut the butter into the flour mixture until it resembles coarse crumbs.
Gradually add ice water, one tablespoon at a time, and mix until the dough just comes together. Be careful not to overmix.
Divide the dough into two equal portions, shape each into a disk, wrap them in plastic wrap, and refrigerate for at least 30 minutes.
2. Prepare the Fruit Filling:
Peel, core, and slice the fruit if necessary. Toss the fruit in a large bowl with the sugar, cornstarch or flour, cinnamon (if using), and lemon juice (if using). Allow it to sit for about 10 minutes to let the juices release.
3. Roll Out the Pie Crust:
Preheat your oven to 375°F (190°C).
Roll out one of the chilled dough disks on a lightly floured surface to fit a 9-inch (23 cm) pie pan. Carefully transfer the dough to the pie pan, pressing it gently into the bottom and up the sides.
4. Fill the Pie:
Pour the prepared fruit filling into the pie crust, spreading it evenly.
Dot the filling with small pieces of unsalted butter.
5. Add the Top Crust (Optional):
Roll out the second chilled dough disk and place it over the fruit filling.
Trim any excess dough and crimp the edges of the pie to seal it. You can also create a lattice crust if you prefer.
6. Vent the Pie:
If you’re using a solid top crust, make a few slits in the center to allow steam to escape.
7. Bake:
Place the pie on a baking sheet (to catch any potential spills) and bake in the preheated oven for about 45-55 minutes, or until the crust is golden brown, and the filling is bubbling.
8. Cool and Serve:
Allow the pie to cool on a wire rack for at least a few hours before slicing and serving. This helps the filling set.
9. Serve with whipped cream or ice cream if desired.
Enjoy your homemade fruit pie!
You can vary the fruit and spices to create a wide range of delicious pies, from apple and cherry to blueberry and peach.
Muffins
Muffins are a versatile and delicious baked treat that can be made in various flavors.
Here’s a basic recipe for classic homemade muffins:
Ingredients:
2 cups all-purpose flour
1/2 cup granulated sugar
2 teaspoons baking powder
1/2 teaspoon baking soda
1/2 teaspoon salt
1 cup buttermilk (or 1 cup milk with 1 tablespoon white vinegar or lemon juice, let sit for 5 minutes to curdle)
1/2 cup unsalted butter, melted and cooled
2 large eggs
1 teaspoon pure vanilla extract
Optional Add-Ins:
1 cup of your choice of mix-ins like chocolate chips, blueberries, diced fruit, nuts, or grated cheese (customize to your preference)
Instructions:
Preheat your oven to 375°F (190°C). Line a muffin tin with paper liners or grease the muffin cups.
In a large mixing bowl, whisk together the flour, sugar, baking powder, baking soda, and salt.
In another bowl, whisk together the buttermilk, melted butter, eggs, and vanilla extract until well combined.
Pour the wet ingredients into the dry ingredients and stir until just combined. Be careful not to overmix; a few lumps in the batter are okay.
If you’re adding any mix-ins, gently fold them into the batter.
Using a spoon or an ice cream scoop, fill each muffin cup about 2/3 full with the batter.
Bake in the preheated oven for 18-20 minutes, or until a toothpick or cake tester inserted into the center of a muffin comes out clean, with no wet batter (some crumbs are okay).
Remove the muffins from the oven and let them cool in the muffin tin for a few minutes before transferring them to a wire rack to cool completely.
Enjoy your homemade muffins!
Feel free to experiment with different flavors and add-ins to create your favorite muffin variations. Here are some ideas:
Blueberry Muffins: Add 1 cup of fresh or frozen blueberries to the batter.
Chocolate Chip Muffins: Mix in 1 cup of chocolate chips.
Banana Nut Muffins: Add mashed ripe bananas and chopped nuts.
Lemon Poppy Seed Muffins: Add lemon zest and poppy seeds.
Savory Cheese and Herb Muffins: Use grated cheese and chopped herbs like chives or parsley.
Apple Cinnamon Muffins: Fold in diced apples and cinnamon.
Homemade muffins are perfect for breakfast, snacks, or even dessert.
They’re a great way to start your day or enjoy a warm, freshly baked treat any time!
Homemade Bread
Baking homemade bread is a rewarding and satisfying culinary endeavor.
Here’s a basic recipe for a classic white bread:
Ingredients:
4 cups all-purpose flour
2 teaspoons active dry yeast
2 teaspoons salt
1 1/2 cups warm water (about 110°F or 43°C)
2 tablespoons granulated sugar
2 tablespoons vegetable oil or melted butter (optional)
Instructions:
1. Proof the Yeast:
In a small bowl, combine the warm water and sugar. Sprinkle the yeast over the water and let it sit for about 5-10 minutes until it becomes frothy. This indicates that the yeast is active and ready to use.
2. Mix the Dough:
In a large mixing bowl, combine the flour and salt.
Pour the activated yeast mixture (and oil or butter, if using) into the dry ingredients.
Stir everything together until a dough forms.
3. Knead the Dough:
Turn the dough out onto a lightly floured surface.
Knead the dough for about 10 minutes until it becomes smooth and elastic. You can also use a stand mixer with a dough hook attachment for this step.
4. First Rise:
Place the dough in a greased bowl and cover it with a clean kitchen towel or plastic wrap.
Allow the dough to rise in a warm, draft-free place for 1-2 hours, or until it has doubled in size.
5. Shape the Loaf:
Punch down the risen dough to release any air bubbles.
Shape the dough into a loaf by flattening it into a rectangle and then rolling it up tightly.
Place the shaped dough into a greased or parchment-lined 9×5-inch (23×13 cm) loaf pan, seam side down.
6. Second Rise:
Cover the pan with a kitchen towel or plastic wrap and let the dough rise for an additional 30 minutes to 1 hour, or until it has risen to the top of the pan.
7. Preheat and Bake:
Preheat your oven to 375°F (190°C) during the last 15-20 minutes of the second rise.
Bake the bread in the preheated oven for 25-30 minutes, or until it is golden brown on top and sounds hollow when tapped on the bottom.
8. Cool and Enjoy:
Remove the bread from the pan and let it cool on a wire rack for at least 30 minutes before slicing. Slicing too soon may result in a gummy texture.
9. Slice and Serve:
Once the bread has cooled, slice it and enjoy! It’s great for sandwiches, toast, or simply with butter or jam.
You can customize your homemade bread by adding ingredients like seeds, herbs, or even dried fruits to the dough for added flavor and texture.
Experiment and have fun with your bread-baking adventures!
Baking is More Fun When You Experiment
Once you have mastered the basics of baking, experimenting with new ingredients and techniques can take your baking skills to the next level and add a whole new dimension to your creations.
By swapping out non-essential ingredients such as toppings and fillings, you can completely transform a recipe and create a unique flavor profile that’s all your own.
Additionally, changing up the flavorings can give an old favorite a fresh and exciting twist.
Baking should always be a thrilling experience, and there’s no better way to keep things exciting than by trying out new and creative ideas.
Whether you’re feeling adventurous and want to create your own recipe from scratch or looking for inspiration to take your baking game up a notch, there’s no shortage of fun and exciting things to bake when you’re feeling bored.
So, don’t be afraid to experiment and try something new.
Who knows?
You may just discover a new favorite recipe or even invent a brand new one!
With endless possibilities and a little bit of creativity, the sky’s the limit when it comes to baking.


 Chocolate chip cookies are a classic favorite that’s easy to make and always a crowd-pleaser.


 Cheesecake is a decadent and creamy dessert loved by many.
 Homemade cinnamon rolls are a delightful treat that’s perfect for breakfast or as a sweet snack.
 Fruit pies are a classic and delicious dessert that can be made with a variety of fruits.
 Muffins are a versatile and delicious baked treat that can be made in various flavors.
 Baking homemade bread is a rewarding and satisfying culinary endeavor.


