

When baking bread in a Dutch oven, many home bakers notice a chewy texture that may not align with their expectations.
The main reasons for this chewiness often stem from factors such as the type of flour used, the hydration levels in the dough, and the fermentation process.
Understanding these elements can help bakers adjust their techniques to achieve the desired crust and crumb.
In addition to flour choice and hydration, the kneading method and the baking time play critical roles.
Overworking the dough can lead to excess gluten development, which contributes to a denser, chewier bread.
Bakers can experiment with these variables to find the perfect balance for their desired loaf.
For those frustrated with their results, knowing the science behind bread baking allows for better control over the final product.
By making slight adjustments, they can transform their Dutch oven bread into a lighter, airier creation.
Understanding Gluten Development in Bread

Gluten plays a crucial role in determining the texture and chewiness of bread.
Its formation and development are influenced by several factors that affect the final product.
Role of Gluten in Bread Texture
Gluten is a protein found in wheat flour, primarily composed of two proteins: glutenin and gliadin.
When water is added to flour, these proteins combine to form gluten.
- Elasticity: Gluten contributes to the dough’s elasticity, allowing it to stretch and trap gases produced during fermentation. This gives bread its structure.
- Chewiness: The strength of gluten also affects the chewiness of the bread. A well-developed gluten network results in a denser texture, while underdeveloped gluten leads to a lighter, more crumbly loaf.
- Moisture Retention: Gluten helps retain moisture, which can impact the softness of the bread over time.
Factors Affecting Gluten Formation
Several factors can influence gluten development in bread dough:
- Hydration: Sufficient water is necessary for gluten formation. Low hydration levels can result in weak gluten.
- Kneading: Proper kneading is essential for gluten stretching. Inadequate kneading keeps gluten formation incomplete.
- Type of Flour: Different flours contain varying protein levels. Bread flour, with higher protein content, produces stronger gluten than all-purpose or cake flour.
- Resting Period: Allowing dough to rest enables gluten to relax, which can improve texture.
Understanding these components will aid in achieving the desired bread chewy texture.
Key Ingredients Impacting Chewiness

The chewiness of Dutch oven bread is influenced by the choice of flour, the hydration ratio, and the addition of other ingredients.
Each factor plays a critical role in determining the final texture of the bread.
Effect of Flour Type on Chewiness
Different types of flour contain varying levels of protein, which significantly impacts the chewiness of bread.
Higher protein flours, such as bread flour, develop more gluten when kneaded.
This gluten structure contributes to a chewy texture.
Conversely, all-purpose flour has less protein and may yield a softer loaf.
Specialty flours like whole wheat or rye can add complexity and slight chewiness but may require adjustments in hydration and kneading.
Baker’s percentages can guide flour selection.
A higher percentage of protein generally leads to a chewier crumb.
Understanding the flour’s role is essential for achieving the desired bread texture.
Importance of Hydration Ratio
Hydration ratio refers to the amount of water used relative to the flour.
A higher hydration level results in a more open crumb structure, enhancing chewiness.
The water activates gluten proteins and allows for better gluten development during fermentation and baking.
Typically, a hydration ratio of 65% to 75% is common for chewy bread.
Lower hydration may lead to denser, crumblier bread.
In contrast, overly hydrated dough can be too sticky to handle and may compromise the final product.
Bakers often experiment with hydration levels to balance chewiness and manageability.
Properly adjusting hydration can be a game-changer for bread texture.
Influence of Additional Ingredients
Additional ingredients, such as fats and sugars, also impact chewiness.
Fats like butter or oil create a tender crumb by coating flour particles.
This can reduce chewiness if used excessively.
Sugars can contribute to a softer texture as they attract moisture.
However, a balance is necessary; too much sugar can lead to overly soft bread.
Adding eggs may enhance the chewiness but can also introduce richness.
In some recipes, ingredients like malt or dairy can improve chewiness through their interactions with proteins and yeast.
Understanding how these additions affect dough consistency is crucial for achieving the desired chewiness in Dutch oven bread.
Kneading Techniques and Bread Chewiness

The method used for kneading dough significantly influences the texture of bread, particularly its chewiness.
Understanding the differences between kneading by hand and using a mixer, as well as the importance of optimal kneading time, can enhance bread-making results.
Kneading by Hand vs. Mixer
Kneading dough by hand allows for greater control over the texture.
This method enables bakers to feel the dough’s elasticity and adjust their technique accordingly.
A gentle folding and stretching motion helps develop gluten, resulting in a chewy texture.
Using a stand mixer offers efficiency, especially for larger batches.
The dough hook mimics hand kneading but can lead to over-kneading if not monitored closely.
Over-kneaded dough might become too tight, producing a dense loaf instead of a chewy one.
It’s essential to find a balance when choosing between these techniques based on the desired bread outcome.
Optimal Kneading Time
Kneading time directly affects gluten development.
For most bread recipes, the ideal kneading time is approximately 8 to 10 minutes when done by hand.
In a mixer, this time is typically reduced to about 5 to 7 minutes.
The critical factor is observing the dough. It should become smooth and elastic without being sticky.
A windowpane test can determine kneading adequacy.
If the dough stretches thin without tearing, it has been kneaded sufficiently.
Kneading beyond this point can diminish the chewiness desired in some bread styles, leading to an undesired texture.
Proofing and Its Effect on Bread Texture

Proofing is crucial in determining the final texture of bread.
It allows the dough to rise and develop flavor, impacting its chewiness.
This process can vary in time and method, leading to distinct textures in the finished product.
The Relationship Between Proofing Times and Texture
Longer proofing times generally lead to a more developed gluten structure, impacting the chewiness of the bread.
As the dough ferments, it becomes more elastic, creating a chewy texture.
- Short Proofing (1-2 hours): Often results in denser bread, which may have less chewiness.
- Medium Proofing (2-4 hours): Allows for moderate gluten development, yielding a pleasant texture.
- Long Proofing (4+ hours): Enhances flavor and results in a light, airy crumb with significant chewiness.
Choosing the right proofing time is essential to achieving the desired outcome.
Signs of Proper Proofing
Observing specific indicators can help confirm that bread has been proofed correctly.
- Volume Increase: The dough should roughly double in size.
- Poke Test: A gentle poke should leave an impression that slowly springs back.
- Surface Texture: The surface should appear smooth and slightly domed.
These signs ensure the dough is ready for baking, ultimately influencing the bread’s final texture, including chewiness.
Proper proofing enhances both flavor and structure.
The Baking Process

The baking process significantly influences the texture of Dutch oven bread.
Key factors include oven temperature, baking time, and the introduction of steam, all of which contribute to a chewy crust and moist interior.
Oven Temperature and Baking Time
The temperature at which bread is baked plays a crucial role in its final texture.
Typically, Dutch oven bread is baked at temperatures ranging from 450°F to 475°F (232°C to 246°C).
At these high temperatures, the heat rapidly activates the yeast, promoting a good rise.
Baking time also impacts chewiness.
A typical duration is 30 to 45 minutes, during which the bread develops its outer crust.
If baked for too long, the crust may become excessively tough.
The ideal balance of temperature and time ensures a chewy yet tender result, giving the bread its characteristic texture.
Steam in Oven and Crust Formation
Steam is vital in creating a desirable crust on Dutch oven bread.
By trapping moisture inside the pot, the steam prevents the formation of a crust during the initial baking phase.
This moisture allows for a more extended rise, resulting in a lighter crumb.
After about 20 minutes, the lid can be removed to let the crust crisp up.
This combination of steam and high temperatures leads to a beautifully golden, chewy crust.
The right timing and method for introducing steam are essential to achieving this perfect result.
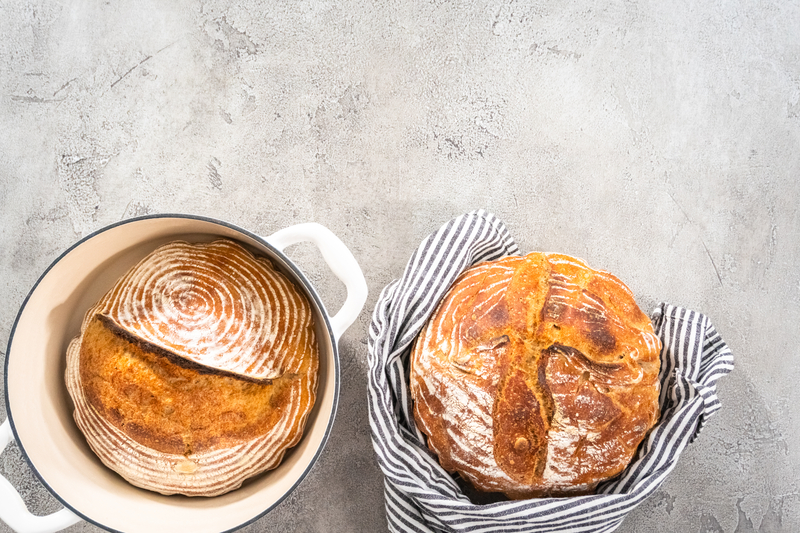
Slicing and Serving Recommendations

Proper slicing and serving techniques enhance the experience of Dutch oven bread.
These practices ensure optimal texture and flavor, making each bite enjoyable.
Best Practices for Slicing Dutch Oven Bread
To achieve clean slices, it’s important to use a sharp bread knife.
A serrated edge works best, as it can easily cut through the crust without squishing the soft interior.
- Let the bread cool completely before slicing. This allows the crumb to set, preventing gummy slices.
- Cut the bread at an angle for wider pieces, which are ideal for sandwiches or toasting.
- For a rustic presentation, leave some pieces irregular in shape; this adds to the homemade charm.
Technique is crucial. Applying gentle pressure while slicing avoids compressing the loaf.
A straight, deliberate motion results in even pieces.
Serving Suggestions for Optimal Texture
Serving Dutch oven bread immediately after slicing enhances its crust and crumb.
Freshly cut pieces can pair beautifully with various accompaniments.
- Spread Options: Warm butter or flavored oils elevate the bread’s flavor.
- Toppings: Pairing with cheeses, meats, or spreads can create a delightful appetizer tray.
- Pairing Recommendations: Complement the bread with soups, stews, or salads for a well-rounded meal.
To maintain freshness, store any leftover bread in a paper bag at room temperature.
Avoid plastic, as it traps moisture and softens the crust.
Reheating slices in an oven briefly can restore their original texture.
Troubleshooting Common Issues

When baking bread in a Dutch oven, several factors can contribute to a chewy texture.
Adjusting hydration levels and oven temperature can improve results while knowing how to prevent a tough crust is equally important.
Adjusting for Overly Chewy Crumb
A chewy crumb often arises from excess gluten development or high hydration.
To adjust, consider reducing the water content.
A hydration level between 65-75% is generally ideal.
If the dough was mixed too long, it could create more gluten than desired.
In such cases, try using less vigorous mixing techniques or shorter kneading times.
Additionally, the choice of flour impacts chewiness.
Opt for bread flour, which has a higher protein content, and monitor the amount used.
Preventing a Tough Crust
A tough crust can result from using too high a baking temperature or overbaking.
To achieve a softer crust, reduce the oven temperature to around 425°F (218°C).
Timing is key as well; remove the bread from the oven once it reaches an internal temperature of around 200°F (93°C).
Using a lid can create steam, leading to a more tender crust.
Consider baking with the lid on for the first half of the baking time and then removing it to allow the crust to brown without hardening excessively.
Final Thoughts on Perfecting Dutch Oven Bread Texture

Achieving the ideal texture in Dutch oven bread requires attention to detail and specific techniques.
Several factors influence the chewiness of the finished loaf.
Hydration Level:
The amount of water in the dough plays a crucial role. More hydration typically results in a chewier texture, while less can lead to a denser bread.
Kneading Technique:
Kneading helps develop gluten, which contributes to chewiness. Properly kneading the dough for about 8-10 minutes is recommended.
Fermentation Time:
Allowing the dough to ferment long enough helps develop flavor and texture. A longer fermentation can enhance the chewiness.
Baking Temperature:
Baking at a higher temperature can create a better crust and chewy interior. Using a preheated Dutch oven is ideal for achieving this.
For those looking to experiment, consider adjusting the following:
- Flour Type: Different flours yield different textures. Bread flour is preferable for chewiness.
- Add Ins: Ingredients like whole grains can affect chewiness; use sparingly.
Patience is integral. Perfecting Dutch oven bread texture may take several attempts.
Adjustments may be necessary, but attention to these factors will yield satisfying results.
