Why Make Bread in a Dutch Oven? Steam, Crust, Texture & More
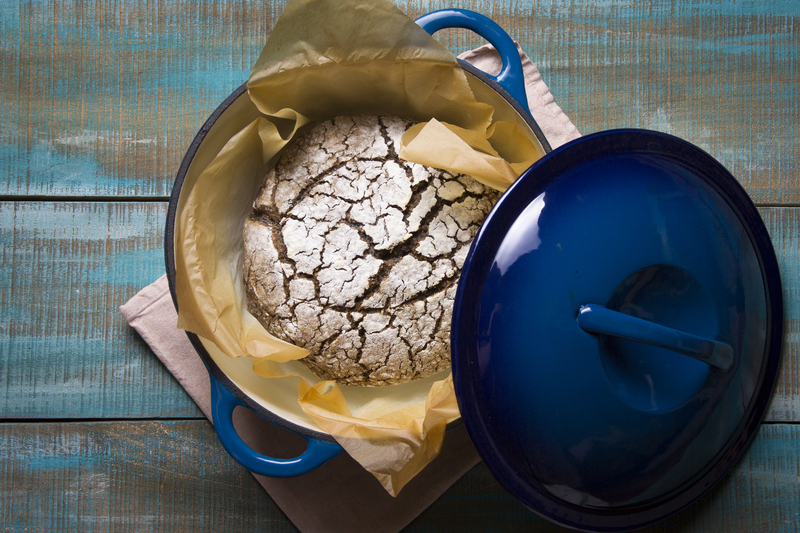
Have you ever wondered why so many home bakers swear by a heavy pot with a lid?
A Dutch oven traps steam around your dough as it bakes, helping create a crisp, golden crust and a soft, airy interior.This simple tool can make your kitchen baking more like a bakery’s.
If you are new to bread baking, this method takes away much of the guesswork. It makes baking no-knead bread simple and predictable, even for beginners. The pot helps by holding in heat and moisture at the right moments.
Homemade bread often falls short of bakery bread because home ovens do not retain steam well. A Dutch oven simulates a steam-injected oven, helping address that problem. Read on to learn why this method works and how to use it in your kitchen.
How Trapped Steam Helps Bread Rise
In artisan bread baking, controlling steam is essential for getting the best results. When you bake bread in a Dutch oven, the lid traps moisture released by the dough. This keeps the surface soft enough to expand, helping the loaf rise.
Why Moisture Keeps the Dough Flexible
Bread dough contains water. When it meets high heat, some of that water turns into steam.
Inside a covered Dutch oven, the steam stays close to your loaf instead of dispersing into the oven.
This matters because dry heat causes the outer layer of dough to firm up quickly. Once that happens, the loaf cannot expand as easily.
Steam slows this process. It keeps the surface soft and stretchy for longer, giving the dough more time to rise before the crust sets.
How Heat and Steam Improve Oven Spring
Oven spring is the rapid rise your loaf gets in the first few minutes of baking. Gases trapped inside the dough expand quickly when exposed to high heat.
For this to work well, the dough’s surface needs to stay flexible. A preheated Dutch oven traps steam to help form a glossy, crackled crust. A cold pot may not trap steam as effectively and can produce a denser, paler loaf.
Here is how the process works:
First stage: Steam builds up inside the covered pot, keeping the dough soft as it rises.
Second stage: You remove the lid, allowing dry heat to brown and crisp the crust.
This two-part method is a key reason baking bread in a Dutch oven works so well for home bakers who want strong oven spring and a crisp crust.
How the Pot Creates a Crisp, Golden Crust
A Dutch oven traps steam around your dough during the first part of baking, then lets the steam escape so the crust can brown. This two-step process gives Dutch oven bread its sheen and deep color.
How Steam Gives the Surface Its Sheen
When you put your dough into a hot, covered pot, moisture from the dough turns into steam and gets trapped inside. The steam keeps the surface of your loaf soft and stretchy for longer.
That extra flexibility matters. It lets your dough expand before the crust hardens, which is why covered pots help produce a burst of steam similar to a professional oven.
The steam also interacts with starches on the dough’s surface. These starches swell and become glossy, giving crusty bread its sheen.
Without steam, the surface dries out too quickly. Your loaf may turn out paler, less crisp, and duller in appearance.
Why Removing the Lid Encourages Browning
Steam is useful early in baking, but it needs to escape toward the end. Once your loaf has expanded, remove the lid to let the trapped moisture out.
This step helps the crust brown. Without it, your bread may stay soft and light instead of turning golden brown.
Removing the lid lets dry heat reach the dough’s surface. The heat promotes browning through caramelization and the Maillard reaction, creating a deeper color and richer flavor.
Many recipes call for uncovering the pot during the last 5 to 10 minutes of baking, based on common Dutch oven baking practices. This final stretch helps give your loaf a firm, crackling crust.
The Basic Dutch Oven Baking Method
Baking homemade bread in a Dutch oven follows a simple pattern: heat the pot, add your dough, bake covered, then uncover to finish. This practical approach to bread baking helps produce a crisp crust and a fully baked loaf.
Preheat the Pot and Transfer the Dough Safely
Put your empty Dutch oven and lid into a cold oven. Set the temperature to 450°F and let the pot heat for about 30 minutes after the oven reaches that temperature.
This step is important. A preheated Dutch oven retains heat, giving your dough an immediate burst of warmth when you add it.
When the pot is ready, remove it carefully using thick oven mitts. Set it on a heat-safe surface, such as a cooling rack or wooden board. Avoid placing it on a cold or wet surface, as a sudden temperature change can damage the pot.
Lift your risen bread dough by the parchment paper underneath it, and lower it into the hot pot. Score the top with a sharp knife before covering.
Bake Covered, Then Finish Uncovered
Put the lid on and place the pot back in the oven. Bake covered for 25 to 30 minutes.
During this time, steam builds up inside the pot. It keeps the crust soft long enough for the loaf to expand before the crust sets.
After baking covered, remove the lid. Bake the bread uncovered for another 5 to 10 minutes.
This second stage lets the crust turn golden brown and crisp. Without it, your loaf may stay pale and soft on the outside. Baking bread in a Dutch oven this way helps produce both a strong rise and a deeply colored crust.
Check Doneness and Cool Before Slicing
Check your bread when the crust looks deep golden brown. Tap the bottom of the loaf; it should sound hollow.
You can also use a thermometer for a more precise check:
Bread Type
Target Internal Temperature
Lean white or wheat bread
190–200°F
Enriched or sweet bread
190°F
Once done, take the loaf out of the pot right away. Let your homemade bread cool completely on a wire rack before slicing.
Cutting too soon can release steam before the crumb has set, leaving the inside gummy.
Choosing a Pot That Fits Your Loaf
The pot’s size and material affect how your bread bakes. The wrong choice can leave you with a squished loaf, a burned bottom, or poor oven spring.
Size, Shape, and Lid Fit
Your pot needs room for the dough to expand without touching the lid or sides. A standard 5-quart Dutch oven works well for a typical 1.5- to 2-pound loaf. Using a 5 to 6-quart round Dutch oven gives the dough space to rise while trapping steam for a crisp crust.
If your pot is too large, the steam may disperse more widely. For most home kitchens, a 5-quart Dutch oven provides an ideal balance of volume and heat concentration.
Lid fit matters as much as size. A close-fitting lid helps keep steam inside during the first part of baking, supporting good crust formation.
Some bakers prefer a 6-quart pot with a bread lame and silicone sling, since these tools make scoring and transferring dough easier and safer.
Heat Ratings and Material Considerations
Your pot must handle high heat without cracking or warping. Most bread recipes call for oven temperatures around 450°F, so check your pot’s maximum heat rating before you start.
Cast iron is a favorite choice for bread baking because it retains heat well and distributes it evenly. Enameled cast iron offers similar heat retention with a smooth surface that’s easier to clean.
Some lighter materials, such as enameled steel, heat up faster but may not retain heat as well. This can affect how evenly your crust browns.
Whatever pot you use, make sure it’s rated for empty preheating if you plan to heat it before adding your dough. Not every pot is designed to handle that step safely.
Doughs That Benefit Most From This Method
High-hydration doughs and low-yeast recipes benefit especially from a Dutch oven. These doughs can benefit from the trapped steam and steady heat, which help them rise and develop a good crust.
No-Knead and Yeasted Loaves
No-knead bread is one of the most common types of dough baked in a Dutch oven. This dough uses a small amount of active dry yeast and a long rest time instead of kneading. Because the dough is wet and loose, it benefits from the pot’s sides, which help it hold its shape as it bakes.
Because no-knead bread relies on high hydration, it releases abundant steam inside the covered vessel. This gives the wet dough the support it needs to develop an airy interior and crackly exterior.
A basic bread recipe made with all-purpose flour works well with this method. All-purpose flour has enough protein to provide structure while helping create a tender crumb. For a chewier texture, swap in bread flour, which has more protein and helps the dough hold gas bubbles during the rise.
Sourdough and Other Rustic Loaves
Sourdough dough relies on a live sourdough starter instead of commercial yeast, so it ferments more slowly and needs support to hold its shape. A Dutch oven provides steady heat and traps steam, helping the dough rise before the crust hardens.
Other rustic loaves, such as batards and country-style boules, also work well with this method. These doughs often have a slack, sticky texture that spreads on a flat pan. The pot’s sides contain the dough as it bakes, helping it rise upward instead of spreading out for a taller, more even loaf.
Common Problems and Practical Fixes
Even with reliable equipment, bread baking comes with a slight learning curve. Most Dutch oven bread problems come down to proofing time, oven temperature, or dough handling.
Here is how to identify and fix common issues.
A Flat Loaf or Limited Oven Spring
A flat loaf often means the dough overproofed before it went into the oven. If a poke leaves a dent that doesn’t spring back, the dough may have proofed for too long.
Weak gluten development is another common cause. If you don’t fold or shape the dough enough, it may not hold its structure in the oven.
A Dutch oven that isn’t fully heated can also limit oven spring. Preheat the Dutch oven with the lid on for 45–60 minutes before loading the dough. Cast iron takes time to heat through, even after the oven reaches its set temperature.
Try these fixes:
Shorten the final proof by 15–20 minutes
Cold-retard the dough in the fridge for 8–16 hours and bake it straight from cold
Confirm your oven and Dutch oven are both fully preheated before loading
A Burnt Bottom or Pale Crust
A burnt bottom often means your Dutch oven is too close to the bottom heating element, or your oven runs hotter than its display indicates. Move the rack to the middle position and consider placing a baking stone or empty sheet pan below the pot to buffer direct heat.
A pale crust usually means the loaf needs more heat or time. If you remove the lid too soon, the loaf may not brown properly. Keep the lid on for the first 20 minutes to trap steam and support early bread crust development.
If the crust still looks pale after you remove the lid, bake the loaf longer. A loaf that looks “almost done” at 30 minutes may need another 10–15 minutes uncovered to reach a deep golden-brown color.
Sticking Dough and Safe Handling
Dough can stick to the pot if there isn’t enough flour, cornmeal, or parchment paper on the bottom. Enameled Dutch ovens are less likely to stick than bare cast iron, but neither is stick-proof.
Lining the pot with parchment paper helps prevent sticking and makes the dough easier to handle. Cut a square about 16 inches by 16 inches, place your shaped dough on top, and use the edges as handles to lower it into the hot pot.
This method also helps protect your hands and arms from burns by keeping you from reaching into a pot heated to 450°F–500°F. Leave a few inches of extra parchment on each side for a secure grip, and don’t trim it flush with the dough before baking.
A Good Dutch Oven for Baking Bread
The Lodge Essential Enamel Cast Iron Dutch Oven is a practical choice for baking homemade bread. Its enameled cast-iron construction retains heat well, while the heavy lid helps trap steam inside the pot during the early stages of baking.
This creates the humid environment that helps bread develop a crisp crust and good oven spring. Lodge describes the 6-quart Dutch oven as suitable for homemade bread and lists it as oven-safe up to 500°F.
The cast iron Dutch oven also gives a typical round loaf plenty of room to expand without making the pot unnecessarily large. The enamel coating means the Dutch oven does not require seasoning like traditional bare cast iron, and it can also be used for soups, stews, braises, and other everyday cooking.
Why Make Bread in a Dutch Oven? Expert Baking Explanation
A Dutch oven is useful for baking bread because its heavy, covered design traps the moisture released by the dough. This creates a humid baking environment during the early part of the bake, helping the loaf expand before the crust becomes firm.
The result is often a taller loaf, a more open crumb, and a crisp, golden crust. King Arthur Baking explains how trapped steam improves bread baking.
How Does a Dutch Oven Improve Bread?
When bread dough first enters a hot oven, it experiences a rapid increase in volume known as oven spring. Steam keeps the surface of the dough moist and flexible, allowing it to stretch instead of setting too quickly.
This gives the dough more time to expand and can help scored areas open attractively. King Arthur Baking’s bread-steaming guide explains that steam is especially important during this early oven-spring stage.
A Dutch oven creates steam naturally from the moisture in the dough. When the lid is placed on the preheated pot, that moisture remains close to the loaf instead of escaping into the larger oven. According to King Arthur Baking’s Dutch-oven bread guidance, preheating the pot helps produce an immediate burst of steam when the dough is added.
The covered pot also helps produce a thin, crisp, and well-browned crust. After the first part of baking, the lid is removed so excess moisture can escape and the crust can dry and brown. King Arthur Baking recommends removing the cover after approximately 20 minutes for many loaves, although the exact timing depends on the recipe and the size of the loaf.
Does a Dutch Oven Make Better Bread?
A Dutch oven does not replace proper fermentation, shaping, or accurate baking, but it makes steam management much easier. Without a covered vessel, home bakers may need a baking stone, a metal pan, and boiling water to create steam. A Dutch oven combines the baking surface and steam chamber in one piece of equipment.
Serious Eats’ bread-baking explanation notes that steam helps bread rise and develop a thick, crunchy crust. This is why Dutch ovens are especially popular for sourdough, artisan loaves, no-knead bread, and other crusty round breads.
How to Use a Dutch Oven for Bread
Preheat your Dutch oven according to the recipe, then carefully place the shaped and scored dough inside, using parchment paper if needed. Bake with the lid on for the first part of the cooking time so the pot can trap steam and help the bread rise.
Then remove the lid and continue baking until the crust is golden and crisp. For example, King Arthur Baking recommends baking one sourdough loaf covered for 30 minutes, followed by approximately 20 minutes uncovered.
Allow the bread to cool on a wire rack before slicing, and always use oven gloves when handling the hot Dutch oven.
FAQ: Why Make Bread in a Dutch Oven?
A Dutch oven helps create the hot, humid environment that bread needs during the early stages of baking. The covered pot traps steam released from the dough, which helps keep the crust flexible while the loaf expands and can contribute to a crisp, well-developed crust.
Does a Dutch Oven Make Bread Rise More?
It can help bread achieve better oven spring because the trapped steam keeps the dough’s surface from setting too quickly. This gives the loaf more time to expand before the crust becomes firm.
Does a Dutch Oven Make Bread Crustier?
Yes. Steam helps delay crust formation during the first part of baking, while removing the lid later allows the surface to dry and brown. This combination can produce a crisp, deeply browned crust.
Do You Need to Preheat a Dutch Oven for Bread?
Many bread recipes recommend preheating the Dutch oven before adding the dough. A thoroughly heated pot provides strong initial heat and helps create the conditions needed for good oven spring.
Can You Bake Any Bread in a Dutch Oven?
A Dutch oven works particularly well for artisan-style crusty breads and high-hydration doughs. It can also be used for other bread recipes, although sandwich loaves and softer breads are often baked in conventional loaf pans.
Should You Bake Bread With the Dutch Oven Lid On?
Yes, usually for the first part of baking. The lid traps steam around the dough; removing it later allows moisture to escape and the crust to brown and become crisp.
What Size Dutch Oven Is Best for Bread?
A 5- to 6-quart Dutch oven is suitable for many standard bread loaves. The pot should be large enough to allow the dough to expand without the sides or lid restricting it.

 Have you ever wondered why so many home bakers swear by a heavy pot with a lid?
 In artisan bread baking, controlling steam is essential for getting the best results. When you bake bread in a Dutch oven, the lid traps moisture released by the dough. This keeps the surface soft enough to expand, helping the loaf rise.
 A Dutch oven traps steam around your dough during the first part of baking, then lets the steam escape so the crust can brown. This two-step process gives Dutch oven bread its sheen and deep color.
 Baking homemade bread in a Dutch oven follows a simple pattern: heat the pot, add your dough, bake covered, then uncover to finish. This practical approach to bread baking helps produce a crisp crust and a fully baked loaf.
 The pot’s size and material affect how your bread bakes. The wrong choice can leave you with a squished loaf, a burned bottom, or poor oven spring.
 High-hydration doughs and low-yeast recipes benefit especially from a Dutch oven. These doughs can benefit from the trapped steam and steady heat, which help them rise and develop a good crust.
 Even with reliable equipment, bread baking comes with a slight learning curve. Most Dutch oven bread problems come down to proofing time, oven temperature, or dough handling.
 The Lodge Essential Enamel Cast Iron Dutch Oven is a practical choice for baking homemade bread. Its enameled cast-iron construction retains heat well, while the heavy lid helps trap steam inside the pot during the early stages of baking.
 A Dutch oven is useful for baking bread because its heavy, covered design traps the moisture released by the dough. This creates a humid baking environment during the early part of the bake, helping the loaf expand before the crust becomes firm.
 A Dutch oven helps create the hot, humid environment that bread needs during the early stages of baking. The covered pot traps steam released from the dough, which helps keep the crust flexible while the loaf expands and can contribute to a crisp, well-developed crust.


