How to Store Homemade Sourdough Bread – Tips for Keeping Your Bread Fresh and Flavorful
You just baked a fresh loaf of sourdough, and now you want to keep it that way for as long as possible.
The best way to store sourdough bread is at room temperature in a paper or linen bag for a few days, then in the freezer if you need to keep it longer.
The right method depends on how soon you plan to eat it.
A homemade sourdough loaf is different from store-bought bread. It has no preservatives, so it can dry out or go stale faster if you store it the wrong way. Knowing how to store sourdough bread properly helps you keep that crisp crust and soft crumb for as long as possible.
This guide walks you through the best ways to keep your sourdough loaf fresh, whether you plan to eat it this week or save it for later. You’ll learn how to store it at room temperature, when to freeze it, and how to bring stale bread back to life.
The Best Storage Method by Timeline
How you store sourdough bread depends on when you plan to eat it. A loaf you’ll finish in a day needs less protection than one you want to keep fresh for a week, and freezing works best when you know you won’t finish it soon.
For Bread You Will Eat Within One to Two Days
Room temperature storage works best for bread you’ll eat quickly. Let the loaf cool completely before you cover it. This can take one to two hours, depending on the size.
Place the bread on a cutting board, cut-side down if you’ve already sliced into it. This keeps the soft interior from drying out while letting the crust stay exposed to air.
You can also loosely cover the loaf with a clean kitchen towel or place it under a large bowl. Avoid airtight bags at this stage. They trap moisture and make a crisp crust turn soft and chewy within hours.
For Loaves Kept Three to Five Days
If you want to keep sourdough bread fresh for three to five days, switch to a cloth bread bag or a paper bag. A linen or cotton bag allows some airflow while still holding in enough moisture to slow staling.
Store the bag at room temperature, away from direct sunlight or heat.
Sourdough bread lasts longer than regular bread because of its natural acidity, which slows mold growth. Still, check the crust and interior each day. The crust will soften over time, but this is normal and doesn’t mean the bread has gone bad.
Skip the refrigerator. Cold temperatures speed up staling and dry out the crumb faster than room temperature storage.
When to Freeze Bread Instead
Freeze sourdough bread if you won’t finish it within five days. Freezing pauses the staling process and keeps the bread’s texture close to fresh.
Slice the loaf before freezing so you can pull out only what you need. Place parchment paper between slices to keep them from sticking together, then seal everything in an airtight freezer bag.
Frozen sourdough bread stays good for up to three months.
To thaw, toast slices directly from the freezer, or let a larger piece sit at room temperature for a few hours. For a whole loaf, you can also reheat it in a 350°F oven for about 15 minutes to restore some of the crust’s crispness.
Prepare the Loaf Before Storage
Fresh sourdough bread needs a few steps before you store it. If you skip these steps, your bread crust and crumb can get soggy or dry out too fast.
Cool Completely on a Wire Rack
Never store sourdough bread while it’s still warm. Warm bread releases steam, and if that steam gets trapped, it makes the crust soft and can lead to mold.
Place your loaf on a wire rack right after it comes out of the oven. A wire rack allows air circulation on all sides of the bread, not just the top.
This helps the crust stay crisp while the inside finishes cooling down. Most loaves need 1 to 2 hours to cool fully, depending on size.
Bigger loaves take longer to cool than smaller ones. Cutting into hot bread also makes the crumb gummy, so waiting is worth it.
Slice Only What You Need
Slicing sourdough bread only when you need it helps the loaf stay fresh longer. Once you cut into a loaf, air can reach the crumb and dry it out faster.
If you’re eating the bread over several days, cut off only what you plan to eat right away. Leave the rest of the loaf whole.
Sliced loaf: Dries out faster, but is more convenient.
Pre-sliced and frozen: Best for grabbing single portions later.
If you know you won’t finish the loaf in a day or two, slice the extra portions and freeze them instead of leaving them out.
Protect the Exposed Crumb
Once you’ve sliced into your loaf, the cut side needs protection. The exposed bread crumb dries out much faster than the crust.
Press the cut side of the loaf against a wooden cutting board or plate. This blocks air from reaching the soft interior.
You can also wrap the cut side with a tea towel while leaving the rest of the crust uncovered. This keeps the crumb from drying out while still letting the crust breathe.
Avoid wrapping the whole loaf in plastic at this stage. Plastic traps moisture against the crust and makes it lose its crispy texture within hours.
Counter Storage Options and Trade-Offs
Your sourdough loaf can sit on the counter for two to five days, but the method you choose changes how the crust and crumb hold up. Some options protect the crust, others protect moisture, and a few try to do both at once.
Cut-Side Down on a Board With a Tea Towel
Once you slice into your loaf, set it cut-side down on a wooden cutting board. The exposed crumb presses against the wood, which slows moisture loss. The crust stays open to the air, so it keeps its crunch.
You can drape a tea towel loosely over the top for a bit of extra protection from dust. This method works best for short-term storage, around one to two days. After that, the cut edges start to dry out no matter what you do, so it’s time to switch to a bag or container.
Paper and Brown Paper Bags
A paper bag or brown paper bag keeps some air moving around your loaf, which helps the crust stay firm. This is the bag you often see bakery loaves sold in.
The trade-off is that paper doesn’t hold in moisture well. Your crust will stay crisp, but the interior crumb dries out faster than it would in a sealed container. Paper bags work best for whole, unsliced loaves you plan to eat within a day or two. If you’re storing a loaf longer than that, paper alone won’t keep it fresh.
Linen and Cloth Bread Bags
A linen bread bag or plain cloth bag offers a middle ground between paper and plastic. The woven fabric lets some air pass through, so the crust doesn’t turn soft and rubbery. At the same time, it holds in more moisture than paper does.
This makes a linen bag or cloth bag a solid choice if you want your bread to last three to four days without losing its texture completely. Reusable options are also a lower-waste alternative to buying paper bags every week. Just shake out crumbs between uses and let the bag air out so it doesn’t develop odors.
Bread Boxes and Dutch Ovens
A bread box creates a semi-sealed space with limited air circulation. This slows both crust softening and crumb drying, making it a balanced option for loaves you want to keep for three to five days.
A dutch oven works in a similar way if you don’t own a bread box. Set your loaf inside with the lid on, and it acts like a small chamber that holds in some humidity while still allowing minor airflow. Neither option is airtight, so you won’t get the same moisture lock as a sealed plastic bag or airtight container. But that’s actually the point: too much sealed-in moisture softens the crust faster than either method allows.
When a Loose Plastic Bag Makes Sense
A loose plastic bag, ziploc bag, or even plastic wrap makes sense when you’ve already accepted that your crust will soften. This trade-off is worth it if you’re storing a soft sourdough loaf, sandwich bread, or rolls that don’t rely on a crackly crust for their appeal.
Sealing bread in an airtight container or airtight bag keeps the crumb moist for up to a week at room temperature. Beeswax wraps offer a reusable alternative with similar sealing power. For classic crusty boules, though, save this method only for bread you plan to toast before eating, since the crust won’t recover its original crunch once it’s fully sealed.
Why the Refrigerator Is Usually the Wrong Choice
Cold temperatures speed up the process that makes bread go stale, and they also dry out the crust and crumb. This is why room temperature storage almost always works better than refrigeration for your loaf.
How Starch Retrogradation Causes Bread Staling
Bread staling happens because of starch retrogradation. This is when starch molecules in the bread lose moisture and change shape as they cool.
Your fridge runs between 35°F and 40°F. This range speeds up starch retrogradation, so your bread goes stale much faster than it would on the counter.
The crumb becomes dry and firm. The texture that made your fresh loaf soft and chewy breaks down within a day or two in the fridge.
Room temperature slows this process down. Your bread stays soft longer when you keep it out of the cold.
Managing Heat, Humidity, and Mold Risk
Heat and humidity create different problems than cold storage does. Warm, damp air can lead to mold growth on your loaf within a few days.
You don’t need the fridge to solve this problem, though. A few simple habits can help:
Cool the bread fully before you store it, since trapped steam creates moisture that feeds mold.
Avoid airtight containers and plastic bags at room temperature, since these trap moisture against the crust.
Use a breathable option like a paper bag, bread box, or cloth wrap instead.
Check humid climates more often, since mold grows faster when the air is thick with moisture.
These steps help you strike a balance. You get a fresh crumb without inviting mold.
Exceptions and Safer Alternatives
There are a few cases where the fridge still makes sense. If you live somewhere very hot and humid, short-term refrigeration can slow mold growth for a day or two.
Sliced bread you plan to toast soon also holds up better in the fridge than a whole loaf does. The smaller pieces don’t lose as much texture, and toasting will restore some crispness anyway.
For most situations, though, better options exist. Try one of these instead:
Storage Method
Best For
Keeps Bread Fresh For
Paper bag at room temperature
Crisp crust, short-term storage
2-3 days
Bread box or cloth wrap
Balanced crust and crumb texture
2-3 days
Freezer (sliced, airtight bag)
Long-term storage
Up to 3 months
Freezing works far better than refrigeration when you need to store bread longer than a few days. It pauses starch retrogradation almost completely, so your bread tastes close to fresh once you thaw and reheat it.
How to Freeze and Thaw Sourdough Successfully
Freezing sourdough bread is one of the best ways to keep it fresh for weeks or months without losing flavor or texture. The key is choosing the right method for how you’ll use it, wrapping it properly, and thawing it the right way so it tastes freshly baked.
Freeze Whole Loaves for Later Meals
Freezing a whole sourdough boule works well if you plan to eat the entire loaf within a few days of thawing.
Let the loaf cool completely before freezing it. This usually takes about six hours after baking.
If you skip this step, trapped steam will create ice crystals inside the bag. This leads to a soggy crust once you thaw it.
Once cooled, place the whole loaf in a freezer bag and press out as much air as you can. A whole loaf frozen this way will keep its texture and flavor for up to two months.
You can freeze it longer, but the crust and crumb will slowly start to lose quality after that point.
Freeze Individual Slices for Convenience
Slicing your loaf before freezing makes sense if you only eat a piece or two at a time.
This method also cuts down on waste, since you only take out what you need. Start by slicing the cooled loaf into pieces.
Lay the slices flat on a baking tray lined with parchment paper. Freeze them for 15 to 30 minutes before bagging them.
This step, called snap freezing, stops the slices from sticking together in the bag. Once frozen solid, transfer the slices into a ziploc bag or airtight container.
Frozen slices are best toasted straight from the freezer. You don’t need to thaw them first.
Wrap Bread to Prevent Freezer Burn
The way you wrap sourdough before freezing has a big impact on how it turns out later.
Freezer burn happens when air reaches the bread’s surface and dries it out. This is one of the main reasons frozen bread tastes stale or feels tough.
Here’s a quick comparison of common wrapping options:
Method
Protection Level
Notes
Aluminum foil
High
Blocks air well, good for whole loaves
Freezer bag
High
Easy to seal, removes air with pressure
Plastic wrap
Medium
Works best combined with foil or a bag
Parchment paper alone
Low
Doesn’t seal tightly enough on its own
For the best results, wrap the loaf in aluminum foil first, then place it inside a freezer bag. This double layer gives strong protection against freezer burn and moisture loss.
Thaw and Reheat for the Best Texture
How you thaw sourdough matters just as much as how you freeze it.
Start by letting the loaf sit at room temperature until it’s fully thawed. This can take a few hours depending on the size of the loaf.
Once thawed, unwrap the bread and lightly mist it with water. Don’t worry about using too much; the crust will not turn soggy.
Place the damp loaf in a hot oven for about five minutes. This step rehydrates the crust and brings back that fresh-baked texture.
For slices, skip the thawing step entirely. Just place them straight into the toaster from the freezer for quick, crisp results.
Refresh Stale Sourdough and Know When to Discard It
Bread staling happens when starch molecules dry out and harden, but adding moisture and heat can bring your loaf back. Knowing how to refresh sourdough bread saves you money and reduces waste, but you also need to spot the signs that a loaf is truly done for.
How to Refresh a Whole Loaf in the Oven
The oven is your best tool for reviving a full sourdough loaf. Start by preheating it to 450°F.
While it heats up, run your loaf under water to dampen the outside. You want it evenly wet, not soaked through.
Place the damp loaf right on the oven rack for 8 to 10 minutes. Thicker loaves may need a few extra minutes to steam all the way through.
Check it by pressing gently with oven mitts. You’re looking for a crisp crust with a soft center underneath.
Let the loaf rest for a few minutes before you slice it. This keeps the crumb from getting squished while it’s still hot.
How to Refresh Slices for Toast and Sandwiches
For single slices, skip the oven and use a faster method. Wet two or three paper towels, then wring out the extra water so they’re damp but not dripping.
Wrap the towels around your bread slice and place it on a microwave-safe plate. Microwave for 10 to 30 seconds, depending on the thickness.
Start with less time first. If you microwave it too long, you’ll dry the bread out even more.
You can also use aluminum foil in a toaster oven instead. Wrap the slice loosely in foil and heat it at 350°F for about 5 minutes to get a crispy crust without drying out the inside.
Recognizing Mold and Other Spoilage Signs
Stale bread is safe to eat and easy to fix. Moldy bread is not, and no amount of heat or moisture will make it safe again.
Check your sourdough loaf for these warning signs before you try to refresh it:
Fuzzy spots: White, green, blue, or black patches on the crust or inside the loaf
Odd smell: A sour, musty, or “off” odor that’s different from sourdough’s normal tang
Slimy texture: Any sticky or wet spots on the crust
Discoloration: Dark spots that weren’t there when you baked or bought the loaf
If you spot any of these signs, throw the whole loaf away. Mold spreads roots you can’t see, so cutting off the moldy part doesn’t make the rest of the bread safe.
What Determines Sourdough Shelf Life
Sourdough lasts longer than regular bread because of how it’s made, not just how it’s stored. Fermentation, hydration level, loaf shape, and your kitchen’s climate all play a role in how long your bread stays fresh.
How Fermentation Creates Natural Preservation
Your sourdough starter is full of wild yeast and lactic acid bacteria. These two work together during fermentation to give the bread its texture, flavor, and long shelf life.
As the bacteria break down sugars in the dough, they produce lactic acid. This acid acts as a natural preservative. It lowers the pH of the bread, which makes it harder for mold to grow.
This is why sourdough often lasts longer than standard yeast bread. Commercial bread relies on added preservatives, but your homemade loaf gets protection from fermentation alone. That said, natural preservation doesn’t stop staling. It only slows mold growth, so you still need proper storage to keep the crumb soft and the crust intact.
How Hydration, Shape, and Flour Affect Freshness
The hydration level of your dough affects how fast your loaf dries out. Higher hydration doughs hold moisture longer, which can extend freshness by a day or so compared to drier, tighter crumb breads.
Shape matters too. A round sourdough boule has less surface area compared to its volume, so it holds onto moisture better than a long, thin loaf. Batards and baguettes dry out faster because more crust is exposed to air.
Flour type also plays a role:
White flour loaves tend to stay soft longer.
Rye bread often stays moist longer due to rye’s natural water-holding properties, but it can also mold faster in humid conditions.
Whole wheat loaves fall somewhere in between, drying out a bit faster than white flour but slower than rye in some cases.
Artisan bread bakers often choose boule shapes for this reason, since they balance crust texture with better moisture retention.
Adjusting Storage for Dry and Humid Kitchens
Your kitchen’s humidity affects how you should store your loaf. In dry climates, bread loses moisture fast, so a paper or linen bag with some air circulation helps prevent the crust from turning rock hard too quickly.
In humid kitchens, too much moisture in the air can cause mold to grow faster, even with sourdough’s natural acidity. A loose plastic bag can trap too much humidity in these conditions, so a bread box or a bag with small airflow gaps works better.
If you’re wondering how long does sourdough bread last in your specific kitchen, check it daily for the first few days. Homemade bread stored in a hot, humid space may only stay fresh for two days, while the same loaf in a cool, dry kitchen can last closer to five.
FAQ: How to Store Homemade Sourdough Bread
Proper storage helps homemade sourdough maintain its crisp crust and soft, chewy interior. The best method depends on how quickly you plan to eat the loaf and whether you want to preserve it for longer-term storage.
How Should You Store Homemade Sourdough Bread?
Store sourdough at room temperature in a breathable bread bag, paper bag, or bread box. Avoid sealing a freshly baked loaf in plastic while it is still warm, as trapped moisture can soften the crust.
Should Sourdough Bread Be Stored in a Plastic Bag?
Plastic can help prevent sourdough from drying out, but it also traps moisture and can make the crust soft. For a crusty loaf, a paper bag or bread box is generally a better option for short-term storage.
How Long Does Homemade Sourdough Bread Last at Room Temperature?
Homemade sourdough typically stays at its best for several days when stored properly at room temperature. Its crust will gradually soften and the crumb will become less fresh over time.
Should You Refrigerate Sourdough Bread?
Generally, refrigeration is not recommended for everyday sourdough storage because the cold environment can accelerate staling and make the crumb firmer. Freezing is a better option for long-term storage.
Can You Freeze Homemade Sourdough Bread?
Yes. Sourdough freezes well when properly wrapped. You can freeze the loaf whole or slice it first so individual pieces can be removed as needed.
How Do You Keep Sourdough Bread Crusty?
Keep the loaf in a breathable container rather than an airtight plastic bag. Allowing some airflow helps prevent condensation from making the crust soggy.
Should You Slice Sourdough Bread Before Storing It?
If you plan to eat the loaf within a few days, keeping it whole helps reduce moisture loss. For freezing, slicing the bread beforehand can make it easier to use individual portions.
How Do You Store Sourdough Bread Overnight?
Allow the loaf to cool completely, then place it cut-side down on a cutting board or store it in a bread bag or bread box. This helps protect the crumb while maintaining some crust texture.
Can You Store Sourdough in an Airtight Container?
You can, but an airtight container may soften a crusty sourdough crust. It can be useful if your priority is preventing the bread from drying out rather than maintaining maximum crust crispness.
What Is the Best Way to Store Sourdough for Long-Term Use?
Freezing is the best option for long-term storage. Wrap the bread securely to protect it from freezer air, then thaw individual slices or the whole loaf when needed.
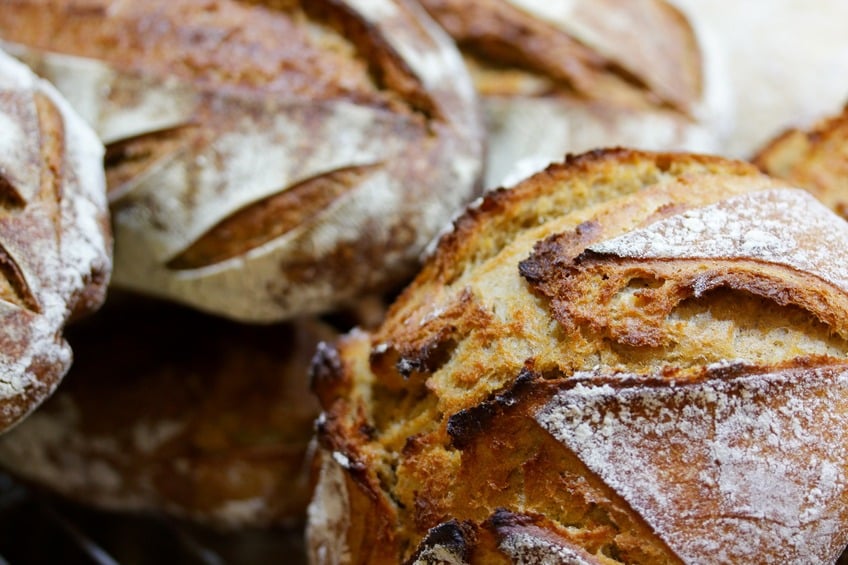


 How you store sourdough bread depends on when you plan to eat it. A loaf you’ll finish in a day needs less protection than one you want to keep fresh for a week, and freezing works best when you know you won’t finish it soon.
 Fresh sourdough bread needs a few steps before you store it. If you skip these steps, your bread crust and crumb can get soggy or dry out too fast.
 Your sourdough loaf can sit on the counter for two to five days, but the method you choose changes how the crust and crumb hold up. Some options protect the crust, others protect moisture, and a few try to do both at once.
 Cold temperatures speed up the process that makes bread go stale, and they also dry out the crust and crumb. This is why room temperature storage almost always works better than refrigeration for your loaf.
 Freezing sourdough bread is one of the best ways to keep it fresh for weeks or months without losing flavor or texture. The key is choosing the right method for how you’ll use it, wrapping it properly, and thawing it the right way so it tastes freshly baked.
 Bread staling happens when starch molecules dry out and harden, but adding moisture and heat can bring your loaf back. Knowing how to refresh sourdough bread saves you money and reduces waste, but you also need to spot the signs that a loaf is truly done for.
 Sourdough lasts longer than regular bread because of how it’s made, not just how it’s stored. Fermentation, hydration level, loaf shape, and your kitchen’s climate all play a role in how long your bread stays fresh.
 Proper storage helps homemade sourdough maintain its crisp crust and soft, chewy interior. The best method depends on how quickly you plan to eat the loaf and whether you want to preserve it for longer-term storage.


