Can You Over Bake Bread? Understanding the Effects on Texture and Flavor
If you wonder can you over bake bread, can you overbake bread easily, or can you overcook bread, the answer is yes. Leaving dough in the heat too long results in dry over baked bread that loses its soft crumb.
Yes, you can over bake bread, and it changes how your loaf looks, feels, and tastes. Baking bread too long dries out the crumb and makes the crust harder than it should be. Heat pulls moisture out of the crumb the longer it stays in the oven.
If you love making homemade bread, you know that getting the baking time right matters. Bake it too short, and the inside stays raw. Bake it too long, and you lose the soft texture that makes fresh bread so good to eat.
Understanding the baking process helps you spot the signs before it’s too late. You will learn what causes these texture changes, how to tell when your bread has gone too far, and what you can do to fix or avoid the problem next time.
What Overbaking Does to a Loaf
Leaving bread in the oven too long changes the bread dough in ways you can see, feel, and taste. The crumb structure, crust color, and overall flavor of the bread all shift when the baking time runs past the point of doneness.
Moisture Loss and a Dry Crumb
Bread starts with a moist center. As the internal temperature climbs toward 200°F, water inside the loaf begins to escape. If you leave the loaf in the oven longer than needed, this process keeps going and the crumb dries out.
During thermal processing, dough passes through specific phases. Early heat triggers the oven spring zone until yeast kill halts expansion around 140°F.
The loaf then enters the critical change zone, where starches gelatinize and crumb set locks in the crumb structure. After crumb set, the bread enters the bake-out zone.
This drying stage is sometimes called the bake-out zone, and it’s the main reason overbaked bread feels dry or crumbly. In commercial baking, thermal profiling helps pinpoint this stage to prevent moisture loss. Without careful monitoring, the texture quickly shifts from soft and springy to stiff and tough.
You’ll notice this most when you slice the loaf. A properly baked crumb bounces back when you press it. An overbaked one feels dense and doesn’t spring back the same way.
Hard, Dark, or Burnt Crust
The crust reacts to heat faster than the inside of the loaf. It sits in direct contact with hot oven air, so it browns and hardens well before the crumb finishes baking.
If you leave bread in too long, the crust keeps darkening. It can turn from golden brown to deep brown, and eventually to a burnt crust that tastes bitter.
Crust browning happens through a chemical reaction between sugars and proteins on the surface of the dough. This reaction speeds up the longer the bread bakes. A crust that’s gone too far often feels rock hard and may be difficult to cut through, even if the inside is still fine.
Changes to Flavor and Shelf Life
Overbaking affects taste, not just texture. Extra time in the oven can dull the natural yeast flavor that gives bread its character. In some cases, a longer bake brings out deeper, toastier notes, but too much time turns those flavors bitter or burnt.
Shelf life also takes a hit. Bread that’s lost extra moisture during baking dries out faster once it cools. You might notice the loaf turning stale sooner than a properly baked one.
Some bakers pull their loaves early to protect moisture, while others judge doneness by crust color instead of a set time. Either way, the baking process directly shapes how long your bread stays fresh and how it tastes days after baking.
How to Tell When Bread Is Properly Baked
You can check bread doneness by combining three methods: temperature, sight, and sound. Each one gives you a different piece of information, and together they help you avoid pulling a loaf that looks done but isn’t.
Use Internal Temperature as the Main Check
Checking internal product temperature is the most reliable way to know if your bread is fully baked. A thermapen or other instant-read thermometer gives you a fast, accurate reading without guessing.
Commercial bakeries use thermal profiling to track a loaf’s temperature-time curve from start to finish. At home, tracking internal product temperature offers that same level of control.
Insert the thermometer into the center of the loaf. Most yeast breads are done between 190°F and 210°F. Softer, enriched breads like brioche often finish lower, closer to 190°F.
Checking your oven with an oven thermometer also helps. Ovens can run hot or cold, and this affects your baking time even when your recipe timer says the loaf should be ready.
Temperature removes the guesswork that comes with visual checks alone. It tells you what’s happening inside the loaf, not just the surface.
Read Crust Color and Other Visual Cues
Visual indicators give you a quick first impression of doneness. Crust color is one of the clearest signs. A finished loaf usually has a deep golden-brown crust, sometimes with darker spots near the edges or top.
If your crust looks pale, your bread likely needs more time in the oven.
Another visual cue is separation from the pan. When bread is fully baked, it typically pulls slightly away from the sides of the pan. This shows the structure has set.
You can also check the bottom of the loaf. It should look firm and browned, not soft or shiny.
Use the Tap Test Only as a Supporting Signal
The tap test can support your other checks, but it shouldn’t replace them. To perform it, remove the loaf from the pan and tap the bottom with your knuckle.
A hollow sound often means the bread is done. A dull or heavy sound may mean it needs more time.
This method has limits. It doesn’t tell you about the crumb structure inside the loaf, and sound can vary based on loaf shape and crust thickness. Dense breads, like rye, may sound different from lighter sandwich loaves even when both are fully baked.
Because of this, use the tap test as a final check, after you’ve already confirmed temperature and visual signs.
Why Bread Overbakes
Bread overbakes when heat exposure lasts too long or runs too hot for the size and type of loaf you are baking. Oven temperature, dough hydration, loaf shape, and even the equipment you use can all push a loaf past its ideal bake point.
Incorrect Oven Temperature
Your oven’s dial does not always match its actual internal temperature. Many home ovens run 20 to 50 degrees hotter or cooler than what you set, and this gap can cause bread to overbake even when you follow a recipe exactly.
Use an oven thermometer to check the real temperature inside your oven. This simple tool gives you accurate temperature control and helps you catch problems before they affect your bread.
If your oven runs hot, your loaf’s crust will darken faster than the inside can finish baking. This forces you to either pull the bread early or leave it in longer, drying out the crumb.
Inconsistent oven zones can also create localized hot spots. If heat gathers along one wall, that section of your loaf may overbake before the rest sets.
Oven humidity also plays a role. Low humidity pulls moisture from the crust quickly, which can make bread seem done on the outside while the inside overbakes trying to catch up.
Loaf Size, Shape, and Hydration
Smaller and thinner loaves, like a baguette, bake faster than large round loaves. If you use a bake time meant for a bigger loaf, a baguette can dry out and overbake in just a few extra minutes.
Dough hydration matters too. Bread made with more water holds moisture longer during baking, which gives you a bit more room for error.
Lower hydration doughs, often made with all-purpose flour, dry out faster since they hold less water to begin with. The type of flour you use also changes how the dough absorbs and releases water during baking.
Here’s a quick comparison:
Loaf Type
Hydration Level
Overbake Risk
Baguette
Low to medium
High
Sandwich loaf
Medium
Medium
Rustic round
High
Lower
The Effects of Baking Stones and Convection
Abaking stone holds and radiates heat directly to the bottom of your loaf. In addition, intense radiant heat flux from upper elements can darken the crust prematurely, leading to an overbaked exterior.
Convection ovens circulate hot air around the loaf, using increased air velocity to accelerate heat transfer. This raises the total heat absorbed by the dough in a shorter amount of time.
If you don’t adjust your time or temperature for convection settings, your bread can finish baking sooner than expected and dry out before you take it out.
Both tools are useful, but they change how quickly heat reaches the dough. Always check your bread a few minutes early when using a stone or convection setting, rather than relying only on the original recipe time.
Avoiding a Dry or Burnt Loaf
A few simple habits can keep your homemade bread from drying out or burning. Watching your baking time, checking your oven, and adjusting for the type of bread you make will help you get consistent results.
Set a Reliable Baking-Time Range
Most bread recipes give you a baking time range instead of one exact number. This range exists because ovens vary, even when they show the same temperature setting.
Start checking your bread a few minutes before the earliest time listed. This helps you catch a loaf that is baking faster than expected.
You should also use an internal temperature check to know when your bread is done. A Thermapen gives you a fast, accurate reading. Most bread is done between 190°F and 210°F, depending on the recipe.
Relying on time alone can lead to a dry, overbaked loaf. Checking temperature gives you a clearer picture of doneness.
Preheat and Verify the Oven
A fully preheated oven helps your bread bake evenly from the start. If you put dough into an oven that hasn’t reached the right temperature, your bread may bake unevenly or take longer than expected.
Many ovens run hotter or cooler than their display shows. An oven thermometer gives you an accurate reading, so you can adjust the dial as needed.
Oven placement matters too. Keep your loaf on the center rack for even heat, away from cooler or hotter oven zones near the elements.
If you use a baking stone, preheat it for at least 30 minutes. This helps prevent a burnt bottom crust, which is a common issue with sourdough.
If you bake with a convection oven, lower the temperature by 25°F. Convection ovens circulate hot air, which can speed up crust browning.
Adjust the Bake for Different Bread Styles
Different bread styles need different baking approaches. A dense sandwich loaf bakes differently than a lean, crusty baguette.
Here is a simple guide:
Baguette: Needs high heat and steam early in baking to help the crust form properly.
Sourdough: Benefits from a preheated Dutch oven or baking stone to control heat and prevent a burnt crust.
Enriched loaves: Bake at slightly lower temperatures since sugar and fat can cause faster browning.
If your crust browns too fast, loosely tent the loaf with foil. This slows down crust browning while the inside finishes baking.
Do Not Confuse Overbaking With Overproofing
Overbaking and overproofing are two different problems, but they can look similar in the final loaf. Overproofing happens before your bread even reaches the oven, and it can cause many of the same issues people blame on baking time.
Preventing over proofing is essential because once the gluten network collapses, the loaf struggles to hold its shape. An over proofed dough makes it difficult to achieve a light, airy loaf.
Signs of Over-Proofed Dough Before Baking
Your dough gives you clues before it ever goes in the oven. During proofing, yeast activity produces carbon dioxide, which causes fermentation and makes the dough rise.
If you let this second rise go too long, you’ll end up with over-proofed dough. Here’s what to look for:
Size: The dough has more than doubled and looks like it’s spilling over the sides of the bowl or proofing box.
Surface: The top looks puffy, fragile, or slightly deflated.
Smell: The dough smells like alcohol, a sign of extended fermentation.
Finger test: Press your finger into the dough for two seconds. If the indent stays and doesn’t spring back, your proofing time has gone too far.
Checking your dough against these signs helps you catch over-proofed bread before it reaches the oven.
How Weak Gluten Reduces Oven Spring
Gluten development gives your dough the structure it needs to hold gas and rise properly. When proofing time goes on too long, the gluten structure starts to break down.
This weakens the dough’s ability to trap carbon dioxide. As a result, your bread loses much of its oven spring, the quick rise that happens in the first few minutes of baking.
Because over proofed dough lacks tension, it cannot sustain rapid gas expansion in the oven. Instead of a tall, well-risen loaf, you get a flat or dense result.
Extended fermentation can also lead to a buildup of lactic acid, giving over-proofed bread a sour taste along with its structural problems.
How to Rescue Dough That Has Risen Too Far
If you catch your dough before baking, you can often fix it.
Here’s a simple process:
Turn the dough out onto your work surface.
Press down firmly to release the trapped gas.
Reshape the dough into its original form.
Place it back in your bowl or proofing box.
Let it rise again, watching closely this time.
Keep the proofing temperature steady and check the dough every 30 minutes during this second attempt. Most bread only needs one to three hours to rise fully, so use that as your general guide. Reshaping and re-proofing gives the gluten a second chance to trap gas properly before you bake.
If reshaping is not an option, baking over proofed bread requires a delicate touch. You can also transfer over proofed dough into a loaf pan to support its fragile sides while baking.
Handle the loaf gently, score it lightly, and bake immediately in a hot oven to capture whatever lift remains.
Building Better Results From Dough to Oven
Good bread starts long before the oven. How you mix, ferment, and shape your dough sets the stage for what happens once it hits the heat.
Develop Enough Gluten Before Proofing
Gluten forms when flour and water combine, and kneading strengthens that structure. Without enough gluten development, your dough can’t trap the gas produced by yeast activity.
Weak gluten leads to a dense crumb structure, even if you bake the loaf perfectly. Use the windowpane test to check your progress. Stretch a small piece of dough between your fingers. If it stretches thin enough to see light through without tearing, your gluten structure is ready.
Hydration also affects gluten. Wetter doughs often build structure faster but require more careful handling. Salt strengthens gluten too, so add it early rather than skipping it or adding it too late.
Control Fermentation Rather Than Watching the Clock
Fermentation depends on temperature, not just time. Yeast activity speeds up in warm conditions and slows down in cooler ones, so a recipe’s stated proofing time is only a guideline.
Instead of watching the clock, monitor your dough rise directly. Check for size increase, surface tension, and gas bubbles under the surface. Keeping an eye on the rate of expansion is key to preventing over proofing your bread dough.
Temperature control matters just as much during proofing as during baking. A proofing temperature that’s too high can cause overproofing, which weakens the gluten structure and leads to poor oven spring. A proofing environment that’s too cool slows fermentation, which can leave your dough underdeveloped.
Track these factors instead of relying on time alone:
Room temperature: Warmer rooms speed fermentation
Dough temperature: Aim for consistency between batches
Visual cues: Look for a slight dome and light jiggle when moved
Cool and Store Bread to Preserve Texture
Bread continues cooking slightly after it leaves the oven, as trapped steam and heat escape. Cutting into it too soon can make the crumb structure gummy, since moisture hasn’t fully redistributed yet.
Let your loaf cool on a wire rack for at least an hour before slicing. This allows air to circulate and helps prevent condensation from softening the crust.
Once cooled, store bread properly to protect its texture. Wrap it in a clean towel or paper bag if you plan to eat it within a day or two. For longer storage, use a sealed container or freezer bag to prevent it from drying out or picking up unwanted moisture.
Can You Overbake Bread? — Citation-Supported Answer
Yes, bread can be overbaked. Leaving a loaf in the oven for too long allows excess moisture to escape, making the crumb dry, firm, and tough instead of soft and tender. King Arthur Baking explains how to recognize when bread is properly baked .
For most yeast breads, an internal temperature of approximately 190°F (88°C) is a useful indication of doneness. Denser whole-grain or enriched breads may require a slightly higher internal temperature, often around 200–205°F (93–96°C). Once the bread reaches the correct temperature and develops the expected crust color, additional baking may dry it out unnecessarily. King Arthur Baking discusses using a thermometer to check yeast bread .
Overbaking can also produce an excessively dark or hard crust and leave the interior noticeably dry. The University of Georgia Cooperative Extension recommends checking bread for proper browning, texture, and doneness rather than relying only on baking time, since ovens, loaf sizes, and recipes vary. University of Georgia Cooperative Extension – Bread Baking .
FAQ: Can You Overbake Bread?
Yes, bread can be overbaked. Leaving bread in the oven too long can cause excessive moisture loss, resulting in a dry, hard crumb and overly thick or dark crust.
What Happens If You Overbake Bread?
Overbaking causes more moisture to evaporate from the loaf. The result can be dry, tough, and crumbly bread, with a crust that is harder and darker than intended.
How Do You Know If Bread Is Overbaked?
Overbaked bread typically has a very dark or hard crust and a dry interior. If the crumb feels unusually firm or lacks the moisture expected for that type of bread, the loaf may have been baked too long.
What Temperature Should Bread Be When Done?
For many yeast breads, the center of the loaf should reach approximately 190–210°F (88–99°C), depending on the type of bread. An instant-read thermometer provides a more reliable indication of doneness than crust color alone.
Can You Fix Overbaked Bread?
You cannot fully restore moisture that has been lost during overbaking, but you can make the bread more enjoyable by toasting it, using it for breadcrumbs or croutons, or serving it with moist toppings or spreads.
Why Is My Bread Dry Even Though I Didn’t Overbake It?
Dry bread can result from more than just excessive baking. Too much flour, insufficient liquid, inadequate fermentation, or an inaccurate oven temperature can also produce a dry loaf.
Does Bread Continue Baking After You Remove It From the Oven?
Bread continues to set internally as it cools, although this is not the same as continuing to bake in the oven. Removing the loaf once it has reached the appropriate internal temperature helps prevent unnecessary moisture loss.
Can You Overbake Bread at a Low Temperature?
Yes. Even at a relatively low temperature, leaving bread in the oven for too long can cause excessive moisture loss. Both oven temperature and baking time influence the final texture.
How Can You Prevent Overbaking Bread?
Use the recipe’s recommended temperature and baking time, and begin checking the loaf toward the end of the suggested baking period. An instant-read thermometer is one of the best ways to determine when bread is done, allowing you to remove it before unnecessary moisture is lost.
What Is the Difference Between Overbaked and Underdone Bread?
Overbaked bread is typically dry, hard, and excessively browned, while underbaked bread tends to have a gummy or doughy center. Checking the internal temperature and allowing the loaf to cool properly can help distinguish between the two.
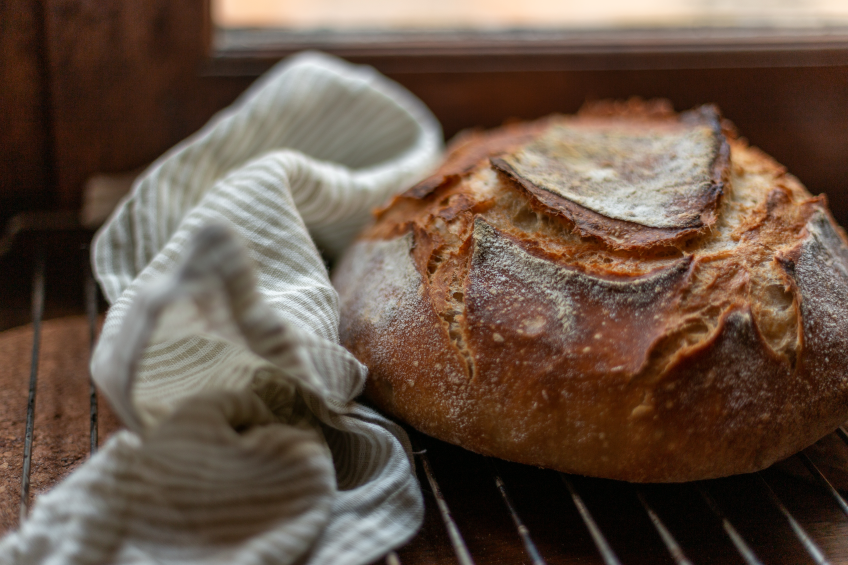


 Leaving bread in the oven too long changes the bread dough in ways you can see, feel, and taste. The crumb structure, crust color, and overall flavor of the bread all shift when the baking time runs past the point of doneness.
 You can check bread doneness by combining three methods: temperature, sight, and sound. Each one gives you a different piece of information, and together they help you avoid pulling a loaf that looks done but isn’t.
 Bread overbakes when heat exposure lasts too long or runs too hot for the size and type of loaf you are baking. Oven temperature, dough hydration, loaf shape, and even the equipment you use can all push a loaf past its ideal bake point.
 A few simple habits can keep your homemade bread from drying out or burning. Watching your baking time, checking your oven, and adjusting for the type of bread you make will help you get consistent results.
 Overbaking and overproofing are two different problems, but they can look similar in the final loaf. Overproofing happens before your bread even reaches the oven, and it can cause many of the same issues people blame on baking time.
 Good bread starts long before the oven. How you mix, ferment, and shape your dough sets the stage for what happens once it hits the heat.
 Yes, bread can be overbaked. Leaving a loaf in the oven for too long allows excess moisture to escape, making the crumb dry, firm, and tough instead of soft and tender. King Arthur Baking explains how to recognize when bread is properly baked .
 Yes, bread can be overbaked. Leaving bread in the oven too long can cause excessive moisture loss, resulting in a dry, hard crumb and overly thick or dark crust.


