Is Sourdough Bread Better in a Dutch Oven? A Practical Guide
Baking sourdough bread can feel tricky, especially when you’re trying to get the perfect crust. You might wonder whether special equipment makes a real difference.
Dutch oven sourdough bread has become the standard for home bakers seeking artisan results. Baking sourdough in a Dutch oven mimics the steam-injected deck ovens found in professional bakeries.
When baking sourdough bread in a Dutch oven, trapped moisture and concentrated heat work together to elevate your loaf.
A Dutch oven can produce better sourdough bread because it traps steam around the dough as it bakes. The steam keeps the crust soft at first, giving the loaf time to rise before the outside hardens. The result can be a loaf with a crisp, golden crust and a light, airy interior, similar to bread from a professional bakery.
You don’t need advanced skills to get these results. A Dutch oven helps create consistent baking conditions, which is why many home bakers use one for sourdough.
The Verdict: Better Results, with Some Trade-Offs
A Dutch oven can give you a more consistent crust and better oven spring than many open-bake setups, but it can’t fix every problem. You trade some weight and awkward handling for greater control over baking conditions.
Where a Covered Pot Makes the Biggest Difference
The biggest difference comes during the first 20 minutes of baking. A covered pot traps steam released by the dough, keeping the crust soft long enough for the loaf to expand.
This is especially helpful in a dry kitchen or an oven that doesn’t retain steam well. You may notice taller loaves and more pronounced ears along the scores.
The lid also shields the loaf from direct heat, which can help it brown more evenly. If open baking has produced flat or pale loaves, a covered pot may help, though dough preparation and oven temperature still matter.
For many home bakers, a quality Dutch oven for sourdough transforms inconsistent bakes into beautifully blistered loaves.
What a Dutch Oven Cannot Fix
A Dutch oven won’t save a loaf that’s overproofed or underproofed. If the dough has lost its structure before baking, steam can’t restore the oven spring it has lost.
It also can’t make up for weak gluten development or an inactive sourdough starter that doesn’t leaven the dough properly. A healthy sourdough starter is vital for any successful bake.
Scoring technique matters just as much with a covered bake as with an open bake. A shallow or poorly placed score can still limit how the loaf opens, whether or not you use a pot.
Costs, Weight, and Handling Considerations
A quality Dutch oven can cost anywhere from $70 to $300, depending on the brand and size. That’s a significant expense if you’re just starting out with sourdough baking.
Weight is another factor. A hot cast-iron pot with a loaf inside can be heavy and dangerous to handle, so use thick oven mitts and steady hands every time you bake.
Here’s a quick comparison of the trade-offs:
Factor
Dutch Oven
Open Bake
Crust and rise
Often more consistent
Depends on the steam method
Upfront cost
$70–$300
Low, if you already own a tray
Handling risk
Higher, because the pot is heavy and hot
Lower
Learning curve
Moderate
Simple
If you bake often, the cost may be worthwhile over time. If you bake occasionally, an open bake with a steam tray may suit you better.
Why a Covered Pot Changes the Bake
A lid traps moisture and heat around your loaf in a way a bare baking sheet cannot. This combination affects two key aspects of your bread: how much it rises in the oven and how its crust forms.
For anyone exploring sourdough bread baking, steam retention is essential. Trapping that moisture allows the loaf to expand fully before the exterior hardens.
This trapped steam keeps the crust soft and flexible during the first part of baking, allowing the loaf to expand before the crust hardens. That expansion is called oven spring, and it is why Dutch oven baking can produce taller, more open loaves than baking on a sheet pan without added steam.
Without enough steam, the crust can set too quickly and restrict the loaf’s rise. Baking a loaf in a Dutch oven at 245–260°C for about 20 minutes with the lid on can give the dough time to rise before the surface stiffens.
Heat Retention and Crust Development
Cast-iron and ceramic pots retain heat and release it evenly around your loaf. This steady heat matters after you remove the lid, when the bake moves into crust development.
With steam escaping and heat surrounding the dough, sugars and proteins on the surface brown and form a firm crust. This can produce a deeply colored crust with a satisfying crunch.
You can preheat the empty pot with the lid on for 30–60 minutes at 450–500°F (230–260°C) before adding the dough. This heats the pot fully so the loaf starts baking as soon as it goes in, rather than waiting for the pot to heat up.
Consistent preheating is a cornerstone of Dutch oven baking. When baking sourdough in a Dutch oven, proper thermal saturation provides the initial push required for impressive oven spring.
Choosing a Pot and Preparing the Dough
The pot you choose affects how well your loaf rises and how its crust turns out. Your dough also needs the right preparation before it goes into the oven.
Selecting the best Dutch oven for sourdough depends on your loaf shapes, baking routine, and budget.
Cast Iron, Enameled Pots, and Combo Cookers
A cast-iron Dutch oven retains heat well and can produce a dark, crisp crust. Plain cast iron handles high heat but needs seasoning to help prevent rust.
A classic cast iron Dutch oven creates an intensely hot baking environment. A standard Lodge Dutch oven is a durable, budget-friendly choice that many bakers rely on.
An enameled Dutch oven also works well for sourdough. Its coating means it doesn’t need seasoning and is easier to clean. Check the manufacturer’s temperature guidance, as heat limits vary by pot and lid components.
A combo cooker is another option. It has a shallow pan and a deep skillet that work together as a base and lid. The Lodge combo cooker is a common choice because it’s affordable and accommodates different loaf shapes.
Size, Oven-Safe Parts, and Safe Preheating
A 5- to 6-quart cast iron Dutch oven works well for many home loaves. This size gives the dough room to expand without spreading too flat or crowding the sides.
Check that every part of your pot, including the lid knob, is rated for your baking temperature. Some plastic or wooden knobs can’t handle 450°F and may need to be replaced or removed before baking.
Preheating matters as much as pot size. Put the empty pot in the oven as it heats, then allow at least 30 to 45 minutes at the target temperature. A fully heated pot provides steady heat for the loaf and helps the dough’s moisture create steam once the lid is on.
Always use oven mitts when handling the hot lid and base.
Starter, Flour, Folding, and Proofing
Your bread needs an active sourdough starter to rise well. Feed your starter several hours before baking so it’s bubbly and has roughly doubled in size.
Bread flour is often a good choice for sourdough. Quality bread flour provides the gluten strength needed to trap fermentation gases and support a dramatic rise.
During bulk fermentation, use stretch-and-folds or coil folds to build strength in the dough. Regular stretch and folds gently align gluten strands without tearing the dough.
Stretch-and-folds involve pulling the dough up and over itself, while coil folds lift the middle and tuck the edges underneath. Either method works, and many bakers do a few rounds over a couple of hours.
Once bulk fermentation is complete and the dough is shaped, place it in a banneton for its final proof. The basket supports the dough’s shape and can leave ridged lines on the baked crust.
Dusting the banneton with rice flour keeps sticky dough from tearing during transfer. Mastering these prep steps makes baking sourdough bread far more consistent.
How to Bake Sourdough Bread in a Dutch Oven
Learning how to bake sourdough bread in a Dutch oven comes down to three steps: heat the pot, score and bake the dough covered, then uncover it to brown before cooling. Each step affects the crust and crumb, so timing and temperature matter at every stage.
Mastering this process ensures your loaf gets maximum oven spring and a blistered, crisp crust.
Preheat the Pot and Transfer the Dough
Put your empty Dutch oven, including the lid, in the oven and heat it to 500°F. Let it preheat for 45 to 60 minutes before adding your dough.
This step matters more than many bakers expect. Cast iron is dense and takes time to heat through. If you shorten the preheat, the pot may cool too quickly when the dough goes in, limiting the loaf’s rise.
While the pot heats, take your dough out of the fridge and turn it onto a piece of parchment paper. Let it rest for a few minutes before scoring. The parchment acts as a sling, letting you lower the dough into the hot pot without touching it. For enameled pots with knobs rated below 500°F, use the cold pot method as an alternative.
Score and Bake with the Lid On
Before putting the dough in the pot, score the top with a bread lame or sharp razor blade. Hold the blade at a 45-degree angle and make one clean cut about half an inch deep.
This cut guides the dough as it expands during baking. A dedicated bread lame gives you the control needed for smooth, swift incisions that open cleanly under steam.
Once scored, lower the dough into the hot pot using the parchment paper as handles, then cover it with the lid right away. Bake at 500°F for 20 minutes with the lid on.
The covered pot traps steam around the dough, keeping the crust soft while the loaf expands. Don’t open the oven door during this time, as releasing steam early can limit the loaf’s rise.
Uncover, Finish Baking, and Cool
After 20 minutes, carefully remove the lid, as steam will escape quickly. Lower the oven to 450°F and bake uncovered for another 20 to 25 minutes.
Baking uncovered gives the loaf a browned, crisp crust. As steam escapes, the surface dries and browns from the oven’s heat. Aim for a deep golden brown, not pale tan.
To check doneness, insert an instant-read thermometer into the center of the loaf. It should read between 205°F and 210°F.
Once baked, move the loaf to a wire rack using tongs or a spatula. Let it cool for at least 2 hours before slicing. Cutting into it too soon releases steam before the crumb has set, which can leave it gummy.
With careful timing, baking sourdough bread in a Dutch oven delivers a distinct, crackling crust every time.
Troubleshooting the Finished Loaf
The loaf’s appearance and crumb can help identify what went wrong during baking. Common causes include oven temperature, proofing time, and the position of your Dutch oven.
Weak Rise or a Dense Crumb
A flat loaf with little oven spring usually means the dough was overproofed or the starter wasn’t active enough. Check the crumb after the loaf cools: large tunnels near the top with dense bread below can signal underproofing, while a tight, cake-like crumb throughout may point to a weak starter or insufficient fermentation.
Before baking, you can test your starter by dropping a spoonful into water. If it floats, it may be active enough to raise your dough. If it sinks, feed it again and wait for it to become active.
Your Dutch oven also affects oven spring. A heavy, preheated pot traps steam around the dough, keeping the crust soft while the loaf expands. Skipping the preheat can reduce this effect and limit the rise.
Burnt Bottom Crust
A scorched bottom usually means your Dutch oven sat too close to the oven’s bottom heating element. Cast iron and enameled pots retain heat well, but that can also overcook the base of your loaf before the top finishes browning.
Place a baking sheet on the rack below your Dutch oven to block direct heat and promote more even baking. You can also move the oven rack to the middle position instead of the lower third to reduce exposure to heat from the bottom of the oven.
If the bottom crust keeps burning, a shorter preheat or slightly lower temperature during the first stage may help with your sourdough baking routine.
Pale Crust or Uneven Browning
A pale, dull crust may mean your oven wasn’t hot enough or the dough didn’t get enough steam during the first 20 minutes of baking. During this early stage, steam keeps the crust soft and stretchy while the loaf expands.
Preheat your Dutch oven for 45 to 60 minutes before baking. For extra steam, add two or three ice cubes beside the dough, not on top of it, just before covering the pot.
Uneven browning may also result from an old or warped Dutch oven lid that doesn’t seal tightly, allowing steam to escape. Rotating the pot halfway through the covered bake can help distribute heat more evenly across the loaf.
When Another Baking Method Makes More Sense
A Dutch oven isn’t your only option for baking sourdough. Other tools may better suit your kitchen setup or baking style.
Baking Stones, Steel, and Added Steam
If you bake more than one loaf at a time, a baking stone or steel may work better. These tools heat up and retain heat well, helping create a strong, even bottom crust.
The main difference is steam. A Dutch oven traps steam on its own, while a stone or steel requires you to add steam to the oven.
You can do this a few ways:
Place a metal pan on the oven floor and pour hot water into it just before loading your bread.
Mist the inside walls of your oven with a spray bottle.
Use ice cubes in a preheated pan to create a quick burst of steam.
This open baking method takes a bit more setup but gives you more control over batch size.
Bread Cloches, Covered Bakers, and Loaf Pans
A bread cloche or covered baker works much like a Dutch oven. It traps steam around your loaf as it bakes, helping create a crisp crust and an open crumb.
Many are made from clay or ceramic, so they’re lighter than cast iron and easier to lift in and out of a hot oven.
A combo cooker gives you another option. It has a shallow pan and a deep domed lid that you can flip to suit your loaf shape. This makes it a good choice if you shape boules or batards and want more flexibility than a standard Dutch oven offers.
If you bake sandwich bread, a loaf pan is your best bet. It supports the dough to create straight sides and an even shape, which a Dutch oven can’t provide.
FAQ: Is Sourdough Bread Better in a Dutch Oven?
Sourdough bread is often easier to bake successfully in a Dutch oven, particularly when making a rustic, free-form loaf. The covered pot traps moisture released from the dough, creating a steamy environment that delays crust formation and allows the bread to expand more fully during the early stage of baking.
This can produce better oven spring, a crisp crust, and a well-developed interior. A Dutch oven is not essential for sourdough, however; similar results can be achieved in a conventional oven by creating steam using other methods.
Why Is a Dutch Oven Good for Sourdough?
A Dutch oven creates a small, enclosed baking environment around the dough. As the dough heats, its moisture turns into steam and becomes trapped inside the covered pot.
The steam keeps the surface of the dough flexible during the first part of baking, giving the loaf more time to expand before the crust hardens. Once the lid is removed, moisture escapes and the crust can brown and crisp.
Does a Dutch Oven Give Sourdough Better Oven Spring?
It can. The trapped steam helps prevent the crust from setting too quickly, which gives the dough more opportunity to expand in the oven.
Oven spring also depends on other factors, including fermentation, dough hydration, gluten development, shaping, scoring, and the strength of the sourdough starter. A Dutch oven cannot compensate for poorly fermented or improperly prepared dough.
Does Sourdough Need to Be Baked in a Dutch Oven?
No, sourdough does not require a Dutch oven. You can bake sourdough on a baking stone, baking steel, or baking sheet in a conventional oven.
The main challenge without a Dutch oven is producing enough steam during the beginning of the bake. A suitable steam-generating method can help keep the dough surface flexible and encourage good oven spring.
Should You Preheat a Dutch Oven for Sourdough?
Preheating the Dutch oven is commonly recommended for sourdough bread. A thoroughly heated pot provides strong initial heat when the dough is transferred into it and helps the loaf begin baking immediately.
Follow the manufacturer’s instructions for the particular Dutch oven, especially regarding maximum temperature and whether the lid or handles are oven-safe at the temperature used in the recipe.
How Long Should Sourdough Bake in a Dutch Oven?
Baking times vary according to the loaf’s size, dough formulation, oven temperature, and the particular recipe. A common approach is to bake covered during the initial stage and then remove the lid to finish browning the crust.
Rather than relying solely on a fixed baking time, look for a deeply browned crust and use an internal temperature when the recipe calls for it. Allow the loaf to cool before slicing so the crumb can finish setting.
Can You Bake Sourdough Without Steam?
Yes. A Dutch oven is simply one of the easiest ways to create a steamy environment for sourdough. Without one, bakers can use other methods to introduce steam into the oven, although these require suitable equipment and careful handling.
The goal is the same: maintain enough moisture around the dough during the early part of baking to delay crust formation and support oven spring.
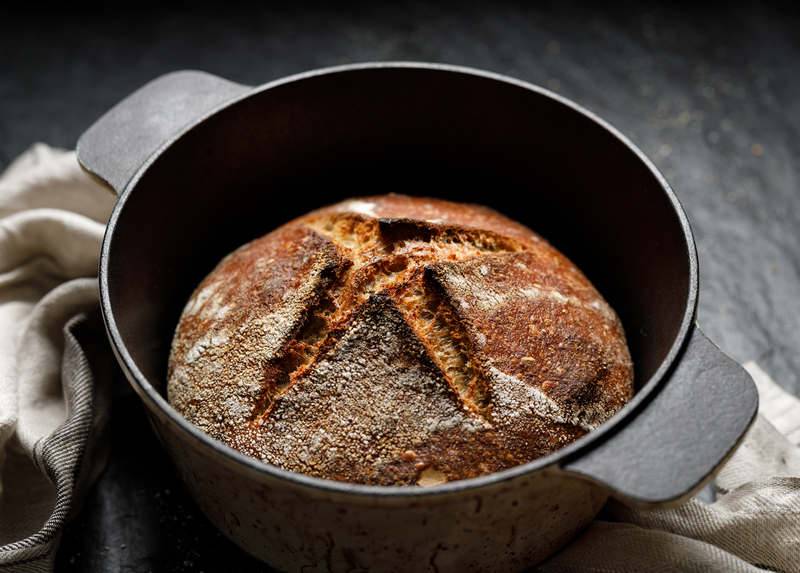


 A lid traps moisture and heat around your loaf in a way a bare baking sheet cannot. This combination affects two key aspects of your bread: how much it rises in the oven and how its crust forms.
 The pot you choose affects how well your loaf rises and how its crust turns out. Your dough also needs the right preparation before it goes into the oven.
 Learning how to bake sourdough bread in a Dutch oven comes down to three steps: heat the pot, score and bake the dough covered, then uncover it to brown before cooling. Each step affects the crust and crumb, so timing and temperature matter at every stage.
 The loaf’s appearance and crumb can help identify what went wrong during baking. Common causes include oven temperature, proofing time, and the position of your Dutch oven.
 A Dutch oven isn’t your only option for baking sourdough. Other tools may better suit your kitchen setup or baking style.
 Sourdough bread is often easier to bake successfully in a Dutch oven, particularly when making a rustic, free-form loaf. The covered pot traps moisture released from the dough, creating a steamy environment that delays crust formation and allows the bread to expand more fully during the early stage of baking.


