Can You Put a Cold Dutch Oven in the Oven? Safety Guide
You can put a cold Dutch oven in the oven, but you need to be careful about how fast the temperature changes.
A sudden jump from cold to very hot can crack the enamel coating or damage the pot, so it’s best to let it warm up gradually.
This matters whether you own a cast iron Dutch oven or an enameled one, since each type reacts to heat a little differently.
Many home cooks pull their Dutch oven straight from the fridge or a cool counter and wonder if it’s safe to place in a hot oven. The short answer is yes, but the way you do it makes a big difference in whether your cookware lasts for years or ends up damaged after one bake.
This guide walks through what happens when you go from cold to hot, how to protect your Dutch oven from thermal shock, and what temperature limits you should follow. You’ll also learn the difference between safe practices for bare cast iron and enameled versions, so you can bake, roast, or braise with confidence.
The Safe Short Answer
Yes, you can put a cold Dutch oven in the oven in most cases. The key is checking your specific pot’s rating, since material and hardware determine what temperature is actually safe for your cookware.
When a Cold Pot Can Go Straight Into the Oven
Most Dutch ovens can go from a cold start straight into a preheated oven without any problem. This works well for recipes like braised meats, casseroles, and no-knead bread that call for placing the pot in the oven from the beginning of the cooking process.
Bare cast iron handles this transition the best. It’s built to withstand direct heat and temperature changes without cracking.
Enameled cast iron also works fine for cold starts in most cases. The main thing to avoid is extreme, sudden temperature jumps.
Going from a cold pot into a 500°F oven is more likely to stress the material than going into a 350°F oven. If your recipe calls for very high heat, letting the pot warm up gradually with the oven can reduce risk.
Why Manufacturer Instructions Take Priority
Every Dutch oven brand sets its own oven-safe temperature limits. These limits often appear on the bottom of the pot, on the lid, or in the included manual.
Your manufacturer’s instructions matter more than general advice or recipe notes. A recipe might say 450°F, but if your pot is only rated to 400°F, you should follow your cookware’s limit instead.
This matters because materials and coatings vary between brands. Le Creuset and Staub have different specs than budget enameled pots.
Skipping this step risks damage to your cookware and can affect food safety if a coating cracks or breaks down under heat. Always check your specific model before assuming it matches what you’ve read online.
The Lowest-Rated Component Sets the Limit
A Dutch oven has multiple parts, and each one has its own heat limit. The main pot might handle 500°F just fine, but the lid knob could be rated much lower.
Here’s a typical breakdown:
Component
Common Limit
Bare cast iron body
500°F or higher
Enameled cast iron body
Up to 500°F
Standard plastic/composite knob
350°F–390°F
Stainless steel knob
500°F or higher
Your maximum oven temperature is always set by the weakest part, not the pot itself. If your knob melts at 400°F, that’s your ceiling regardless of what the pot can handle.
Check every component before setting your oven temperature, not just the main body.
Preventing Thermal Shock During Heating
Sudden temperature changes are the main reason Dutch ovens crack, especially enamel-coated cast iron. You can protect your cookware by heating it gradually and avoiding extreme jumps between hot and cold.
How Drastic Temperature Changes Damage Cookware
Thermal shock happens when one part of your Dutch oven heats or cools faster than another part. This creates stress inside the material.
Enamel coating is more likely to crack than bare cast iron. That’s because enamel and cast iron expand at different rates when heated. If the temperature change is too fast, the enamel can chip or crack, even if the cast iron underneath stays fine.
Bare cast iron handles temperature swings better. It’s still smart to avoid extreme changes, but bare cast iron won’t crack as easily as enamel.
The risk goes up with the size of the temperature gap. Moving a pot from the fridge straight into a 450°F oven creates more stress than moving it from room temperature into the same oven.
Cold Oven Starts and Gradual Heating
You can put a Dutch oven into a cold oven and heat both together. This is one of the safest ways to avoid thermal shock.
As the oven heats up, your Dutch oven warms up at the same steady pace. There’s no sudden jump in temperature for the pot to adjust to.
If you prefer to preheat your oven first, let your Dutch oven sit at room temperature before adding it in. Avoid pulling it straight from the fridge or freezer.
A simple rule to follow:
Best option: Start with a cold oven and cold pot together
Good option: Let the pot reach room temperature, then place it in a preheated oven
Risky option: Put a cold or refrigerated pot directly into a hot, preheated oven
Moving a Refrigerated Pot to the Oven
If your Dutch oven has been in the fridge, don’t put it straight into a hot oven. The temperature gap between a cold fridge and a hot oven is often 300°F or more. That’s enough to crack enamel coating.
Instead, let the pot sit on the counter for 20 to 30 minutes before cooking. This gives it time to warm up closer to room temperature.
If you’re short on time, place the cold pot in a cold oven, then turn the oven on. This lets the pot heat up slowly along with the oven, lowering the risk of damage.
Cooling and Cleaning After Oven Cooking
Thermal shock can also happen when a hot Dutch oven cools too fast. Never place a hot pot directly into cold water or on a cold, wet surface.
Let your Dutch oven cool on the stovetop or counter first. Use a heat-resistant mat or trivet to protect your counter and give the pot a stable surface to cool on.
Wait until the pot is warm, not hot, before washing it. Running cold water over a hot Dutch oven can crack the enamel almost instantly.
Once it’s cool enough to handle, clean off any food residue with warm water and a soft sponge. Avoid soaking a hot pot in the sink, and never place it in the freezer to speed up cooling. Overheating the pot during cooking can also make the enamel more likely to crack when it eventually cools, so stick to the temperature your manufacturer recommends.
Match the Method to the Dutch Oven Material
Not every Dutch oven handles heat the same way. Bare cast iron, enamel coating, and lighter materials like aluminum or ceramic each come with their own rules for going into a cold or hot oven.
Bare Cast Iron at High Heat
A bare cast iron Dutch oven can handle high heat better than most cookware. It is built for open flame, campfires, and hot ovens without much fuss.
Seasoning is what keeps a bare cast iron dutch oven working well. This is a layer of baked-on oil that builds up over time and creates a natural nonstick surface.
Placing a cold bare cast iron pot into a hot oven is generally fine. The metal heats up steadily and spreads heat evenly across the bottom and sides.
Just avoid sudden temperature swings, like pouring cold liquid into a screaming hot pot. This can stress the metal over time, even though bare cast iron is tough.
Enameled Cast Iron and Enamel Care
Enameled cast iron works differently than bare cast iron. The enamel coating sits on top of the metal, and it does not respond well to sudden temperature changes.
Most enameled dutch ovens are safe up to around 450°F, but this varies by brand. Check your manufacturer’s guide before assuming your pot can handle higher heat.
Placing a cold enameled pot into a very hot oven can cause thermal shock. This might crack the enamel or damage the pot over time.
It is safer to let enameled pots heat up gradually with the oven instead of starting at full blast. This protects the coating and helps the pot last longer.
Cleaning matters too. Avoid abrasive scrubbing on enamel coating, since it can scratch the surface. Warm water and a soft sponge usually get the job done.
Ceramic, Aluminum, and Other Materials
Ceramic dutch ovens and aluminum dutch ovens behave differently than cast iron. They tend to heat up faster, but they do not always distribute heat as evenly.
Material
Heat Retention
Even Heat Distribution
Cold-Start Safe?
Bare cast iron
High
Strong
Usually yes
Enameled cast iron
High
Strong
Only with gradual heating
Ceramic
Moderate
Moderate
Check manufacturer limits
Aluminum
Low to moderate
Weaker
Often not recommended
Glass bakeware follows similar caution as ceramic and aluminum. Sudden temperature jumps can cause cracking, so gradual heating is the safer choice across the board.
Inspecting Chips, Cracks, and Coatings
Before putting any pot in the oven, take a moment to inspect it. Small chips or cracks in enamel coating can get worse with repeated heat exposure.
Look closely at the rim and interior surface of enameled pots. If you see exposed metal, this is a sign the coating has worn down and may need extra care.
For bare cast iron, check for thin spots in the seasoning. A well-seasoned surface should look dark and slightly glossy, not dry or patchy.
Ceramic and ceramic-coated pots should be checked for hairline cracks, which are sometimes hard to spot but can expand with heat. When in doubt, avoid high heat until you are sure the pot is in good condition.
Check the Lid, Knob, and Handles Before Baking
Your Dutch oven’s pot can usually handle high heat, but the lid is a different story. Knobs and handles are often made from materials with lower heat limits, so check them before you bake.
Plastic and Phenolic Knob Temperature Limits
Many Dutch ovens come with a black knob made of phenolic resin, a hard plastic material. These knobs can crack, warp, or melt if your oven gets too hot.
Standard phenolic knobs are often only safe up to 350°F to 390°F. If your recipe calls for higher heat, like the 450°F to 500°F (232°C to 260°C) often used for baking bread, that knob could become a problem.
A melted plastic knob isn’t just annoying to clean up. It can also release fumes into your oven and ruin your lid.
Check your owner’s manual or look up your specific model before you set the temperature. If you can’t find the heat rating, don’t take a risk. Remove the knob or use a lower temperature instead.
When a Metal or Stainless Steel Knob Is Safer
A metal knob solves the heat problem that plastic knobs create. Stainless steel knobs, along with those made of copper or gold-toned metal, typically handle heat up to 500°F (260°C) without any issues.
This makes them a better choice for high-heat cooking, like searing meat or baking crusty bread. Many brands sell replacement metal knobs that fit standard lid screws, so you can swap out a plastic knob without buying a whole new lid.
If you bake often at high temperatures, this small upgrade can save you from future headaches. Check that the replacement knob matches your lid’s screw size before you buy one.
Glass Lids and Broiler Restrictions
Some Dutch ovens, especially non-stick or budget models, come with tempered glass lids instead of solid cast iron ones. These lids can typically handle regular oven heat but are not built for broiler use.
The intense, direct heat from a broiler element can cause glass to crack or shatter, even if the glass is tempered. This is different from gradual oven heat, which spreads more evenly.
If your recipe calls for broiling, take the glass lid off first. Check your product manual to confirm your lid’s specific broiler rating, since limits can vary between brands.
Using the Pot Without Its Lid
If your knob or lid material isn’t rated for the temperature you need, you don’t have to skip the recipe. Simply remove the lid and cook your dish uncovered, or cover it with foil instead.
This works well for recipes like:
Roasted vegetables
Braised meats that don’t need a tight seal
Bread that benefits from a dry, crusty finish
Just keep in mind that cooking without a lid changes moisture levels in your dish, so you may need to adjust liquid amounts or cooking time. Always use sturdy oven mitts when handling the hot pot, since cast iron retains heat for a long time after it leaves the oven.
Practical Oven Methods for Everyday Dishes
Different dishes call for different starting temperatures. Some need a cold Dutch oven that heats up slowly, while others need a hot pot right from the start.
Braises, Short Ribs, and Slow-Cooked Stews
For braising, you’ll want to start with searing. Brown your short ribs or stew meat in the Dutch oven on the stovetop first. This step builds flavor before the slow cooking begins.
After searing, add your stock, wine, and vegetables. Cover the pot and place it in a low-heat oven, usually between 275°F and 325°F. Cooking low and slow breaks down tough meat fibers over several hours.
You don’t need to preheat the oven to a high temperature for this method. A moderate, steady heat works better than a hot start. Check your stew or braise every hour to make sure there’s enough liquid.
Roasts, Beans, Soups, and Casseroles
Roasts and casseroles often do best with a preheated oven. This gives the outside a good sear while the inside cooks evenly.
For beans and soups, you have more flexibility. You can start with a cold Dutch oven since these dishes rely on gentle simmering rather than a quick temperature change. Simmering beans in a Dutch oven at a low oven temperature, around 300°F, gives you tender results without watching a pot on the stove.
Baked pasta dishes and casseroles typically need medium heat, around 350°F to 375°F. Here’s a quick reference:
Dish Type
Oven Temp
Start Cold or Hot?
Roast
400°F+
Preheated
Beans/Soup
275-300°F
Either works
Baked Pasta/Casserole
350-375°F
Preheated
Cold-Start Bread Baking
Cold-start baking means you place your dough in a Dutch oven, then put the whole thing into a cold oven. You turn the oven on afterward and let it heat up with the bread already inside.
This method works because the dough continues to rise slightly as the oven warms. It also reduces the risk of burning the bottom crust, since the heat builds gradually.
Bakers who use this method often get a flatter loaf compared to preheated methods. The dough has more time to spread before the crust sets. This can work well for rustic, free-form loaves where a flatter shape isn’t a problem.
Preheated-Pot Bread Baking
Preheated-pot baking is the more traditional approach. You heat your Dutch oven in the oven, often at 450°F to 500°F, for 30 minutes before adding the dough.
This creates an intense burst of heat the moment your dough goes in. The result is often better oven spring, meaning the bread rises more before the crust hardens.
You’ll need oven mitts and careful handling here, since the pot is extremely hot. Use a piece of parchment paper to lower the dough into the pot safely. This method tends to produce a rounder, taller loaf with a crispier crust compared to the cold-start approach.
Bread Results and Reliable Handling Practices
Baking bread in a cold Dutch oven changes the way your loaf rises and browns. Knowing what to expect, and how to handle the pot safely, helps you get consistent results every time you bake.
Steam, Oven Spring, and a Crisp Crust
A cold start changes how your bread develops steam. In a preheated Dutch oven, dough hits high heat right away, and this quick blast helps it spring up fast. With a cold start, the dough heats up slowly along with the pot.
This slower process can reduce oven spring, especially for sourdough bread and other high-hydration doughs. Your loaf may not rise as tall or as fast.
The trapped steam still helps form a crisp crust, since the lid holds moisture in during the early bake. You’ll likely need to add 10 to 20 extra minutes of baking time to make up for the slow start. For artisan bread with an open, airy crumb, a preheated pot usually gives better results.
Using Parchment Paper Safely
Parchment paper makes it easier to lower dough into a Dutch oven without burning your hands or misshaping the loaf. It also helps you lift the finished bread out cleanly.
Most parchment paper is rated safe up to 425°F to 450°F. Check your baking temperature before you start, since some no-knead bread recipes call for higher heat.
Here’s how to use it safely:
Cut the paper to fit the base of your pot, with small edges to grip
Avoid letting excess paper touch the lid or oven walls
Remove the paper partway through baking if your recipe suggests it, to help the crust brown evenly
If your recipe needs heat above 450°F, use parchment rated for higher temperatures.
Safely Loading, Unloading, and Resting the Pot
Loading dough into a cold Dutch oven is simpler and safer than working with a scorching hot one. You can take your time shaping the dough and placing it in the pot without rushing to avoid burns.
Once you turn the oven on, the pot heats up gradually with the bread inside. This means less risk of steam burns compared to dropping dough into a pot already at 450°F.
After baking, use oven mitts to remove the pot, since it will be very hot by the end of the bake. Let the Dutch oven rest on a heat-safe surface for a few minutes before touching the lid or handles. Sudden temperature changes, like placing a hot pot on a cold, wet counter, can cause cracking in some materials.
Brand-Specific Ratings From Lodge, Le Creuset, and Staub
Not all Dutch ovens handle cold starts the same way. Material and construction affect how evenly your bread bakes and how safely the pot heats up.
Similar to Le Creuset; consistent heating, sturdy lid design for trapping steam
All three brands are considered oven-safe for cold starts within standard baking bread temperatures, usually up to 500°F. Always check your specific model’s manual, since some lid knobs have lower temperature limits than the pot itself.
FAQ: Can You Put a Cold Dutch Oven in the Oven?
A cold Dutch oven can often be placed into a cold oven and heated gradually, but whether it can safely go directly into a preheated oven depends on the material and manufacturer’s instructions. Sudden temperature changes can cause thermal shock, particularly with some enameled or ceramic cookware.
Can You Put a Cold Dutch Oven in the Oven?
Yes, in many cases. A cast-iron Dutch oven can generally be placed in a cold oven and heated gradually. Always check the manufacturer’s instructions, particularly for enameled cookware.
Can You Put a Cold Dutch Oven Into a Hot Oven?
It depends on the Dutch oven. Bare cast iron generally tolerates high temperatures well, but sudden temperature changes can be more problematic for enameled or ceramic-coated cookware.
Is It Better to Preheat a Dutch Oven?
For bread baking, preheating the Dutch oven is common because the hot vessel helps provide strong oven spring and crust development. The manufacturer’s instructions should be followed when preheating enameled cookware.
Can a Cold Dutch Oven Crack?
A sudden and extreme temperature change can cause thermal shock and potentially damage some cookware. This is particularly important with ceramic or enameled Dutch ovens.
Can You Put a Cold Enameled Dutch Oven in a Hot Oven?
Do not assume that every enameled Dutch oven can safely withstand a large temperature change. Check the manufacturer’s instructions for recommended preheating and temperature limits.
Can You Put a Dutch Oven Straight From the Refrigerator Into the Oven?
It is generally better to allow a very cold Dutch oven to warm gradually rather than moving it directly from a refrigerator into a very hot oven. Sudden temperature changes increase the risk of thermal shock.
Can You Put a Dutch Oven on the Stove Before Putting It in the Oven?
Yes, many cast-iron Dutch ovens are designed for both stovetop and oven use. However, heat should still be increased appropriately rather than subjecting cold cookware to extreme temperature changes.
What Temperature Can a Dutch Oven Handle?
The maximum temperature varies by manufacturer and by component, particularly the lid knob and enamel coating. Always check the specific cookware’s instructions before using it at high temperatures.
Should You Put a Dutch Oven on a Cold Surface After Baking?
Place a hot Dutch oven on a dry, heat-resistant surface rather than a cold or wet countertop. A sudden temperature change can stress the cookware.
What Is the Safest Way to Heat a Cold Dutch Oven?
If you’re unsure whether your Dutch oven can tolerate thermal shock, the safest approach is to place it in a cold oven and allow both the oven and cookware to heat gradually. Follow the manufacturer’s instructions for your specific model.
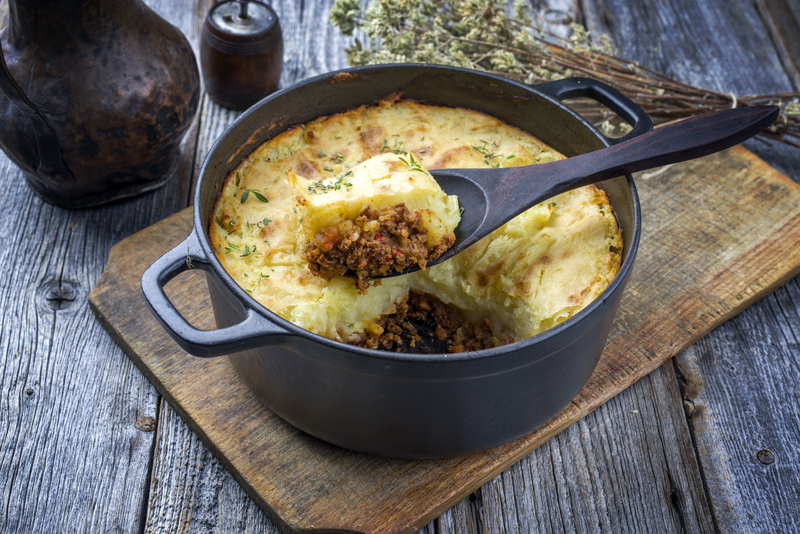


 Yes, you can put a cold Dutch oven in the oven in most cases. The key is checking your specific pot’s rating, since material and hardware determine what temperature is actually safe for your cookware.
 Sudden temperature changes are the main reason Dutch ovens crack, especially enamel-coated cast iron. You can protect your cookware by heating it gradually and avoiding extreme jumps between hot and cold.
 Not every Dutch oven handles heat the same way. Bare cast iron, enamel coating, and lighter materials like aluminum or ceramic each come with their own rules for going into a cold or hot oven.
 Your Dutch oven’s pot can usually handle high heat, but the lid is a different story. Knobs and handles are often made from materials with lower heat limits, so check them before you bake.
 Different dishes call for different starting temperatures. Some need a cold Dutch oven that heats up slowly, while others need a hot pot right from the start.


