Do You Bake Bread at 425 or 450? Choosing the Right Heat
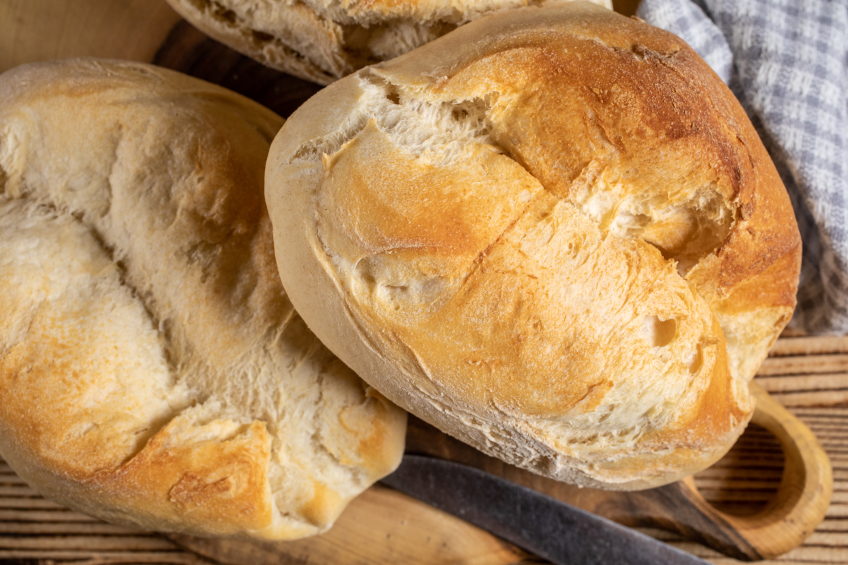
Both temperatures work, but they serve different goals.
If you want a crusty artisan loaf with a deep golden color, 450°F is the better choice, while 425°F gives you more control and a slightly softer crust for everyday sandwich bread.
The right pick depends on what kind of bread you are making and how much oven spring you want during the first few minutes of baking.
Oven temperature has a direct effect on how your bread rises, browns, and holds its shape. A hotter oven creates steam quickly inside the loaf, which helps the crust set fast and traps gas bubbles for a lighter crumb. A slightly lower temperature slows this process down, giving you more even baking for loaves that have a lot of ingredients like milk, butter, or eggs.
Bread baking is not a one-size-fits-all process, and the temperature you choose can change your results more than you might expect. In this article, you will learn how each temperature affects crust, texture, and bake time, along with tips for adjusting your oven based on the type of bread you are making.
When to Choose 425°F
Baking bread at 425°F works best for lean doughs and recipes that need a slightly slower bake to develop flavor and structure. This temperature gives you good crust color without rushing the interior.
Breads That Bake Well at 425°F
Lean dough breads do well at 425°F. These breads only use flour, water, salt, and yeast.
Here are common types that bake well at this temperature:
Rustic bread and boules with a simple ingredient list
Focaccia, which needs a crisp bottom but a soft, oily crumb
Flatbread, since it bakes fast and doesn’t need extreme heat
Bagels, after boiling, to get an even bake without over-browning
This temperature also suits sourdough loaves that use a long, slow fermentation process. The lower heat matches the slower rise and helps the bread cook evenly all the way through.
Expected Crust and Crumb Results
At 425°F, you get a crust that’s firm but not overly thick. The color turns golden brown instead of deep brown or dark.
Inside, the crumb has a soft, even texture. You won’t get the same dramatic oven spring you’d see at higher heat, but the bread still rises well.
This temperature works well when you want balance. The crust stays crisp without becoming tough, and the inside cooks fully without drying out.
Artisan bread bakers often choose this range when they want a crackly crust with a chewy bite, rather than an extra-hard shell.
Typical Baking Time at 425°F
Most loaves take between 35 and 45 minutes at 425°F, depending on size and shape. Smaller loaves like flatbread or ciabatta cook faster, often in 20 to 25 minutes.
Here’s a quick reference:
Bread Type
Approximate Bake Time
Rustic boule
40–45 minutes
Sourdough loaf
40–50 minutes
Ciabatta
20–25 minutes
Focaccia
20–25 minutes
Flatbread
10–15 minutes
Bagels
18–22 minutes
Always check for doneness with an internal temperature of 190°F to 210°F, rather than relying on time alone. Oven differences can shift these numbers by a few minutes in either direction.
When to Choose 450°F
A hotter oven works best when you want a crispy crust and a strong rise in a short amount of time. This setting is common for artisan bread, rustic loaves, and pizza dough.
Best Uses for Higher Heat
You should bake at 450°F when your recipe calls for a high-hydration dough or a crusty finish. This includes baguettes, ciabatta, and other artisan bread styles that rely on a hot oven for oven spring.
Pizza dough also does well at this temperature, since it needs quick heat to crisp the bottom and edges. The high heat helps the dough puff up fast before it dries out.
Rustic bread with a thick, chewy crust benefits from this setting too. If your goal is a bold, golden crust with a light and airy inside, 450°F gives you that result more reliably than a lower temperature.
Managing Fast Browning
Baking at 450°F speeds up crust formation, which means your loaf can brown faster than you expect. Keep a close eye on your bread during the last 10 minutes of baking.
If the crust starts to darken too quickly, you can tent the loaf with foil. This slows down browning while the inside finishes cooking.
Using steam early in the bake also helps control browning. A pan of hot water or a few ice cubes in the oven creates steam that keeps the crust from setting too fast, giving you a better texture.
Typical Baking Time at 450°F
Most loaves baked at 450°F take between 20 and 35 minutes, depending on size and shape. Baguettes often bake faster, closer to 20 to 25 minutes, since they are thinner.
Larger rustic loaves may need closer to 35 minutes to fully cook through. Ciabatta usually falls in the middle, around 25 to 30 minutes.
Always check for doneness rather than relying on time alone. A fully baked loaf should sound hollow when tapped on the bottom and reach an internal temperature of about 190°F to 210°F.
Temperature Guide by Bread Style
Bread type matters more than any single rule. Lean hearth loaves need high heat for a crisp crust, enriched breads need gentler heat to avoid burning sugar and butter, and quick breads need low, steady heat to bake through evenly.
Lean Hearth Loaves
Lean doughs like baguettes, boules, and other rustic breads have no fat or sugar. This means they can handle high heat without burning.
Bake these at 450°F. This high temperature helps the dough rise fast in the oven, known as oven spring. It also creates a crisp, golden crust.
Focaccia falls into this category too, though it often bakes closer to 425°F because of the olive oil on top. Bagels also need high heat, usually between 425°F and 450°F, after they are boiled.
Steam matters for these breads. Adding steam in the first 10 minutes keeps the crust soft long enough for the bread to expand fully before it hardens.
Soft Enriched Breads
Enriched breads contain eggs, butter, milk, or sugar. These ingredients brown quickly, so high heat can burn the crust before the inside finishes baking.
Bake sandwich bread, dinner rolls, and burger buns at 350°F to 375°F. This lower range gives the dough time to cook through without the outside getting too dark.
Croissants are the exception. They need a higher heat, around 400°F, to help the layers of butter puff up properly. Watch them closely since the sugar in the dough can brown fast.
Most bread recipes for enriched doughs will state 350°F as a safe starting point. If your rolls or buns look pale after baking, try increasing the heat slightly next time.
Quick Breads and Dense Loaves
Quick breads use baking soda or baking powder instead of yeast. This includes banana bread and other batter-based loaves.
Bake these at 325°F to 350°F. The lower temperature allows heat to reach the center of the loaf without burning the outside, since quick breads are often thicker and denser than yeast breads.
Potato bread also falls into a moderate range, usually around 350°F, due to its higher moisture content.
A toothpick test works best for these breads. Insert it into the center, and if it comes out clean, the loaf is done. Quick breads generally take longer to bake than lean or enriched doughs because of their density.
How Heat Changes the Finished Loaf
Oven temperature affects three main parts of your loaf: how much it rises, how the crust looks and tastes, and how much moisture stays inside. Small changes in temperature can lead to very different results, even when you use the same recipe.
Oven Spring and Interior Structure
Oven spring is the quick rise that happens in the first few minutes of baking. Heat causes trapped gas in the dough to expand fast, which pushes the loaf upward before the crust sets.
Higher temperatures, like 450°F, create stronger oven spring. This works well for lean doughs made with just flour, water, salt, and yeast, since these doughs can handle a fast, intense burst of heat.
Lower temperatures, like 425°F, give the dough more time to expand slowly. This can help enriched doughs, which contain butter, sugar, or eggs, rise evenly without burning on the outside before the inside cooks through.
The interior crumb also changes with heat. Higher heat tends to create larger, more irregular air pockets. Lower heat often results in a tighter, more even crumb structure.
Crust Formation and the Maillard Reaction
Crust formation depends heavily on oven temperature. Higher heat causes the surface of the dough to dry out and brown faster, creating a crispy crust.
This browning happens through the Maillard reaction. This is a chemical process where heat causes sugars and proteins in the dough to react and turn golden brown. It also creates the deep, toasty flavor you expect from good bread.
At 450°F, the Maillard reaction happens quickly, giving artisan loaves like boules and sourdough their dark, crackly crust. At 425°F, the reaction is slower, which produces a lighter, thinner crust that works better for soft sandwich bread or enriched loaves.
Quick comparison:
Temperature
Crust Result
450°F
Thick, crisp, deeply browned
425°F
Thin, soft, lightly browned
Moisture Loss and Doneness
As bread bakes, water evaporates from the dough. This process shapes both the texture of the crumb and how done the bread becomes.
Higher temperatures cause faster moisture loss near the crust, which helps seal in steam and keep the inside soft. Lower temperatures allow moisture to escape more evenly throughout the bake, which can help thicker or denser loaves cook all the way through without burning.
You can check doneness with an instant-read thermometer. Most bread is fully baked when the internal temperature reaches 190°F to 210°F. Enriched breads often finish on the lower end of that range, while lean, crusty loaves usually reach the higher end.
Set Up the Oven for Consistent Results
Your oven setup matters as much as the temperature you pick. Small details, like preheating time, steam, and pan choice, can change how your loaf turns out even if the dial says the same number every time.
Preheating and Verifying Oven Temperature
Most home ovens run hotter or cooler than the number on the dial. This can throw off your bread baking temperatures without you knowing it.
Use an oven thermometer to check the real temperature inside. Place it in the center of the oven, since heat can be uneven near the walls or door.
Preheat your oven for at least 30 to 45 minutes before baking bread. This gives the walls and any baking stone time to fully heat up, not just the air inside.
A cold or under-heated oven can cause weak oven spring. This means your loaf may not rise as much as it should in the first few minutes of baking.
Steam, Baking Stones, and Dutch Ovens
Steam plays a big role in artisan bread and sourdough. It keeps the crust soft for the first few minutes, which lets the dough expand fully before the crust hardens.
You can add steam a few ways:
Place a metal pan on the bottom rack and pour hot water into it right after loading your bread.
Spray the inside walls of the oven with water using a spray bottle.
Use a Dutch oven with a lid, which traps the dough’s own steam.
A baking stone helps too, but for a different reason. It stores heat and transfers it straight to the bottom of your loaf or baguette, giving you a firmer, more even crust.
Dutch ovens work well for round loaves like boules, while stones suit longer shapes like baguettes.
Adjusting for Loaf Size and Pan Material
Loaf size changes how heat moves through your dough. A large loaf needs more time at a lower oven temperature so the inside cooks fully before the crust burns.
Small rolls or baguettes can handle higher heat since they cook through faster.
Pan material also affects baking:
Pan Type
Heat Behavior
Best For
Dark metal
Absorbs heat fast, browns crust quickly
Sandwich loaves
Light metal
Reflects heat, gives softer crust
Enriched breads
Glass
Heats slowly, holds heat longer
Slow-baked loaves
Cast iron
Holds and radiates high heat
Artisan and sourdough loaves
If you switch pan types, watch your bread closely near the end of baking. You may need to adjust time or temperature by 10 to 15 degrees to get the same result.
Prepare Dough for the Chosen Temperature
Your oven temperature choice affects how you build your dough from the start. Getting the ratio of ingredients right, along with proper kneading and proofing, sets your loaf up for success at either 425°F or 450°F.
Flour, Water, Yeast, and Salt Balance
Your dough’s basic ingredients determine how it will react to oven heat. Flour gives structure, water activates gluten, yeast creates rise, and salt controls fermentation speed.
For a 450°F bake, you want a dough that can handle fast, intense heat. This usually means a lean dough with a higher hydration level, around 70-75% water to flour by weight. The extra moisture helps create steam inside the loaf, which supports oven spring.
At 425°F, you have more flexibility. Enriched doughs with butter, eggs, or milk work well here because the lower heat won’t scorch the added fats and sugars before the inside cooks through.
Keep your salt at 1.8-2% of your flour weight. Too little salt speeds up fermentation too much; too much slows it down and weakens gluten.
Kneading, Fermentation, and Proofing
Kneading develops the gluten network that traps gas and gives bread its structure. For high-hydration doughs baked at 450°F, you can use stretch-and-fold methods instead of traditional kneading. This builds strength without overworking wetter dough.
Fermentation time also depends on your target temperature. A longer, cooler fermentation (bulk rise in the fridge for 12-18 hours) works well for lean doughs headed to a hot 450°F oven. This slow process builds flavor and strengthens the dough’s structure.
Proofing is your final rise before baking.
Watch for these signs your dough is ready:
Poke test: Press a finger into the dough. It should spring back slowly, leaving a slight indent.
Size increase: The dough should look puffy and roughly 1.5 times its original size.
Surface tension: The dough should look smooth, not slack or overly loose.
Under-proofed dough baked at 450°F can split unevenly. Over-proofed dough may collapse in a hot oven before it sets.
Signs the Bread Is Fully Baked
Your baking time will shift based on temperature, so don’t rely on the clock alone. A loaf at 450°F often finishes in less time than the same recipe at 425°F.
Check these signs instead:
Sign
What to Look For
Color
Deep golden brown, not pale
Sound
Hollow thump when you tap the bottom
Internal temp
190-210°F on an instant-read thermometer
Crust
Firm and set, not soft or doughy
Enriched breads baked at 425°F typically reach doneness around 190°F internally. Lean, crusty loaves baked at 450°F often go slightly higher, closer to 205-210°F, since they need more moisture driven out for a crisp crust.
If your crust browns too fast but the inside isn’t ready, tent the loaf with foil and lower the heat slightly to finish baking without burning the outside.
FAQ: Do You Bake Bread at 425 or 450°F?
Both 425°F (220°C) and 450°F (230°C) can be excellent temperatures for baking bread. The best choice depends on the type of bread, the recipe, and how dark or crisp you want the crust.
Do You Bake Bread at 425 or 450°F?
For many artisan-style breads, 450°F (230°C) is a good starting temperature because the higher heat promotes strong oven spring and a well-developed crust. 425°F (220°C) can be better for breads that need slightly gentler baking or are prone to browning too quickly.
Is 450°F Too Hot for Bread?
No. Many breads are intentionally baked at 450°F, particularly crusty artisan loaves and sourdough. However, enriched breads containing ingredients such as butter, milk, or sugar may brown too quickly at this temperature.
Is 425°F Good for Baking Bread?
Yes. 425°F (220°C) is a versatile temperature that works well for many homemade loaves. It provides enough heat for good browning while being slightly less aggressive than 450°F.
Does Bread Bake Faster at 450°F?
Generally, yes. The higher temperature can shorten baking time and encourage faster browning. However, the crust may become dark before the center is fully baked if the loaf is large.
What Temperature Is Best for Sourdough Bread?
Sourdough is often started at around 450°F (230°C) or higher, particularly when baked in a preheated Dutch oven. The exact temperature and whether it is reduced during baking depend on the recipe.
What Temperature Is Best for Sandwich Bread?
Sandwich bread is often baked at a lower temperature, commonly around 350–375°F (175–190°C). The dough contains more fat, sugar, or dairy in many recipes, which can cause the crust to brown quickly.
How Do You Know When Bread Is Done?
A loaf should have a well-developed crust and sound hollow when tapped. For a more reliable check, use an instant-read thermometer; many lean breads are finished when the center is around 190–210°F (88–99°C).
Why Is My Bread Burning at 450°F?
The oven may be too hot for that particular recipe, or the loaf may be positioned too close to a heating element. If the crust browns too quickly, reduce the temperature or loosely cover the loaf with foil toward the end of baking.
Should You Preheat the Oven to 425 or 450°F?
Yes. Preheating is important for bread because the initial burst of heat helps the dough expand properly and develop its crust. If using a Dutch oven, follow the recipe’s instructions for preheating the cookware as well.
Which Is Better: 425 or 450°F?
For a crusty artisan loaf, 450°F (230°C) is often the better starting point. For a softer or more delicate bread, 425°F (220°C) may be more appropriate. Ultimately, follow the recipe because bread type and ingredients have a major effect on the ideal baking temperature.

 Both temperatures work, but they serve different goals.
 A hotter oven works best when you want a crispy crust and a strong rise in a short amount of time. This setting is common for artisan bread, rustic loaves, and pizza dough.
 Bread type matters more than any single rule. Lean hearth loaves need high heat for a crisp crust, enriched breads need gentler heat to avoid burning sugar and butter, and quick breads need low, steady heat to bake through evenly.
 Oven temperature affects three main parts of your loaf: how much it rises, how the crust looks and tastes, and how much moisture stays inside. Small changes in temperature can lead to very different results, even when you use the same recipe.
 Your oven setup matters as much as the temperature you pick. Small details, like preheating time, steam, and pan choice, can change how your loaf turns out even if the dial says the same number every time.
 Your oven temperature choice affects how you build your dough from the start. Getting the ratio of ingredients right, along with proper kneading and proofing, sets your loaf up for success at either 425°F or 450°F.


