Do Silicone Pans Need to be Greased? – Unveiling the Truth and Best Practices
Most silicone baking pans do not need to be greased before you use them.
Silicone bakeware has a naturally smooth surface that releases most baked goods without any butter, oil, or spray. This non-stick quality is one of the main reasons bakers choose silicone over metal or glass pans.
That said, there are times when a light coat of grease can help. Recipes low in fat, intricate molds with tiny details, or delicate cakes may still stick a little without help. Knowing when to skip the grease and when to add it can save you from a ruined dessert and a difficult cleanup.
This guide breaks down exactly when silicone pans need greasing, when they don’t, and how to get an easy release every time you bake.
The Short Answer: When Extra Fat Helps
Most silicone pans release baked goods just fine without any grease. But some recipes and situations still call for a light coating to avoid a stuck mess.
Recipes That Usually Release Without Greasing
Silicone has a natural non-stick surface, so many baked goods pop right out on their own. Standard cakes, cookies, and quick breads made with a normal amount of fat usually release cleanly.
Here’s a quick reference:
Recipe Type
Grease Needed?
Basic cakes
No
Cookies
No
Bread loaves
No
Standard brownies
No
The fat already in the batter or dough creates a barrier between the food and the pan. This means you can skip the butter or spray for most everyday baking without any problems.
Sticky, Delicate, and Low-Fat Recipes That Benefit From It
Some batters need help even with silicone. Muffins and cupcakes with high sugar content can stick because sugar caramelizes and bonds to the surface as it bakes.
Low-fat recipes are another exception. If your batter doesn’t have much butter or oil, it lacks the natural fat that helps food slide out easily.
Recipes with caramel or sticky fillings also benefit from a light grease. The sugar can grab onto tiny grooves in the silicone, making removal harder without a barrier.
For these cases, a thin coat of oil or butter gives you extra insurance. It’s a small step that can save you from a ruined batch.
Why First Use May Call for a Light Coating
A brand-new silicone pan may need extra care the first few times you use it. The surface hasn’t built up the light coating of oil that develops with regular use.
Greasing silicone baking pans during early use helps season the surface. This can improve how well baked goods release in the future.
After a few uses, you may notice the pan performs better without added fat. At that point, you can decide recipe by recipe whether greasing is still needed.
How to Apply a Thin, Even Coating
The right method depends on what you’re baking and what tool you have on hand. A light touch matters more than the type of grease you choose.
Using Neutral Oil for Reliable Release
Canola oil works well for greasing silicone pans because it has a mild taste and spreads easily. It won’t change the flavor of your baked goods.
Pour a small amount onto a paper towel or into a dish. Rub it across the inside of the pan in a thin layer. Cover the bottom and sides, but don’t leave puddles in the corners.
Too much oil can pool and cause soggy spots on your baked goods. Wipe away any extra with a clean paper towel before you add batter.
Using Butter for Flavor and Browning
Butter adds flavor and helps some baked goods brown a bit better than oil alone. Melted butter is easier to spread evenly than solid butter, especially in a silicone baking pan with curves or ridges.
Let the butter cool slightly after melting so it’s not too hot to handle. Use a pastry brush to apply it in a thin layer across every surface inside the pan.
Check for any missed spots, especially where the bottom meets the sides. A light second coat is better than one heavy layer, since too much butter can make the edges of your cake greasy.
Brushing Detailed Molds and Corners
Molds with tight corners, ridges, or raised designs need extra care. Batter can stick in these spots if they’re not fully coated.
A pastry brush is the best tool for this job. Its bristles reach into small grooves and edges that fingers or paper towels can’t cover.
Work the brush into every detail, pressing gently so the oil or butter reaches the deepest parts of the design. Go back over the mold a second time to check for dry spots.
Tap out any extra grease before adding your batter. This keeps the details of the design sharp once you flip the pan and release your finished baked good.
Cooking Spray: Convenience and Residue Risks
Cooking spray can make silicone pans easier to release, but it is not always the best choice. Some sprays leave a sticky film that builds up over time and changes how your pan performs.
Why Some Cooking Sprays Leave a Gummy Film
Many cooking sprays contain oil, lecithin, and propellants. When these ingredients hit the warm surface of a silicone pan, they can bake onto it instead of burning off cleanly.
This creates a sticky residue that feels tacky even after washing. Over time, this buildup fills in the tiny pores of the silicone.
The result is a pan that becomes less non-stick, not more.
You may notice this gummy film most on:
Bundt-style silicone molds with deep grooves
Muffin cups with tight corners
Any pan used often without a full wash between uses
Lecithin, an emulsifier found in many spray brands, is often the main cause of this issue. It clings to silicone more than it does to metal or glass.
How to Use Spray Sparingly When It Is Needed
You do not need to skip cooking spray completely. For sticky batters, detailed molds, or delicate baked goods, a light coat can help.
The key is control. Instead of a heavy, direct blast, hold the can about 6 to 8 inches away and use one short burst.
Use a paper towel to spread the spray evenly across the surface. This helps avoid pooling in corners or seams, which is where residue builds up fastest.
Choose a plain oil-based spray without added flour or butter flavoring, since these extra ingredients tend to leave more residue. Always wash your pan by hand with warm water and mild soap right after use to stop buildup before it starts.
Better Alternatives for Long-Term Pan Care
If you want to protect your silicone pans over time, you have a few solid options that work just as well as spray.
Alternative
Best For
Why It Works
Light coat of oil (brushed on)
Most recipes
Easy to control amount, low residue
Softened butter
Cakes, brownies
Adds flavor, spreads evenly
Parchment paper liners
Muffins, cupcakes
Zero contact with silicone surface
No grease at all
Simple, low-sugar batters
Silicone’s natural non-stick surface is often enough
A thin layer of oil applied with a brush or paper towel gives you more control than a spray can. This lowers the chance of a sticky residue forming on your baking pans.
Parchment paper is another reliable option, especially for muffins or cupcakes. It creates a barrier between the batter and the silicone, so you avoid any spray residue altogether.
Best Practices for Baking With Silicone
A few simple habits will help you get better results from silicone pans. These include stabilizing the mold, adjusting your bake time, and letting your food cool before you try to remove it.
Place Flexible Molds on a Sturdy Baking Sheet
Silicone pans bend easily, even when they are full of batter. This makes them hard to carry safely on their own.
Always set your silicone mold on a metal baking sheet before you put it in the oven. The baking sheet gives the pan a solid base and stops spills. It also helps the batter bake more evenly, since the sheet supports the shape while the oven heat does its job.
This step matters most with cakes, muffins, and other pans filled with liquid batter. Without support, the mold can twist or tip. This can cause uneven baking or a mess in your oven.
Account for Baking Time and Heat Performance
Silicone does not conduct heat the same way metal does. It works more like an insulator, so it takes longer to heat up.
Because of this, baked goods in silicone pans often need a few extra minutes compared to the same recipe in a metal pan. Start checking your food at the normal time listed in the recipe. Then add time in small steps, checking every few minutes, until it’s done.
Even heat distribution is one of silicone’s strengths once it warms up. But the outside of your food may not brown as much as it would in metal. If color matters for your recipe, try raising the oven temperature slightly and shortening the bake time.
Food-grade silicone pans can handle high heat, but check the manufacturer’s limit before use. Most are safe up to 400°F, but this can vary by brand.
Cool Bakes Before Flexing the Pan to Release Them
Silicone pans are known for easy release, but this only works well if you let the food cool first. Trying to remove a hot cake or muffin can cause it to break or stick.
Let your baked goods cool completely on a wire rack while still in the pan. Once cool, gently flex the sides of the silicone pan to loosen the food. Push from the bottom if it’s a shape like a muffin or mini cake.
For stubborn items, place the cooled pan in the freezer for a few hours or overnight. The cold will shrink the food slightly, making it easier to pop out. This trick works well for detailed molds or layered desserts.
Cleaning and Maintaining the Nonstick Finish
Regular cleaning keeps your silicone bakeware working the way it should. A few simple habits will stop grease buildup, protect the non-stick surface, and help your pans last for years.
Hand Washing and Dishwasher-Safe Guidance
Most silicone baking pans are dishwasher safe. Check the label or manufacturer’s instructions to confirm before you toss one in.
If you use a dishwasher, place the pan on the top rack. This keeps it away from the heating element at the bottom, which can cause warping over time.
Hand washing works just as well and gives you more control. Use warm water and a mild dish soap, then scrub gently with a soft sponge or cloth. Avoid anything abrasive, since it can wear down the surface over many washes.
Rinse the pan fully after washing. Soap residue left behind can affect the taste of your next batch of baked goods.
Let the pan air dry completely before you store it. Trapped moisture can lead to mold or a musty smell.
Removing an Oily or Sticky Film
Silicone bakeware can develop a greasy or sticky film over time, even if you grease it lightly. This happens because oils can seep into tiny pores on the surface and build up after repeated use.
A baking soda paste works well to break down this residue. Mix baking soda with a small amount of water until it forms a thick paste, then rub it onto the sticky areas with a soft sponge.
Let the paste sit for about 15 to 20 minutes before rinsing. This gives it time to lift the oily buildup without scrubbing hard.
For stubborn residue, try this simple soak method:
Fill a basin with warm water and a few tablespoons of white vinegar
Submerge the pan for 20 to 30 minutes
Wash as normal with mild soap and a soft sponge
Rinse thoroughly and let it air dry
This method helps restore the pan’s non-stick properties without damaging the material.
Avoiding Damage From Abrasives and Sharp Tools
Silicone is durable, but it can still tear, scratch, or puncture if you’re not careful. Sharp tools are the biggest risk to the surface.
Avoid using metal utensils, knives, or anything with a sharp edge when working with silicone pans. Small nicks and cuts can create spots where batter sticks more easily in the future.
Stick to silicone, wood, or plastic utensils instead. These materials won’t scratch the surface, even with regular use.
When cleaning, skip steel wool, scouring pads, or anything abrasive. A soft sponge or cloth removes food residue just as well without wearing down the finish.
Store your pans away from sharp objects like knives or metal racks. A small tear or puncture can’t be repaired, so prevention matters more than fixing damage after the fact.
Choosing Liners, Silicone, or Traditional Pans
Your choice between parchment paper, silicone bakeware, and traditional metal pans depends on the recipe, the cleanup you’re willing to do, and how much you bake. Each option has clear strengths, and knowing them helps you get better results with less guesswork.
When Parchment Paper Is the Better Choice
Parchment paper works best when you need a flat, sturdy surface for cookies or delicate pastries. It gives you crisp edges and even browning that silicone sometimes can’t match.
You’ll also want parchment when baking sticky items like caramel bars or meringues. It peels away cleanly without leaving residue behind.
Parchment is disposable, so it saves you from scrubbing pans after messy bakes. This makes it a good pick for one-time projects or large batches of cookies.
Keep in mind that parchment can’t be shaped into cups or molds the way silicone can. If your recipe calls for a specific shape, like a bundt cake or muffin cups, silicone or a traditional pan is the better tool.
How Silicone Compares With Conventional Baking Pans
Silicone bakeware and metal pans each handle heat differently. Metal pans conduct heat quickly, which helps cakes and breads rise with a firmer structure and browner crust.
Silicone heats more slowly and evenly, but it won’t give you the same browning. This makes it a solid choice for cupcakes and bar cookies where a golden crust isn’t the main goal.
Feature
Silicone Pans
Traditional Pans
Heat conduction
Slow, even
Fast, direct
Browning
Minimal
Strong
Flexibility
Bends for easy release
Rigid
Weight
Lightweight
Heavier
Storage
Collapsible or stackable
Bulky
If you want deep browning or a crisp crust, choose metal. If you want easy release and simple cleanup, silicone is more convenient.
Using Silicone Beyond Oven Baking
Silicone bakeware isn’t limited to the oven. You can use it in the freezer to make frozen desserts like ice cream bars, frozen yogurt bites, or molded gelatin treats.
Its flexibility makes it easy to pop out frozen shapes without cracking them. This is especially useful for portioned treats or homemade popsicles.
Silicone also holds up well in the microwave and dishwasher, giving you more flexibility than most metal pans. This makes it a practical choice if you bake, freeze, and reheat foods using the same set of tools.
FAQ: Do Silicone Pans Need to Be Greased?
Silicone pans are naturally nonstick, so they often require little or no preparation before baking. However, whether you should grease one depends on the recipe, the pan’s condition, and the type of food being baked.
Do Silicone Pans Need to Be Greased?
Usually, no. High-quality silicone pans are naturally nonstick and generally allow baked goods to release without greasing. However, a light coating of oil or cooking spray can make removal easier for delicate or sticky recipes.
Should You Grease a Silicone Cake Pan?
It is usually optional. For cakes with a high sugar or fat content, lightly greasing the silicone pan can provide extra insurance against sticking.
Do You Grease Silicone Muffin Pans?
You can, but it is generally not necessary. Silicone muffin cups are designed to release muffins easily, although a small amount of grease can help when baking particularly delicate or sticky muffins.
Can You Use Cooking Spray on Silicone Pans?
Yes. A light coating of cooking spray can be used when additional release assistance is needed. Avoid excessive amounts, which can leave a residue on the silicone over time.
What Happens If You Don’t Grease a Silicone Pan?
In most cases, nothing goes wrong. The baked food should release relatively easily once it has cooled enough to handle, provided the pan is clean and the recipe is suitable for silicone.
Why Is My Food Sticking to a Silicone Pan?
Sticking can occur because of:
A damaged or poor-quality silicone pan
Sticky ingredients such as caramel
Insufficient cooling
Food being removed too aggressively
Residue from previous baking
Should You Flour a Silicone Pan?
Usually, no. Flour is generally unnecessary because silicone already provides a nonstick surface. If a recipe specifically calls for greasing and flouring the pan, follow its instructions.
Do Silicone Pans Need to Be Greased for Brownies?
Not usually, but lightly greasing the pan can make brownies easier to remove. Because brownies can be sticky and delicate, allowing them to cool before removing them is also helpful.
How Do You Make Silicone Pans Nonstick?
Wash the pan thoroughly before use and remove any greasy residue from previous baking. If a recipe is particularly sticky, apply a thin layer of oil or cooking spray before adding the batter.
Is Greasing Silicone Pans Better for Baking?
Not necessarily. Greasing is mainly useful when you want additional protection against sticking. For most standard cakes, muffins, and breads, a clean silicone pan should release the baked product without it.
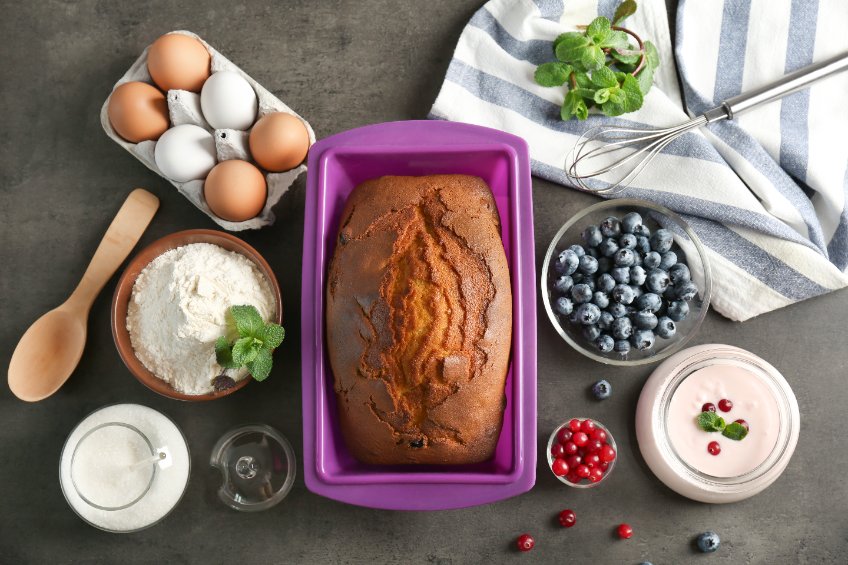


 Most silicone pans release baked goods just fine without any grease. But some recipes and situations still call for a light coating to avoid a stuck mess.
 The right method depends on what you’re baking and what tool you have on hand. A light touch matters more than the type of grease you choose.
 Cooking spray can make silicone pans easier to release, but it is not always the best choice. Some sprays leave a sticky film that builds up over time and changes how your pan performs.
 Regular cleaning keeps your silicone bakeware working the way it should. A few simple habits will stop grease buildup, protect the non-stick surface, and help your pans last for years.
 Your choice between parchment paper, silicone bakeware, and traditional metal pans depends on the recipe, the cleanup you’re willing to do, and how much you bake. Each option has clear strengths, and knowing them helps you get better results with less guesswork.


