Do I Need to Grease a Glass Pan? Understanding Techniques and Best Practices
Grease a glass pan to keep food from sticking.
Yes, you should grease a glass pan for most baking, since glass does not have a natural non-stick surface.
Glass bakeware works well for cakes, casseroles, and other baked goods because it heats evenly and lets you see how your food is cooking. But this smooth surface can cause problems if you skip the grease step. Food can stick, break apart, or leave a mess that takes extra time to clean.
Knowing how and when to grease a glass baking pan can save you time and help your food come out looking better. The next sections cover the best ways to grease your pan, which recipes may not need it, and other tips for using glass bakeware.
The Short Answer: When Pan Preparation Matters
In most cases, you should grease a glass pan before adding your food. The exceptions depend on the recipe, the type of dish, and what results you want.
Recipes That Usually Need a Release Layer
Most baked goods stick to glass unless you prepare the pan first. Cakes, brownies, and cornbread all release batter that can bond to the glass surface as it bakes.
Here are common items that typically need greasing:
Cakes and cupcakes – Batter is sticky and dense, making a release layer necessary.
Brownies and bar cookies – High sugar content can cause sticking without prep.
Cornbread – Needs greasing to form a good crust and clean edges.
Casseroles with cheese or sauce – These can bake onto the glass if left ungreased.
For these foods, using butter, oil, or nonstick cooking spray creates a barrier between the food and the glass. This barrier helps prevent sticking and makes it easier to remove the finished dish without tearing it apart.
When the Recipe Specifically Says Not to Grease
Some recipes call for an ungreased glass pan on purpose. This is common with foods that need to grip the sides of the pan as they cook.
Angel food cake is the clearest example. It relies on climbing up an ungreased pan to reach its full height and light texture. Greasing the pan would cause the batter to slide back down instead of rising properly.
Other recipes that may call for no grease include:
Sponge cakes that need structure from clinging to the pan
Certain soufflés that depend on an ungreased surface for lift
Recipes with a built-in fat content high enough to prevent sticking on their own
Always check the recipe instructions first. If greasing isn’t mentioned, it may be left out for a specific reason tied to how the dish rises or sets.
Why Glass Is Not Automatically a Non-Stick Surface
Glass looks smooth, but that does not mean it acts like a non-stick pan. Unlike cookware with a non-stick coating, glass has no built-in layer to stop food from sticking.
Glass baking pans are popular because they heat evenly and let you see your food as it cooks. But that smooth surface can still hold onto sugary or starchy foods once they bake and cool.
This is why greasing a glass pan is often necessary, even when a recipe doesn’t specifically mention it. A thin layer of oil, butter, or nonstick spray fills in the microscopic texture of the glass, giving your food something smoother to release from. Skipping this step can turn an easy cleanup into a scrubbing project.
How to Prepare the Pan for Reliable Release
Getting a cake out of a glass pan in one piece comes down to three things: how you grease it, whether you add a liner, and if the recipe calls for a dry coating on top. Each step helps stop the batter from sticking to the smooth glass surface as it bakes.
Apply a Thin, Even Coating
Start by covering the inside of your pan with a greasing agent. Butter, margarine, and shortening all work well, and so do vegetable shortening, oil, vegetable oil, canola oil, and coconut oil. Melted ghee is another option if you want a slightly nutty flavor.
Use a pastry brush or a paper towel to spread the fat into an even coating. Don’t skip the corners or the edges where the bottom meets the sides. Missed spots are the most common reason cakes stick.
Cooking spray is a fast alternative to butter or oil. Just hold the can a few inches from the pan and coat the entire inside surface, including the corners.
Line the Bottom With Parchment Paper
For extra insurance, add a parchment paper liner to the bottom of the pan. This step matters more with glass than metal, since glass holds heat differently and can create hot spots that cause sticking.
Trace the bottom of your pan onto a sheet of parchment paper, then cut out the circle or rectangle. Grease the pan first, then press the parchment into place so it sticks to the greased surface.
You don’t need to line the sides. Greasing the sides and lining just the bottom gives you a clean release without extra trimming or folding.
Add Flour, Sugar, or Cornmeal When Appropriate
Some recipes ask you to dust the greased pan with a dry ingredient. Flour is the most common choice for standard cakes, but sugar or cornmeal work better for certain recipes.
Dry Coating
Best Used For
Flour
Standard cakes, pound cakes, quick breads
Sugar
Cakes with a crisp or caramelized edge
Cornmeal
Cornbread, savory dishes baked in glass
Add about a tablespoon of your chosen coating after greasing, then tilt and rotate the pan until it covers the entire surface. Tap out any extra before pouring in the batter. Skip this step only if your recipe specifically calls for a greased pan with no added flour or sugar.
Choosing the Best Greasing Method
Different fats and sprays work better for different recipes. Your choice depends on what you’re baking, how detailed the pan design is, and whether you want a soft or crisp crust.
Butter, Ghee, and Solid Fats
Butter is a common choice for greasing a glass pan because it adds flavor and helps create a golden crust. You can use melted butter or soft butter applied with your fingers or a pastry brush. Make sure to coat the bottom and all sides evenly.
Ghee works the same way as butter but has less moisture. This makes it a good option if you want to avoid sogginess in delicate cakes.
Margarine can replace butter in most recipes. Shortening and vegetable shortening are also solid choices, especially for pans with detailed shapes. These fats don’t burn as fast as butter, so they work well for longer bake times.
Oil and Cooking Sprays
Vegetable oil, canola oil, and olive oil all work as greasing agents for a glass pan. You can spread oil with a paper towel or brush for full coverage. Oils don’t add much flavor, so they’re a good pick for savory dishes or simple cakes.
Coconut oil is another option. It has a mild flavor and works well in melted or solid form.
Cooking spray, also called non-stick cooking spray or non-stick spray, is the fastest way to grease a pan. Hold the can about six inches from the pan and spray an even layer. This method works well for muffins, brownies, and quick breads where you need full coverage without extra mess.
Baking Spray and Flour for Detailed Cakes
Baking spray combines oil and flour in one product. It’s made for cakes with tight corners or raised designs, since it reaches spots a brush might miss.
For extra protection, you can grease the pan first, then add a light coat of flour. This creates two layers that keep the cake from sticking. Tap out any extra flour before you pour in the batter.
This method works best for bundt cakes, layer cakes, or any recipe with a lot of surface detail. Plain oil or spray alone may not be enough for these pans.
Preparation by Recipe Type
How you prep your glass pan depends on what you’re baking. Cakes need a full coat of grease and flour, breads often need less fuss, and some desserts do best with parchment paper instead of grease alone.
Cakes and Brownies
Cake batter and brownie batter both have sugar, and sugar makes baked goods stick to glass. You should grease your glass cake pan with butter, shortening, or non-stick spray, then dust it with flour.
This coating creates a barrier between the batter and the glass. For brownies, many people skip the flour and use parchment paper instead. This makes it easy to lift the whole batch out of the pan in one piece.
If your recipe has a lot of sugar or chocolate, add parchment paper on top of the grease. This gives you extra protection against sticking.
Quick Breads and Yeast Breads
Bread dough behaves differently than cake batter, but it still needs a greased pan. Whether you’re baking a yeast bread or a quick bread with baking soda, grease the inside of your glass pan with butter or oil before adding the dough.
Banana bread and other quick breads have natural sugars that can stick to glass just like cake batter does. For yeast breads, a light coating of oil helps the dough release once baking is done.
Some bakers also dust the greased pan with a bit of flour or cornmeal for extra grip and a better crust. Cornmeal works well if you want a slightly crisp bottom on your bread.
Cheesecakes, Pies, and Other Delicate Desserts
Cheesecakes and pies need careful handling because they’re softer and more likely to crack or tear. For a glass pie pan, you usually don’t need to grease it if your recipe includes a butter-based crust, since the fat in the crust naturally keeps it from sticking.
For custard pies or pies without much fat in the crust, a light grease layer helps.
Cheesecakes are trickier. Even a well-greased pan can let a cheesecake stick to the sides as it cools and shrinks. Lining the bottom with parchment paper gives you a clean release without disturbing the delicate texture. Acidic ingredients, like those found in lemon or fruit-based fillings, can also react with metal pans, which is one reason many bakers prefer glass for these recipes.
Casseroles and Savory Bakes
Casseroles and other savory baked goods are usually more forgiving than sweet baked goods. Most casseroles have enough natural fat or moisture from ingredients like cheese, meat, or sauce that they won’t stick to a glass pan the way a cake would.
Still, a light coating of oil or butter makes cleanup easier and helps prevent any starchy or cheesy edges from sticking.
For dishes with delicate layers, like lasagna or baked pasta, greasing the pan protects the bottom layer from sticking once it’s baked and set.
Glass Pan Baking Adjustments
Glass and metal pans do not heat the same way, so you often need to change your oven temperature or baking time when you use glass. Knowing these differences helps you avoid burnt edges, pale tops, and other baking problems.
How Glass and Metal Pans Handle Heat
Glass pans, including tempered glass options like Pyrex, heat up slower than metal pans. But once glass gets hot, it holds onto that heat much longer.
Metal pans heat up fast and cool down fast. This makes them react quickly to changes in oven temperature.
Because glass holds heat, your food keeps cooking even after you pull the pan out of the oven. This is called carryover cooking. It’s one reason baked goods in glass pans can end up more done than you expected.
Feature
Glass Pans
Metal Pans
Heats up
Slowly
Quickly
Holds heat
Long
Short
Carryover cooking
High
Low
Managing Oven Temperature and Baking Time
When a recipe is written for a metal pan, you should lower your oven temperature by 25°F when using glass instead. For example, if a recipe says 350°F, set your oven to 325°F.
This lower temperature helps make up for how much heat glass holds onto during baking.
You may also need to check your food a few minutes before the recipe’s suggested baking time. Glass pans can sometimes finish baking faster, even at a lower temperature, because they keep transferring heat to the food after the oven cycles off.
Always use a toothpick test or check for visual doneness rather than relying only on the clock.
Avoiding Over-Browning and Uneven Cooking
Glass pans tend to brown food more on the bottom and sides. This happens because glass holds heat against the food longer than metal does.
To reduce over-browning:
Lower your oven temperature by 25°F as noted above.
Avoid placing the glass pan on the very bottom oven rack, where heat is strongest.
Check your food a few minutes early to catch any signs of burning.
Uneven cooking can also happen if the glass pan is too thick or if heat isn’t reaching all sides evenly. Rotating the pan halfway through baking can help spread the heat more evenly and reduce this problem.
Safe Use, Release, and Cleanup Tips
A glass baking pan can last for years if you handle it the right way. Small habits, like avoiding fast temperature changes and letting food cool before removal, protect the glass and make cleanup easier.
Avoid Sudden Temperature Changes
Tempered glass, like Pyrex, is made to handle oven heat. But it can still crack or shatter if the temperature changes too fast.
Never take a glass baking pan straight from the fridge or freezer and put it into a hot oven. The sudden heat can cause the glass to break.
The same goes for the reverse. Don’t set a hot glass pan on a cold or wet surface right after baking.
Here are some safe habits to follow:
Let the pan reach room temperature before baking.
Avoid placing a hot pan under cold water.
Don’t set a hot pan on a cold countertop or metal surface.
Preheat the oven fully before adding the pan.
These steps help prevent cracks and keep your glass pan safe to use for a long time.
Cool Baked Goods Before Removing Them
Removing baked goods too soon can cause them to break apart or stick to the pan. Glass holds heat longer than metal, so food inside keeps cooking a bit even after you take it out of the oven.
Give cakes, casseroles, and other baked goods time to rest before removing them. Most items need at least 10 to 15 minutes to set.
This cooling time helps the food firm up. It also makes it easier to release from the pan without tearing or sticking.
If a recipe calls for greasing, this step works best alongside proper cooling. Together, they help prevent sticking and give you a clean release every time.
Remove Stains Without Damaging the Glass
Glass pans can develop stains over time, especially from baked-on grease or acidic foods. The good news is that most stains can be removed without harming the glass.
A simple mix of baking soda and water works well for this. Make a thick paste, spread it over the stained area, and let it sit for 15 to 20 minutes before scrubbing gently.
Avoid using metal scouring pads or sharp tools. These can scratch the surface of the glass and make it more likely to stain again in the future.
For tougher spots, try this simple process:
Apply a paste of baking soda and water.
Let it sit for 15–20 minutes.
Scrub gently with a soft sponge.
Rinse with warm water and dry completely.
This method keeps your glass baking pan looking clear and free of buildup without risking damage to the surface.
FAQ: Do I Need to Grease a Glass Pan?
Whether you need to grease a glass baking pan depends on what you are cooking. Greasing is often recommended for cakes, breads, and other foods that may stick, while some dishes can be baked directly in an ungreased glass pan.
Do I Need to Grease a Glass Pan?
Usually, yes, for baked goods that can stick. A thin coating of butter, oil, or cooking spray helps food release more easily after baking.
Should You Grease a Glass Pan for Cake?
Yes. Greasing the pan helps prevent the cake from sticking to the sides and bottom. Some recipes also recommend dusting the greased pan with flour.
Do You Grease a Glass Pan for Brownies?
Generally, yes. Lightly grease the bottom and sides of the pan, or line it with parchment paper, to make brownies easier to remove.
Do You Grease a Glass Pan for Bread?
It depends on the recipe. For sandwich bread, quick breads, and similar baked goods, lightly greasing the glass pan can make removal easier.
Do You Grease a Glass Pan for Lasagna?
Usually, a small amount of oil or cooking spray can help with cleanup, although lasagna generally contains enough sauce and moisture that sticking is less of a concern.
Can You Use Cooking Spray on a Glass Pan?
Yes. Cooking spray provides a convenient, thin coating. You can also use butter or a small amount of vegetable or olive oil, depending on the recipe.
Should You Grease a Glass Pan Before Parchment Paper?
Usually, you can lightly grease the pan first to help the parchment stay in place. You can then grease the parchment as well if the recipe calls for it.
What Happens If You Don’t Grease a Glass Pan?
Food may stick to the bottom or sides, making it harder to remove without damaging it. This is especially common with cakes, brownies, breads, and other foods containing sugar or starch.
Is Glass Naturally Nonstick?
No. Glass has a relatively smooth surface, but it is not naturally nonstick. Greasing or lining the pan can make food removal easier.
Does Glass Bake Differently From Metal?
Yes. Glass and metal transfer heat differently, which can affect browning and baking time. If you substitute a glass pan for a metal one, keep an eye on the food and follow the bakeware manufacturer’s recommendations.
What Is the Best Way to Grease a Glass Pan?
Apply a thin, even layer of butter, oil, or cooking spray over the bottom and sides. Avoid excessive grease, which can collect around the edges and affect the finished texture.
Do You Need to Grease a Glass Pan for Everything?
No. Some recipes are specifically designed to be baked in an ungreased pan, and foods such as casseroles may contain enough oil or sauce to prevent significant sticking. When in doubt, follow the recipe’s instructions.
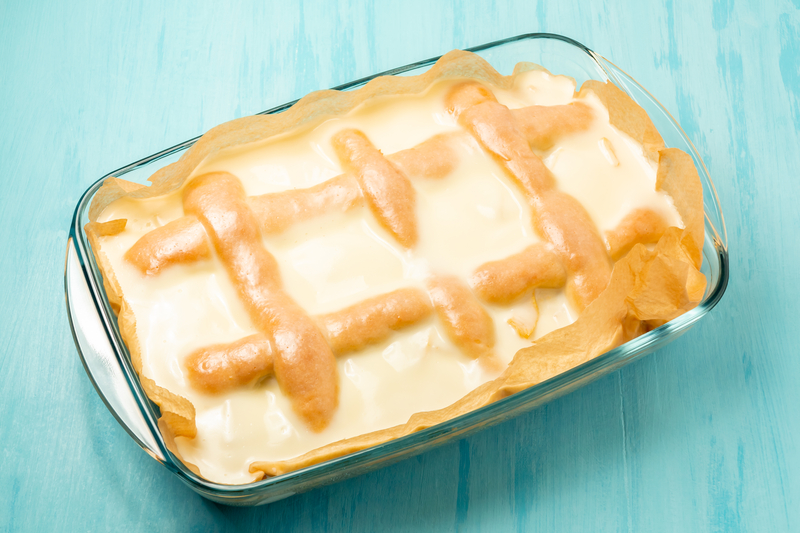


 In most cases, you should grease a glass pan before adding your food. The exceptions depend on the recipe, the type of dish, and what results you want.
 Getting a cake out of a glass pan in one piece comes down to three things: how you grease it, whether you add a liner, and if the recipe calls for a dry coating on top. Each step helps stop the batter from sticking to the smooth glass surface as it bakes.
 Different fats and sprays work better for different recipes. Your choice depends on what you’re baking, how detailed the pan design is, and whether you want a soft or crisp crust.
 How you prep your glass pan depends on what you’re baking. Cakes need a full coat of grease and flour, breads often need less fuss, and some desserts do best with parchment paper instead of grease alone.
 Glass and metal pans do not heat the same way, so you often need to change your oven temperature or baking time when you use glass. Knowing these differences helps you avoid burnt edges, pale tops, and other baking problems.
 A glass baking pan can last for years if you handle it the right way. Small habits, like avoiding fast temperature changes and letting food cool before removal, protect the glass and make cleanup easier.


